If you need a quick, easy way to setup an API for your Dropsource app, many Dropsource members have successfully worked with Bubble. Similarly, if you have an existing app you built in Bubble, you can create a native app in Dropsource that will use the same backend. The steps below outline the generic process involved in connecting to a Bubble backend from a Dropsource app that supports user login and signup – your own app may involve some variations on this but it should help to get you started.
If you plan to use Bubble to serve data that is public and doesn’t require user login you can skip several of the steps below.
Create a Bubble App
If you aren’t working with an existing Bubble app, sign up / log in and create one now.
Setup your Data
In your new Bubble app, open Data. Create Data Types for the information you want to use in your Dropsource app. For example, to build a simple note-keeping app you could create a Note type, and add a text Field for the note content.

If you have an existing Bubble app with App Data already stored in it, you can use that.
If you want to add some initial data to your app for testing, in App Data, select one of your data types and click New Entry to add a few records.

Note that if you plan to restrict access to your data, you will need to use the Created By Field to associate the records with a particular user.
If the data is going to be associated with individual users – in Privacy, define a new role, for example “Notetaker” for the note-keeping app. Specify the detail for your new role, for example if the data for a particular type should only be visible to the user who created it, you can specify:
|
1 |
When - This <Type-Name>'s Creator is Current User |

Check Create, Modify, and/or Delete via API to post and update entries from your app. Uncheck all of the default (“everyone else”) permissions (leave Create via API checked in this section also if you plan to post new items from your app).
If you don’t want to implement user management and simply want all of your API data to be retrievable without the user logging in, you can skip the privacy setup and use an API token from your Settings section instead.
Create your API
In Settings, select API and check the public endpoints you need – Workflow to carry out processing such as login/signup in your Dropsource app, and Data to query and update data from the app.
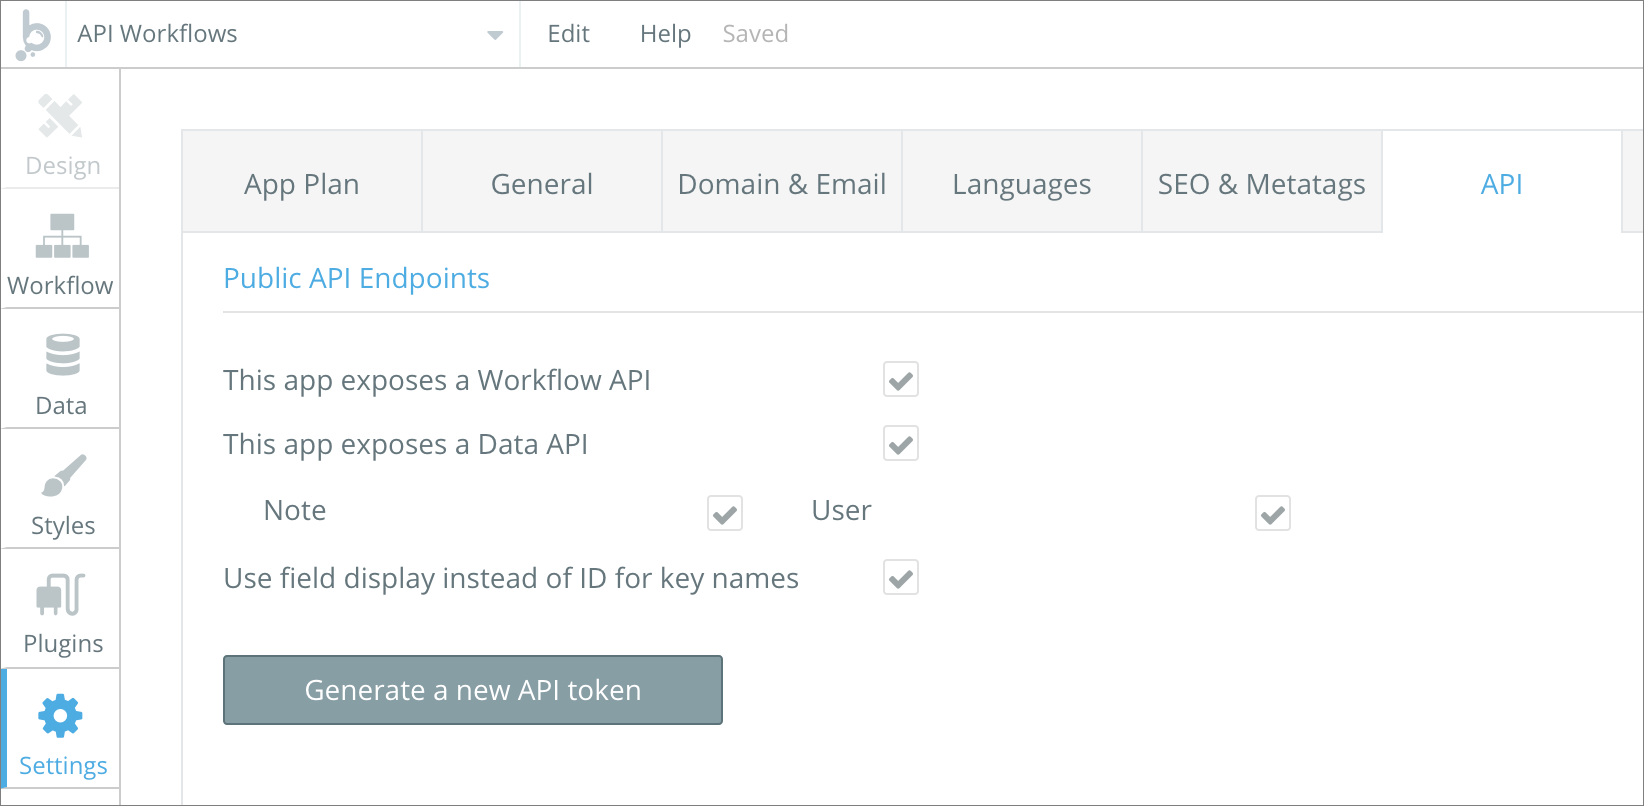
This will create a few default endpoints to send and retrieve each data type (e.g. to create a note or retrieve a list of notes). Depending on your app, you might need to create additional API Workflows (using the same process as what’s outlined next for user login / signup).
Add User Management
In the top menu, select API Workflows to add a route for the user to log into their account. Click to add an endpoint and choose General > New API Endpoint. Give the endpoint a name, such as “Login”, check the option to run the endpoint without authentication, and add two text parameters, one for the email address and one for the password.

Add an action under the new endpoint, selecting Account > Log the user in. Select the email and password parameters you specified.
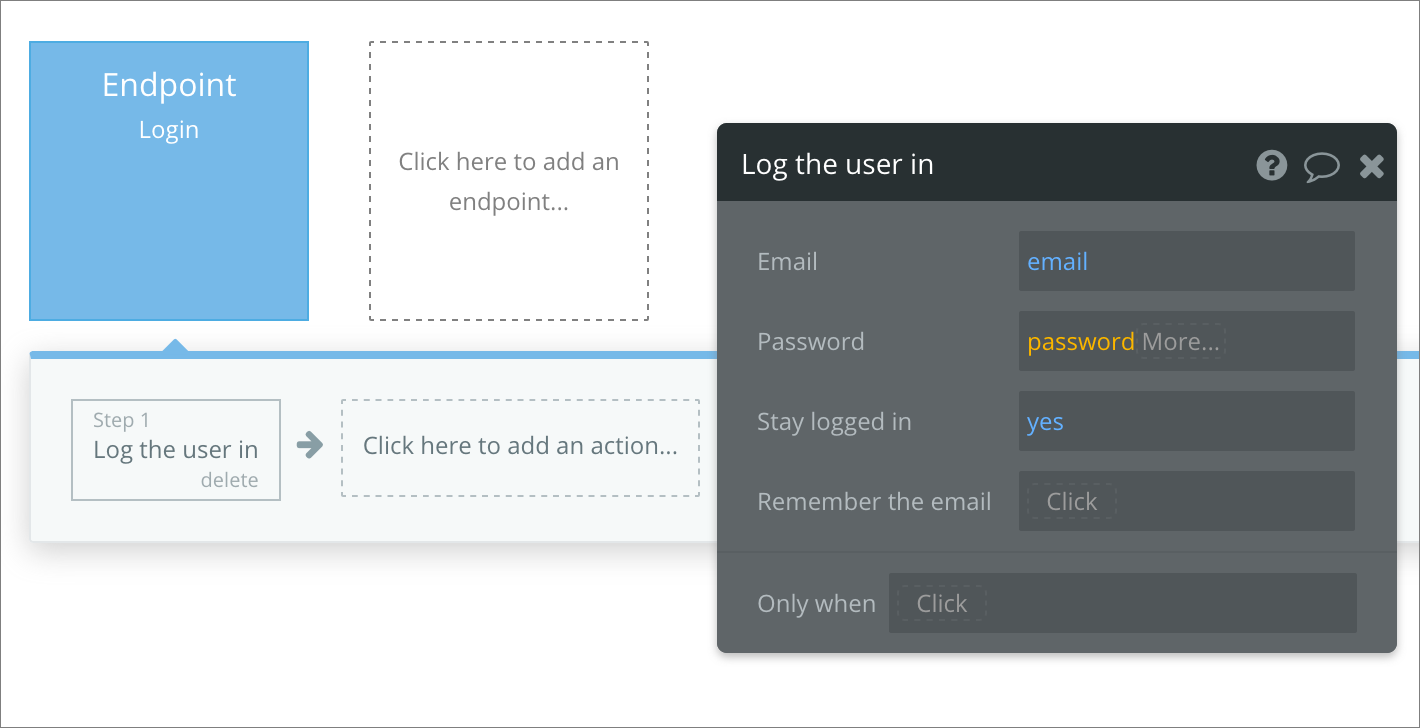
To support user signup as well as login, add another endpoint, using the same process as you did for login, but with Sign the user up as the action.

Make the API Available
Select Deployment and open Deployment and Version Control. Click Deploy Development to Live to make your API publicly available.

Locate your OpenAPI / Swagger specification for the API using a URL with the following format (replace “app-name” with the name of your Bubble app – see the example specification used in this tutorial):
|
1 |
https://app-name.bubbleapps.io/api/1.1/meta/swagger.json |
Import the API into Dropsource
In Dropsource, create a new project if you haven’t already done so, and add a page to it. In the API tab on the right of the editor, click the plus ![]() button, enter your API specification URL, and click Add. Dropsource will add the API to your app.
button, enter your API specification URL, and click Add. Dropsource will add the API to your app.
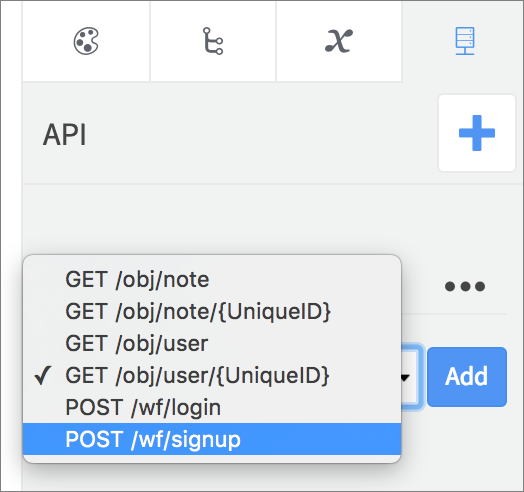
In the API tab, you should now see the available endpoints for your Bubble API.

You will need a token to authenticate your requests – in Variables on the left, create a new Device Variable, giving it a name such as “access_token” and choosing Swift/Java String type.

If you aren’t logging users in and are using an API token from your Bubble Settings instead, set the value of the token on the Device Variable using a Set Value Action, for example in the Lifecycle > Application Launched Event.
Using the Set Authentication control in the API tab, select the variable.


If your Bubble data model is particularly complex, the automatically generated specification file may be too large and cause a save error in Dropsource. If this happens you may need to manually edit the spec to include only the endpoints you need in your app.
Log the User In
Add a page (or pages) to your app for login and signup with Elements to capture user input – you might want a single page to handle both, or you might prefer dedicated pages for each. In either case, add Text Fields for the email address and password (for the password Element check Secure Text Entry on iOS / Password as the Format on Android), and a Button for login / signup.

In the API tab, add the login / signup endpoint by selecting it in the dropdown list and clicking Add.
Click the request to open it. In the Parameters, select body – you will see the email and password parameter fields you specified. Bind them to the text fields on the page by clicking and dragging them onto the relevant Elements on the Canvas, or clicking each field and making a selection.

Open the request Events and add an Action to the 200 Event.
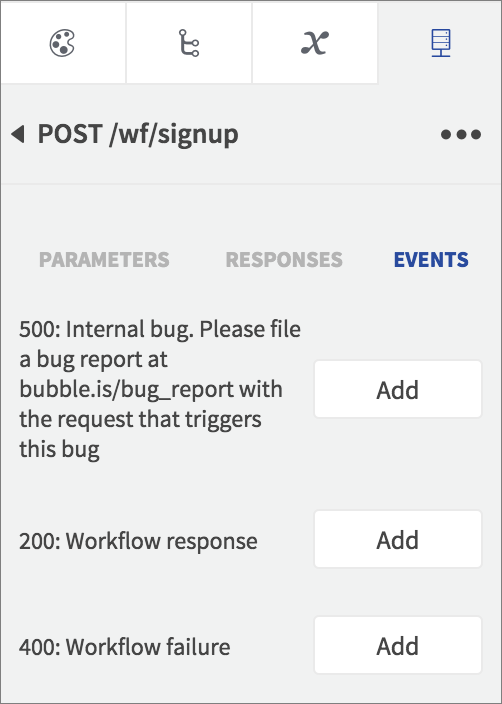
Add a Set Value Action, setting the token Device Variable you created to the token returned from the API, via the Event Data.
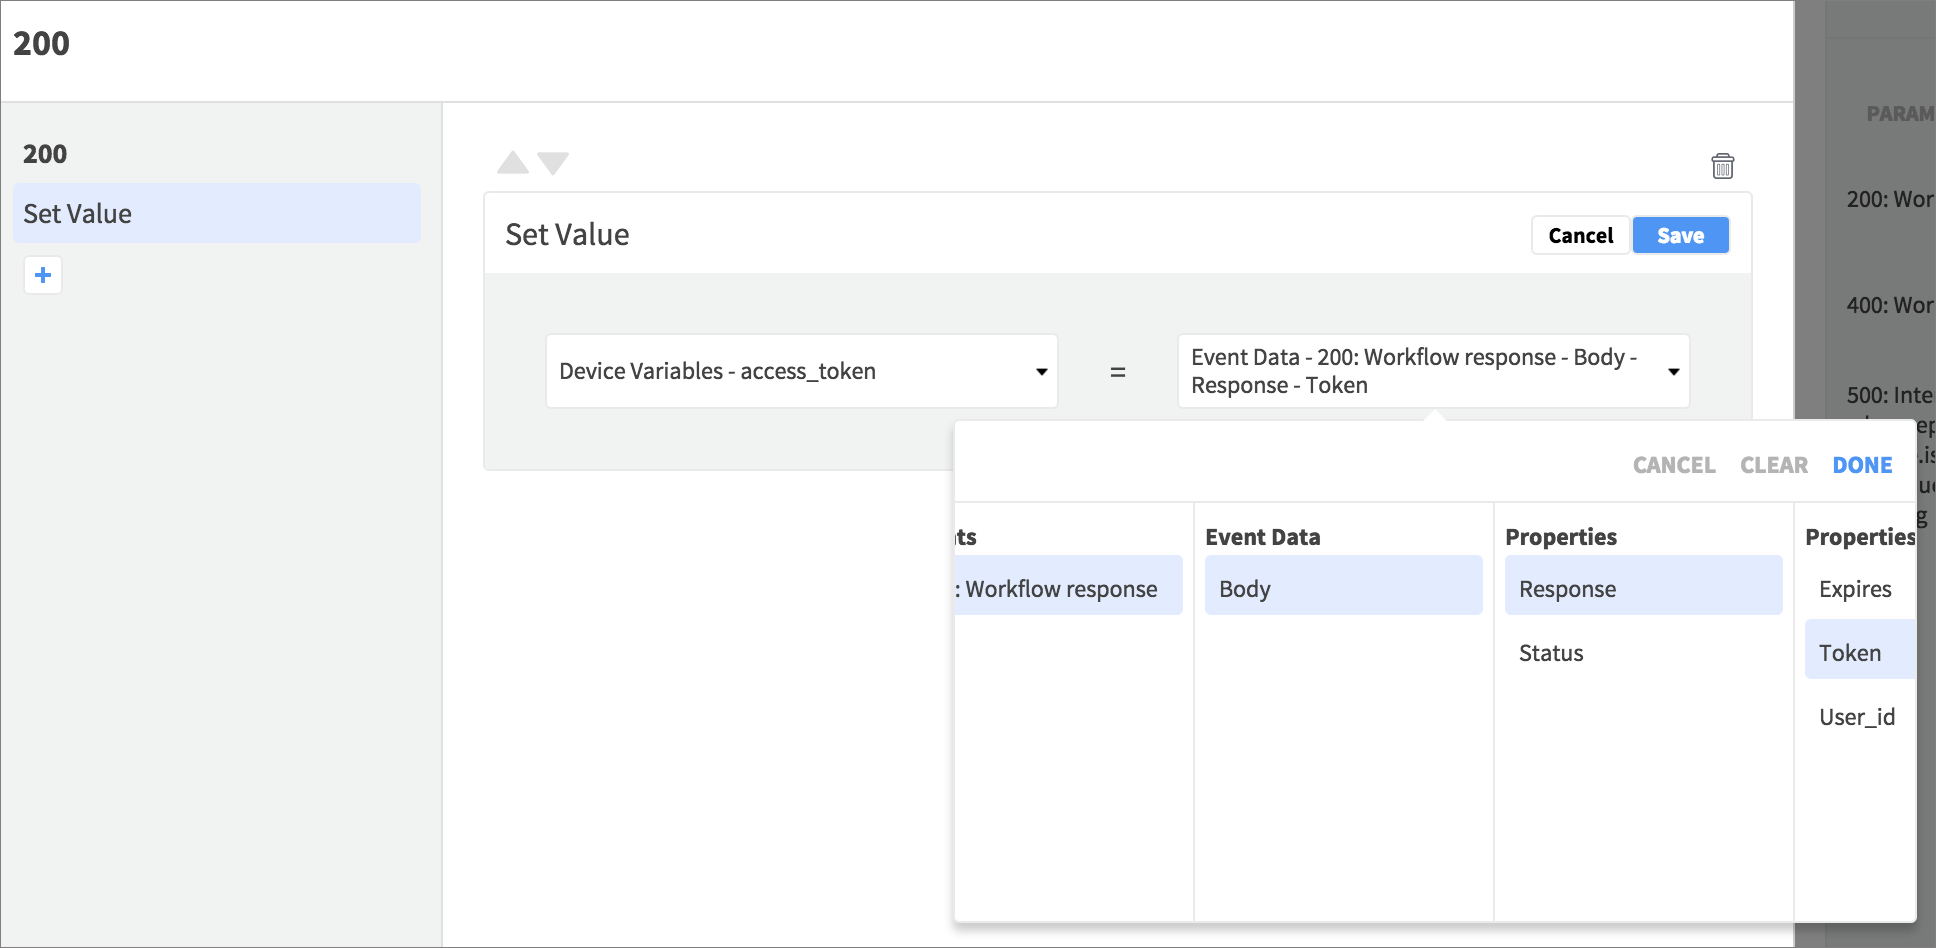
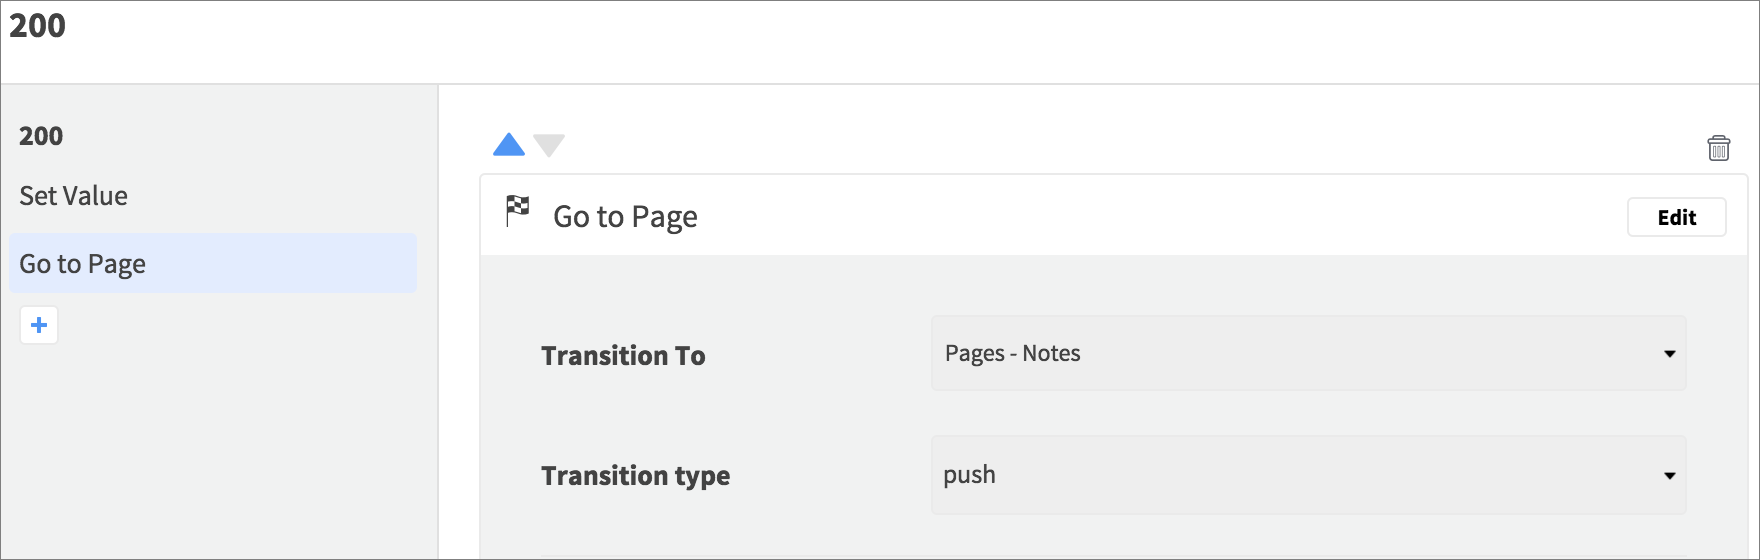
At this point your app signup / login was successful and your variable has an access token you can use to make requests for the user data. After the Set Value Action, you might want to add a Go To Page, navigating to another page where the user will be able to see their account info.
You can also respond to failed login / signup by adding Actions to the other request Events.
Add a Run API Request Action to execute the request, for example when the user taps the login / signup button.
Retrieve User Data
Once signed up / logged in, you can retrieve user data from the Bubble API. In the page where you plan to retrieve that data, add the relevant GET request.
If your request retrieves a list of items (e.g. the default GET for your data types), add a dynamic Element to the page, such as a Table or List (set the Table to Dynamic in Properties). Add a single child Element (e.g. a Table Cell or List Tile). Inside the child Element, add Elements such as Text Views to display your data.

If your request retrieves individual items, you don’t need a dynamic Element, so add any Elements you need to display them anywhere in the page.
Open the request you added in the API tab and select Responses. For lists of items, your data will be returned in an array, which is represented in Dropsource as a Data Source. Bind the Data Source to the dynamic Element you added, and bind the fields inside the array to the Elements you added inside your dynamic Element.

For individual fields, bind them to your Elements on the Canvas.
Once your binding is set up, add a Run API Request Action, for example in the page Appeared / Resume Event (select the page at the top of the Element Tree and open Properties > Events).

Unless your Bubble app already has data in it, you won’t see any user data until you either add a POST request to the app, or manually add data via your Bubble account.
Search and Filter
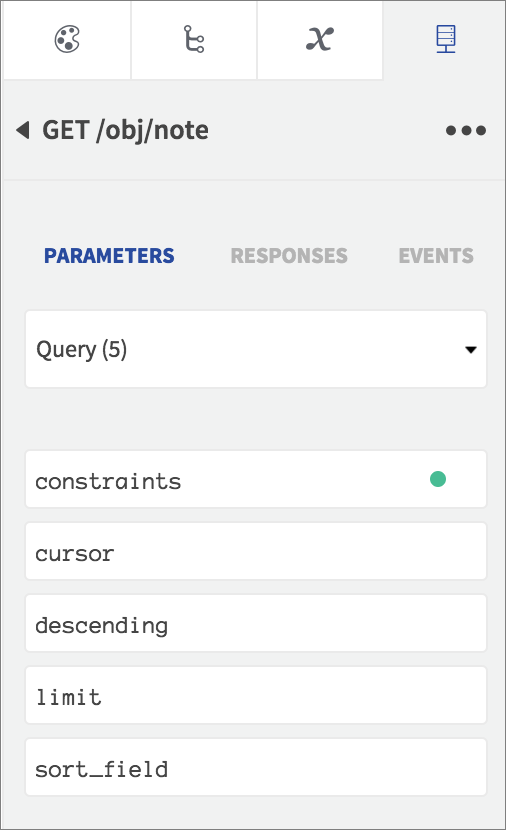
You can use Bubble constraints to search and filter the data returned from your API. The standard GET endpoints from Bubble include a parameter in the Query named constraints, which you can use to refine your request.
The parameter requires the data formatted in a particular way, so you need to use some custom Dropsource Actions before you can pass the relevant data. First add two Page Variables on the right of the editor, one String type and one BubbleConstraints type.

In the request Parameters, bind the Query constraints field to the string variable you created.

In an Event in your app, before running the request, prepare the constraints as follows:
- Add the Initialize Bubble API Constraints Action.
- Use a Set Value Action to save the
BubbleConstraints object to the Page Variable you created, via the Action Data.
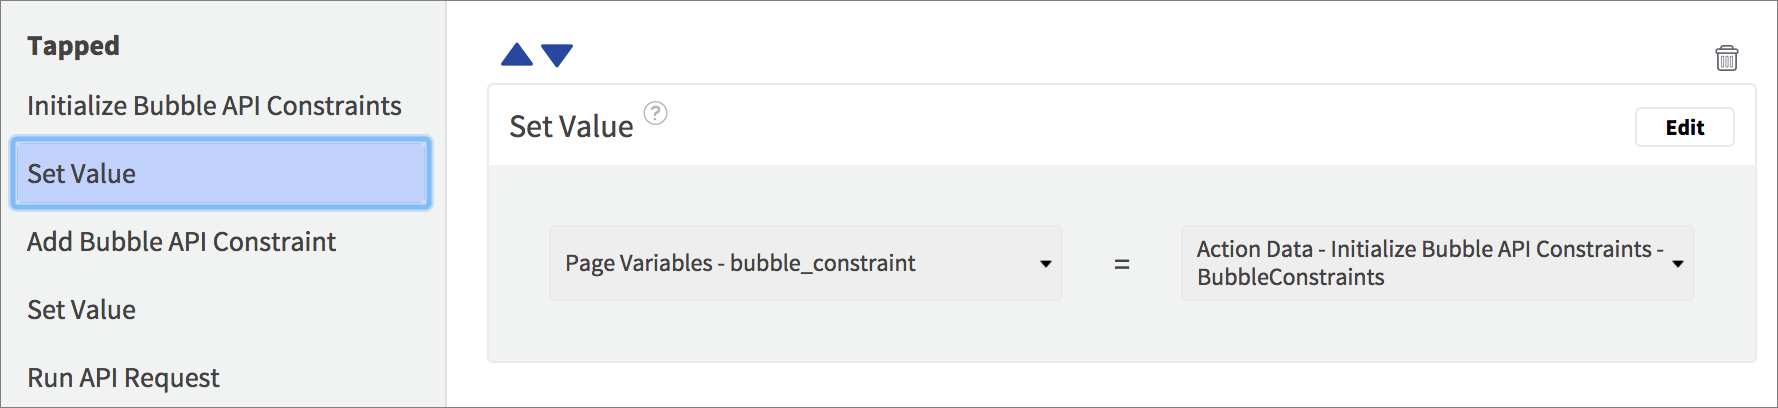
- Use Add Bubble API Constraint however many times you need to add each constraint you want. Choose the Constraints Object Page Variable, a Key (which should be the column name from your Bubble data that you want to filter on), a Constraint Type (see the Bubble reference for more on the options available), and a Value to search for (which can come from user input).

- Save the constraint string to the string Page Variable you created, retrieving it from the constraint object.

Once the string parameter contains the constraints, you can run the API request, and the results will be filtered based on your constraints.
Send Data to the API
Your API will automatically provide endpoints to send new entries for each of your data types.
Add one of the POST endpoints (for creating a new item) to a page in your Dropsource app, for example POST /obj/note. Use input Elements (such as Text Fields) in the page for any user input you want to send to the request, and bind them as you did with the login / signup requests.

Add an Action to run the request, for example when the user taps a button. In the request Events, you could navigate back to another page where the user will see their updated data (e.g. navigating back to the note list page when the user has successfully added a new note).
Your API will also include endpoints for updating and deleting items from your data – the process is very similar to creating new items.
Test your App
Click Test to create a new build, choosing Test in Web Simulator when it’s ready in the Builds list. Try your app out!
If you continue developing your Bubble API after you’ve imported the spec into Dropsource, just remember to deploy your Bubble app, then Update the API inside Dropsource, and you can continue working on the app without losing any of your work. For a more complex example of what you can do using Bubble and Dropsource, check out our Photo Saver example app.