In this tutorial series you are rebuilding the GitHub Example App in Dropsource. The first page in the app will handle user login to GitHub.
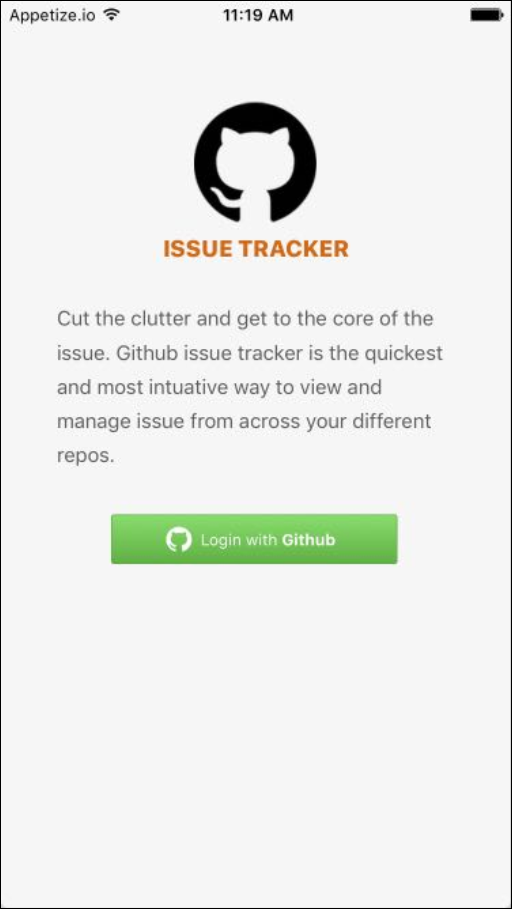

GitHub login page on iOS / Android.
Once the user is logged in, the app will be able to authenticate API requests.
Build the Login Functionality
When you open your new project, you will be prompted to create a page – use the plus ![]() button in Pages on the left. You won’t need any of the config elements for this page on iOS, but choose the App Bar on Android, and click Next and enter the name “Your Repositories”. Create the page.
button in Pages on the left. You won’t need any of the config elements for this page on iOS, but choose the App Bar on Android, and click Next and enter the name “Your Repositories”. Create the page.
The first page is automatically set as the landing page for the app, but when the user runs the app before authenticating with GitHub, they will instead be shown a login page. Create another page, choosing no config elements, naming the page “Login”. Set any styling you like on the page element, such as background color, by selecting it on the Canvas and opening Properties. If you want to emulate the Example App style, keep it open in another tab, select its Elements and copy their Properties into your project.
In the Login page, drag an Image Element onto the Canvas. In Properties, rename it “Logo Image”. For the Image Asset, click Choose and upload the GitHub logo:
![]()
Set the Image to use aspect scale and set its Background Color to transparent. Position the Image in the center of the page horizontally, near the top.
![]()
Under the Image, add a Label / Text View Element and rename it “App Name Label” / “App Name Text View”. Set the Text property to “ISSUE TRACKER”, center it horizontally, and set your chosen font styling.
Under the text Element, add a Text View, renaming it “Description Text View”. Scale it to accommodate around six lines of text, and center it in the page. Set the Text to an informative description such as:
- “Cut the clutter and get to the core of the issue. Github issue tracker is the quickest and most intuitive way to view and manage issue from across your different repos.”
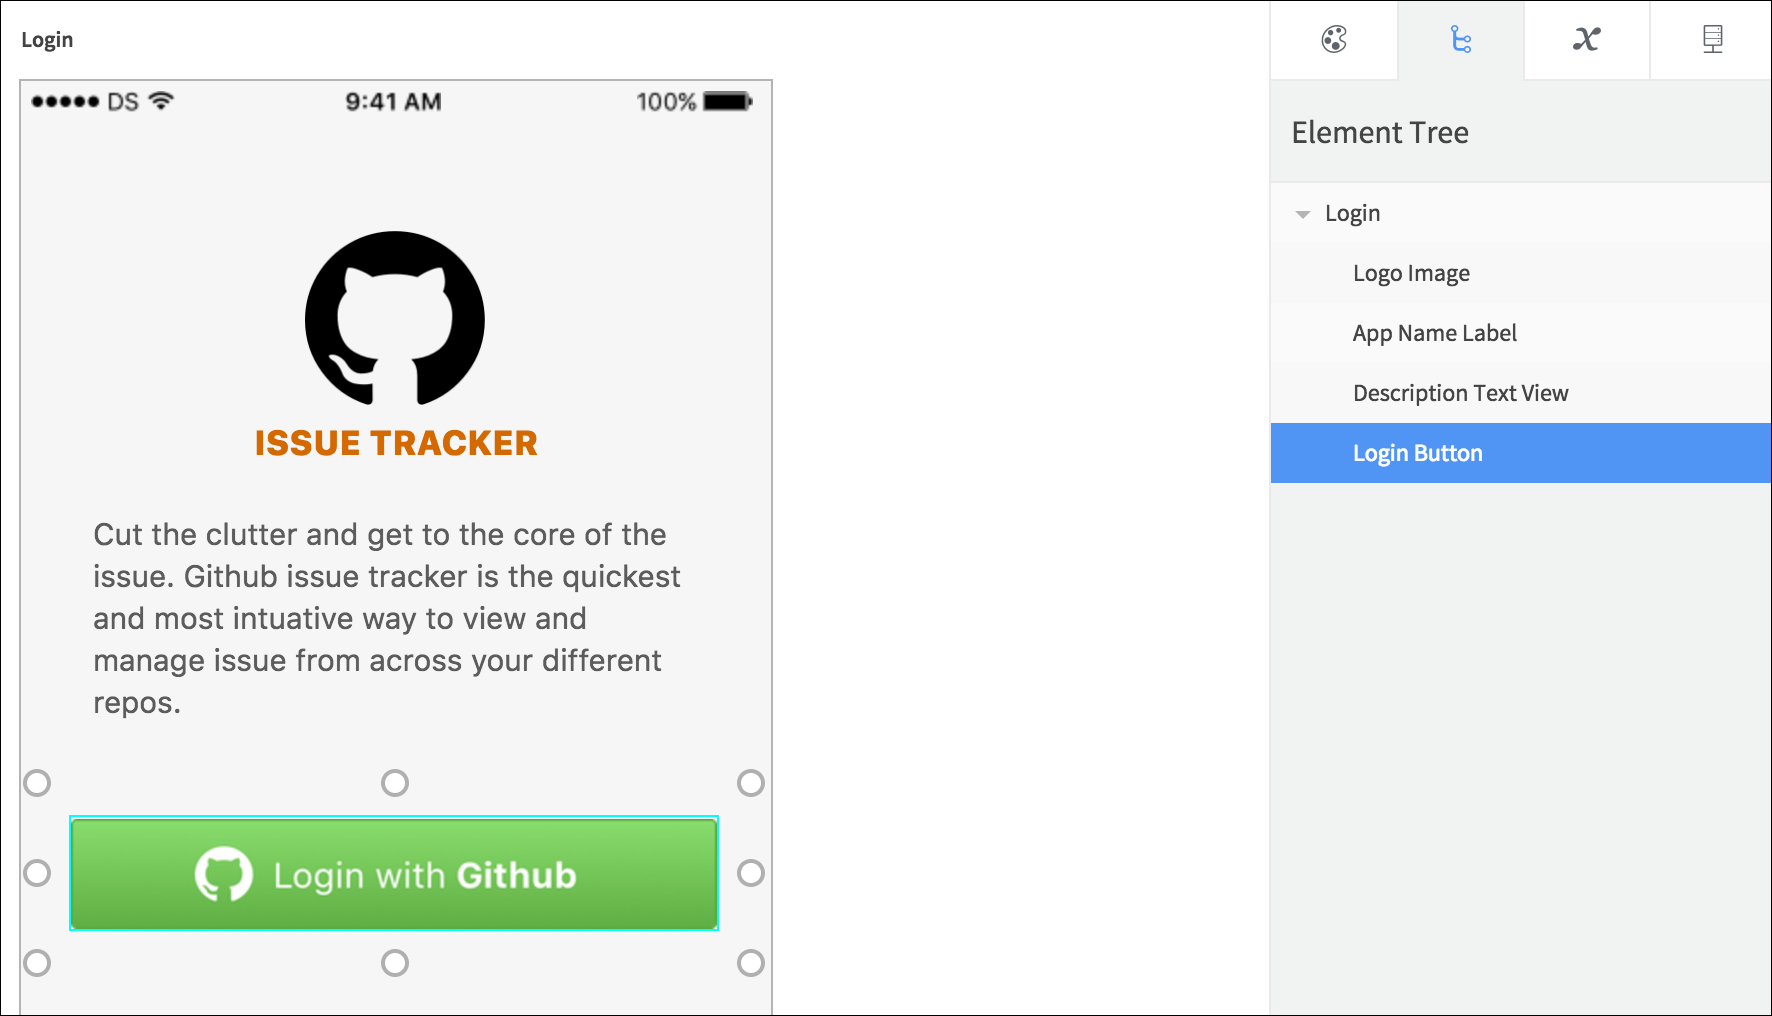
Last in the Login page, add a Button / Image Button Element, naming it “Login Button”. Set its Background Image / Asset to the following button image:

Choose aspect scale and set a transparent background on the Button. Position it to occupy most of the width of the page, under the other Elements. You can also style button Elements during interaction states on iOS, using the Button State list.
Your Login page should look something like this:
Log the User In
Dropsource provides a custom Action for GitHub login, which the app uses to authenticate requests to the API for the user’s repo and issue data. When the user taps the Login Button, they will be sent to GitHub’s login page. GitHub will respond to a successful login by returning an access token which the app will then use to authenticate requests for the user data. The app will store the key in a variable – in Variables on the left of the editor, add a new Device Variable. Give it the name “auth_token” and choose Swift / Java String type.

Select the Login Button and open Properties > Events. Click Add for the Tapped Event, and add an Action. Choose Log User In with GitHub and click to Edit it. The Action requires the details for an app registered via a GitHub Developer account, including a client ID, secret, callback URL (e.g. ghlogin://), and the scope your app requires ( Repo, User Email, and User for this app). Feel free to create your own app and enter the details, or use the details from the Example App for testing purposes.

When the Action fields are complete, Save it.
The Action contains nested Events for successful or failed login. Click the plus ![]() button under the nested successful login Event and add the Set Value Action. Select the Device Variable you created, setting the value to the auth token returned from GitHub, which you can access from the Event Data container – it’s the
Successful Login - accessToken field.
button under the nested successful login Event and add the Set Value Action. Select the Device Variable you created, setting the value to the auth token returned from GitHub, which you can access from the Event Data container – it’s the
Successful Login - accessToken field.
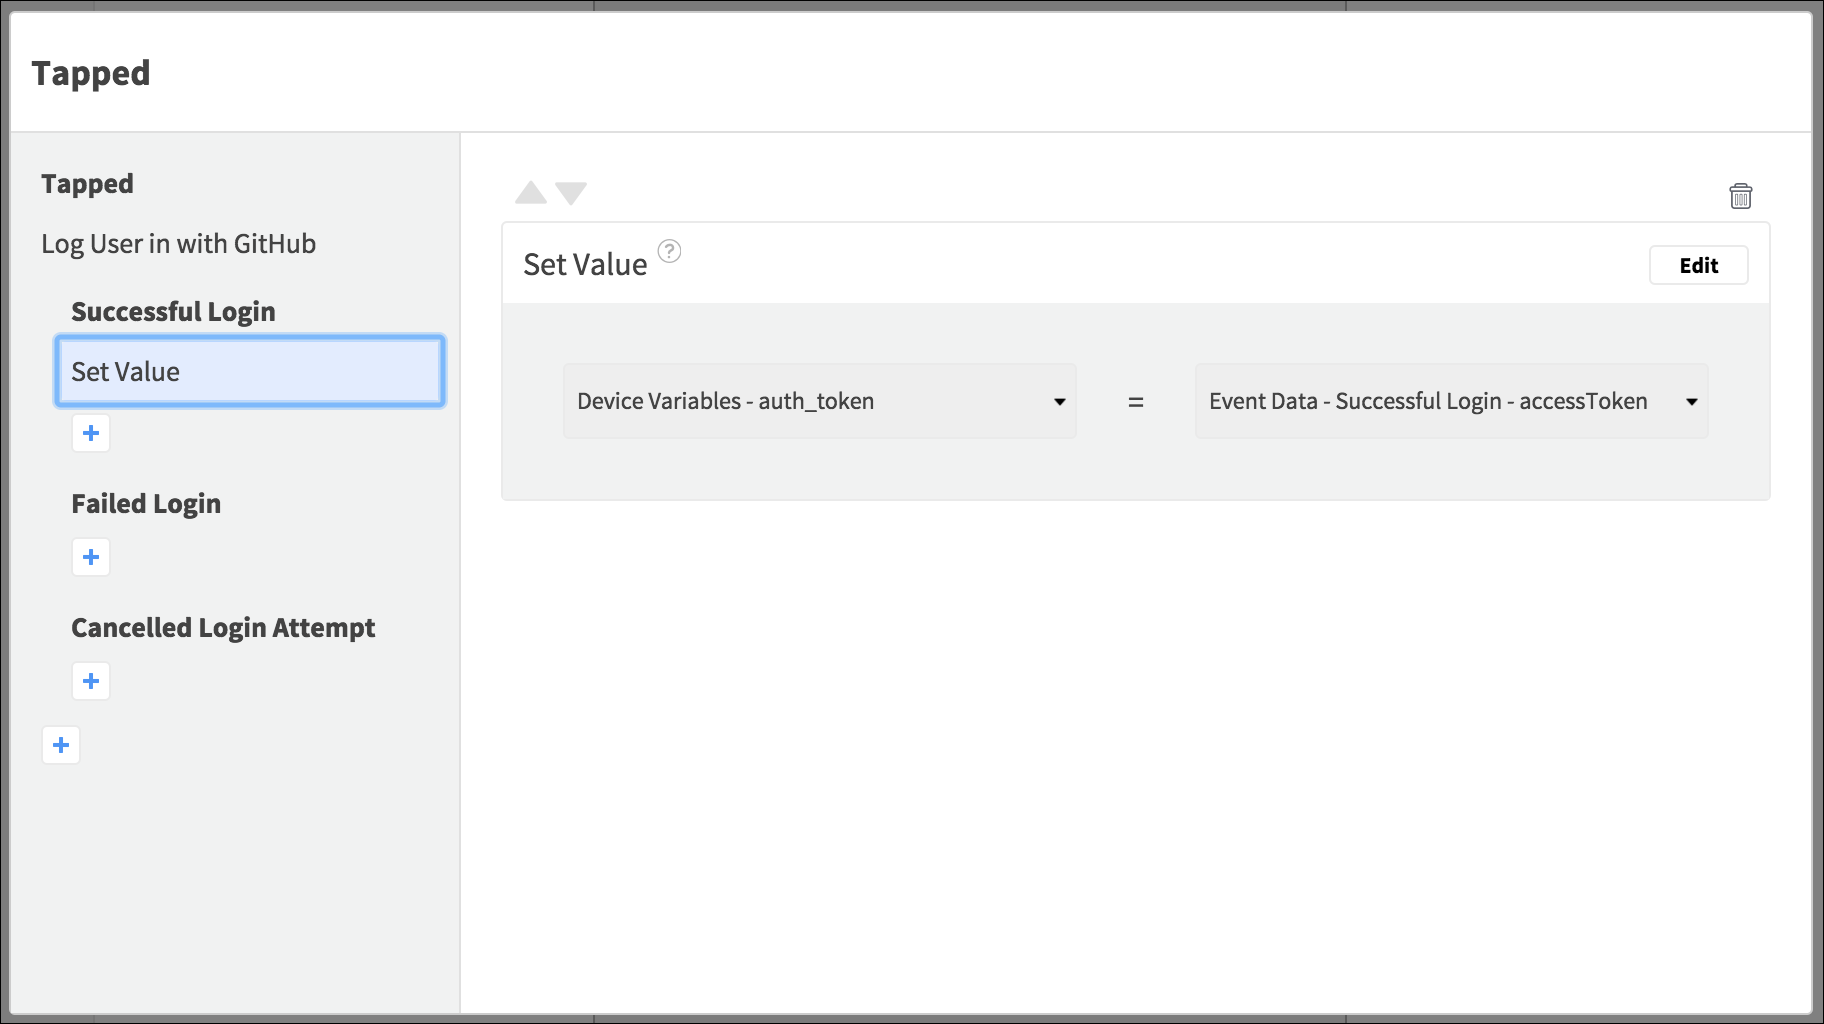
Add another Action to the same Event, choosing Go Back a Page, and selecting true on iOS. Save and close the modal.

When the app launches, the repositories page will attempt to make a request to GitHub. If authentication fails, the app will navigate to the Login page. When the user logs in, they will be taken back to the repositories page, with the access token stored locally and ready to build into GitHub API requests.
The GitHub Login Action is an example of what you can achieve in Dropsource using Plugins. If you would like to discuss adding a plugin for one of your projects, get in touch help@dropsource.com.
Request Repositories
Download the GitHub API specification file used in the example app.
Back in the Your Repositories page, open the API tab. Click the plus ![]() button, click Choose, and upload the GitHub spec file you just downloaded.
button, click Choose, and upload the GitHub spec file you just downloaded.
Dropsource will import the API information into your project. In the API tab, you will see the API – click Set Authentication next to the API name. Select the Device Variable you created.

Once the user has logged in, the variable will contain the access token.
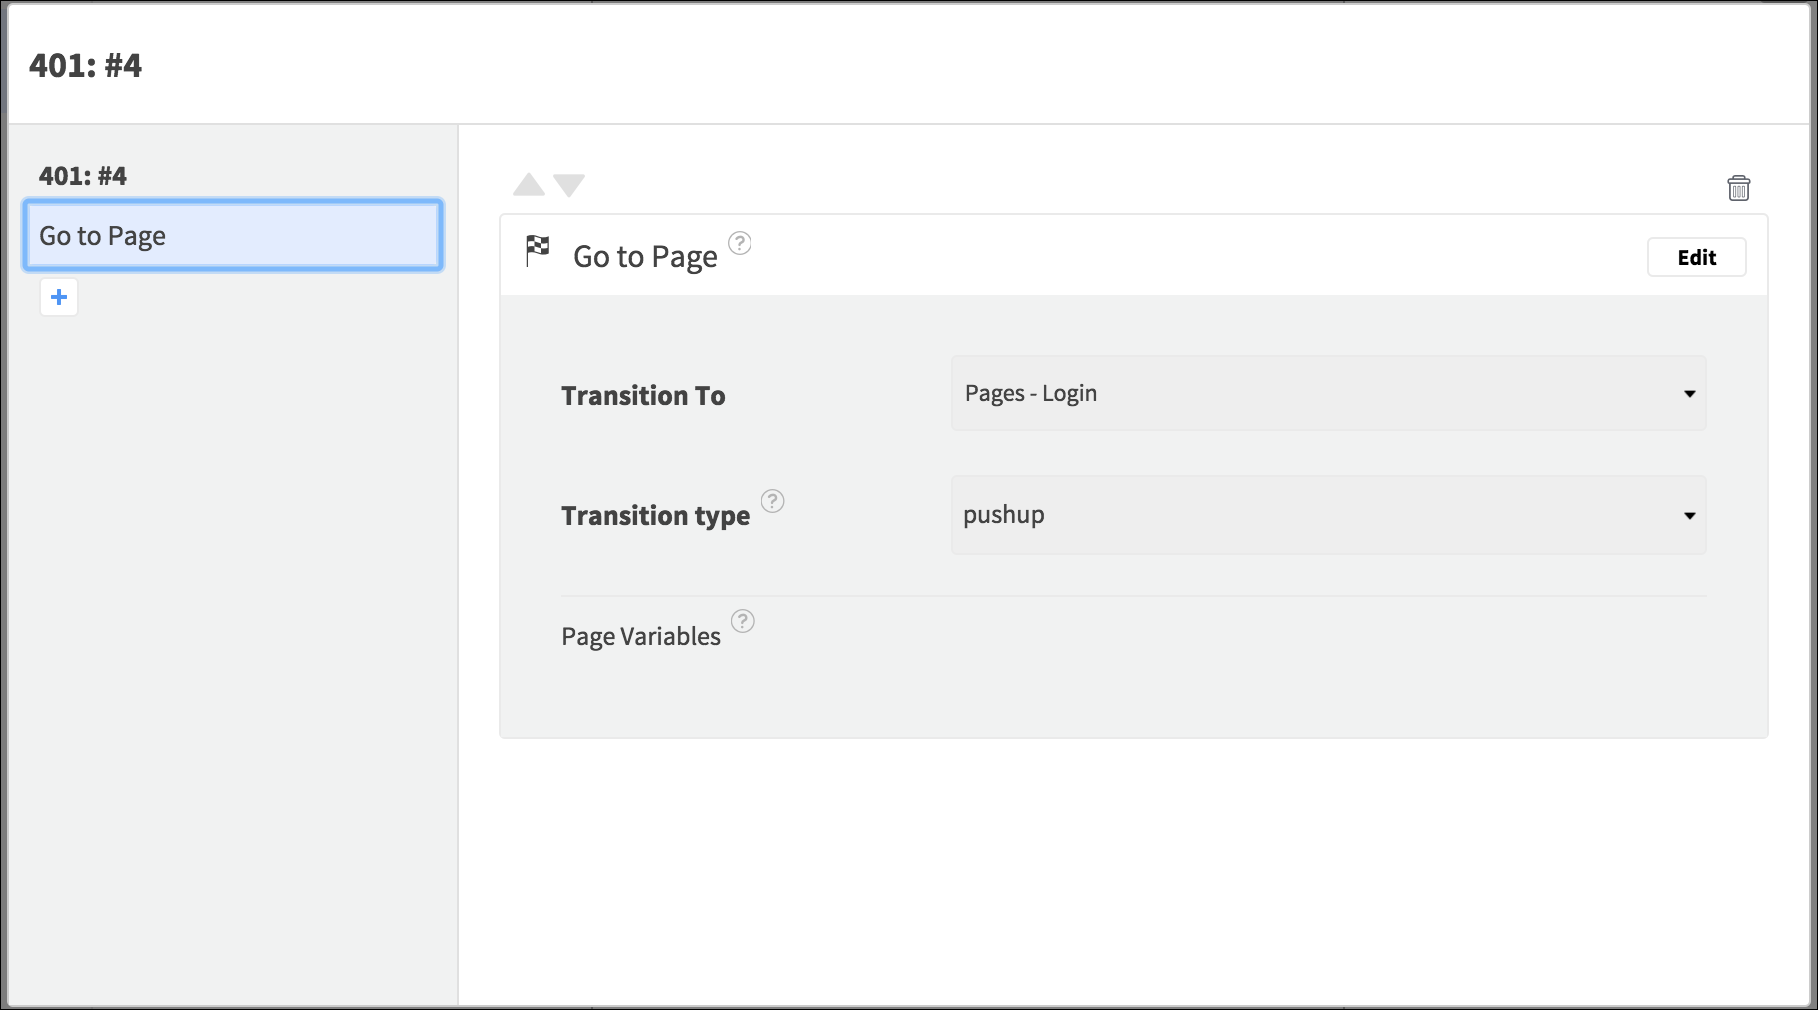
In the drop-down list for the API, select GET /user/repos and click Add so that the page can make a request to that endpoint. Click the new request to open it. You will setup displaying the responses in the page soon, but first open Events. If user auth fails, the 401 code will be returned, and the associated Event will fire – click Add for that Event. Add the Go To Page Action – select the Login page, and pushup transition. This will prompt the user to login so that their requests can be authenticated.
This request should run as soon as the page appears, so select the repositories page on the Canvas and open Properties > Events. Click Add for the Appeared / Resume Event. Add a Run API Request Action, choose the GET request and Save.
Although your repositories page is still empty, you can run the app now to check the login functionality. Click Test (the Web Simulator should automatically be selected in your test configurations). Once a build is ready you will see it in Builds – choose Test in Web Simulator.
When the landing page loads and the request fails to authenticate, the user is redirected to the Login page. On tapping the Login Button, they are taken to GitHub’s login page in the browser.


Once logged in, the user returns to the app, where the request Action takes them to the repositories page (it will appear as a blank page for now). Next you will display the repo details.