In this tutorial series you are rebuilding the Places example app in Dropsource. Last time you created the place search page, this time you will create a place detail page.
When the user taps a place in the list, the app will take them to the new page, which will display more detail on the selected place. The information will include the place contact details and a swipe view of photos.


Place detail page on iOS / Android.
Add another page to the app, choosing the Navigation Bar / App Bar, and naming it “Place”. Dropsource will open the page for editing. Configure the page and navigation Elements – Set the page element Navigation Item Title (iOS) / App Bar Title to “PLACE DETAIL”.
Since this is the second page in the app, you can provide navigation back to the previous page. On iOS you can simply select the page and check Back Button Enabled in Properties.
On Android, select the App Bar and in Properties, set the Nav Icon asset to this back arrow image:
![]()
Select the App Bar and open Properties > Events, clicking Add for the Nav Icon Tapped Event. Add an Action, choosing Go Back a Page.
Pass Place Information
When the Place page loads, it will make an API request for the place selected by the user on the previous page. The Search page will need to pass the ID of the selected place into the Place page. In the Place page Page Variables tab on the right, click the plus ![]() button to add a variable. Name the variable “placeid” and choose the standard Swift / Java String type. Check the Is required during inbound navigation checkbox, so that any page navigating here will be required to supply a place ID.
button to add a variable. Name the variable “placeid” and choose the standard Swift / Java String type. Check the Is required during inbound navigation checkbox, so that any page navigating here will be required to supply a place ID.

Open the Search page again and select the Table Cell / List Tile in the Element Tree. Open Properties > Events and click Add for the Tapped Event. Choose Go To Page, selecting the Place page and Push transition. A section will appear prompting you to supply a value for the Page Variable you declared – since this Action is on a dynamic Table Cell / List Tile Event, it can access the data bound to the Element from the API. Select Data Source > Results Table / List > SearchResult > Place_id.

Now when the Place page loads, it will receive the ID for the place selected by the user.
Display Place Details
Back in the Place page, you can now add Elements to display the details.
Place Photographs
The page will display a swipe view of place photos – add a Page Controller (iOS) / View Pager (Android) at the top of the page, renaming it “Images Controller” / “Images View Pager”. Make it occupy just under half of the page height. In Properties, set the Content (iOS) / Pager Type (Android) to Dynamic. On iOS, set the Indicator Type to None.

Drag a Page Controller View / Pager View inside the Page Controller / View Pager, renaming it “Image View”. Position it to fill the space inside its parent Element.
Drag an Image Element inside the Image View Element, renaming it “Place Image”. Set the Image to use an aspect scale, and make it fill the parent Element.

Place Information
Next add a View Element under the Image section, making it occupy about half of the page height, leaving a small amount below it for the row of buttons. Rename the View “Place Info View”.
Inside the View, you will need 11 Labels / Text Views to show the place information. You might find it quicker to use copy and paste for these, but make sure you rename each one to make it easier to identify – some of them will display info from the API, and the rest will act as informative labels:
- Name information:
- “Name Label” / “Name Text View”, positioned at the top of the View, occupying the full width. Center the text and choose a bold font, setting the Text to “Place Name”.
- Rating information:
- “Rating Label” / “Rating Text View”, under the name on the left of the View. Set the Text to “Rating:”.
- “Rating Value Label” / “Rating Value Text View”, on the right of the Rating text Element. Set the Text to “No Rating”.
- Price information:
- “Price Label” / “Price Text View”, under the Rating Elements on the left. Set the Text to “Price Level:”.
- “Price Value Label” / “Price Value Text View”, to the right of the Price text. Set the Text to “No Price Level Available”.
- Address information:
- “Address Label” / “Address Text View”, under the price level text. Set the Text to “Address:”.
- “Address Value Label” / “Address Value Text View”, to the right of the Address text. Set the Text to “No Address Available”.
- Website information:
- “Website Label” / “Website Text View”, under the address text. Set the Text to “Website:”.
- “Website Value Label” / “Website Value Text View”, to the right of the Website text. Set the Text to “No Website Available”.
- Phone information:
- “Phone Label” / “Phone Text View”, under the website text. Set the Text to “Phone:”.
- “Phone Value Label” / “Phone Value Text View”, to the right of the Phone text. Set the Text to “No Phone Number Available”.
Use different font colors to highlight the text Elements in any way you like, for example to make the “Value” text Elements stand out more.
Place Buttons
Under the place info, the bottom part of the page will display four buttons – make each one occupy the remaining height (around one tenth of the page height), and a quarter of the width, so that they fill the space. On iOS choose a Button for each, and on Android choose Image Buttons.
- “Phone Button” with the phone image:
- “Website Button” with the website image:
- “Comments Button”, with the comments image:
- “Map Button”, with the map image:


Choose aspect scale for the images on the Buttons, and set tinting / background color options as you prefer. Set a Border Color for the Buttons on iOS to make their bounds clearer, and set Button State styling for user interaction.
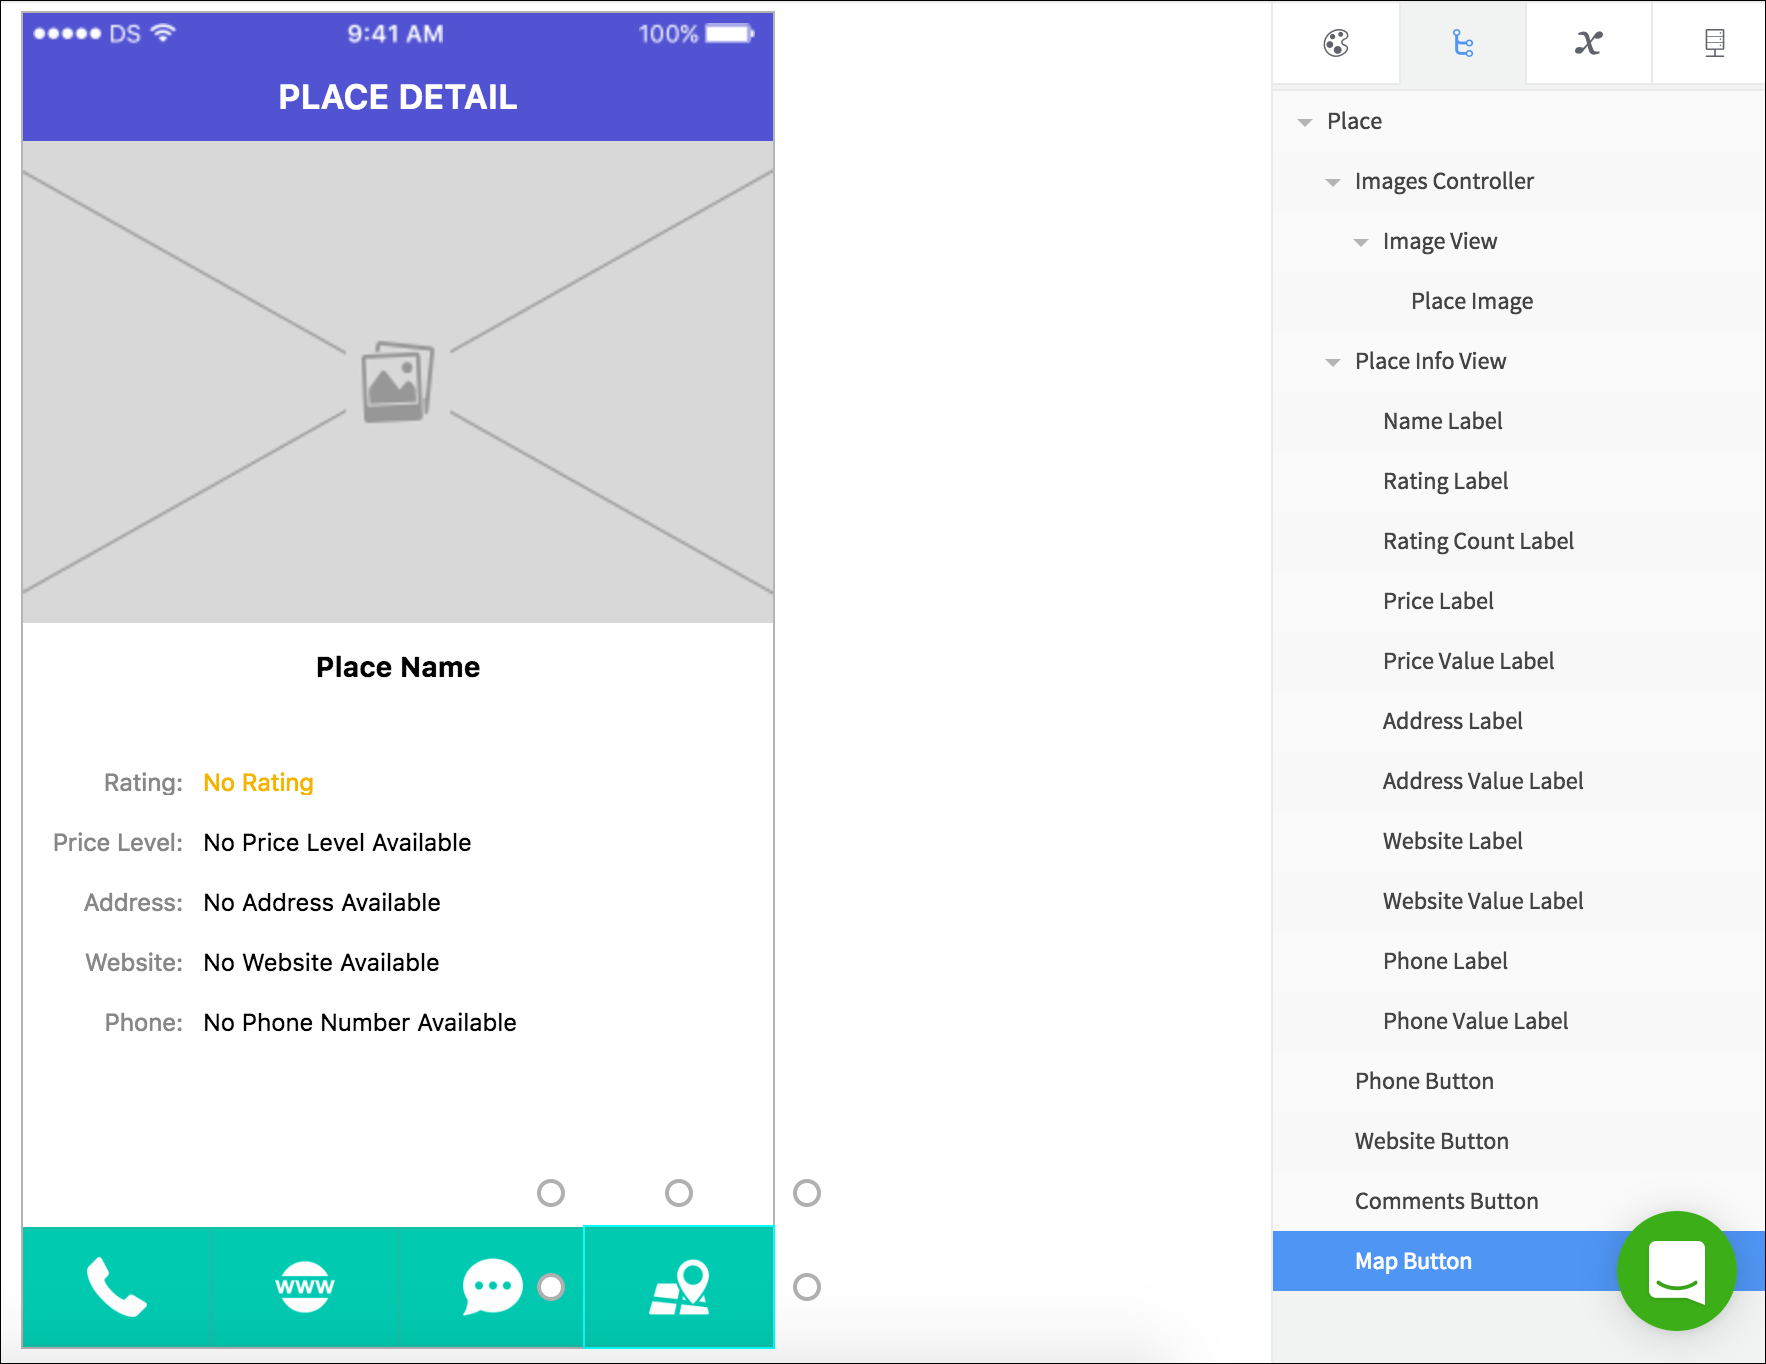
Your Place page should now look something like this:
Request Place Detail Info
Now you can add the API request for the place information. In the API tab, select the details endpoint from the drop-down list and add it to the page. Click to open it. Select Query from the Parameters drop-down list and bind the placeid parameter to the Page Variable you created.

In the Responses section, bind the fields as follows:
- price_level to the Price Value text Element
- formatted_address to the Address Value text Element
- formatted_phone_number to the Phone Value text Element
- name to the Name text Element
- website to the Website Value text Element
- the photos Data Source to the Page Controller / View Pager
The images will be loaded in a little differently – select the Image View Element inside the Page Controller / View Pager and open Properties > Events. Click Add for the Load / Loaded Event. Add a Display Image from URL Action, selecting the Place Image Element, and retrieving the URL from the API response bound to the Element from the Data Source: Data Source > Images Controller / View Pager > Photo > Photo_url.

Save the Action. When the Data Source loads into the parent Element, the Action will execute, loading the image from the URL response field.
Now you can run the request – since it will have the information it needs straight away from the Page Variable, it should run as soon as the page loads. Select the page in the Element Tree (it’s the parent Element at the top), and open Properties > Events. Click Add for the Load / Loaded Event and add the Run API Request Action, choosing the request.
Add Place Functionality
Next you can add functionality to the Buttons – select the Phone Button first, opening Properties > Events. Click Add for the Tapped Event and Add an action. First you need to check if the API returned a phone number for the place, as this will not always be the case. Add an If Else Action, checking if the Phone Value text Element Text value is equal to the placeholder text you entered for the Element.

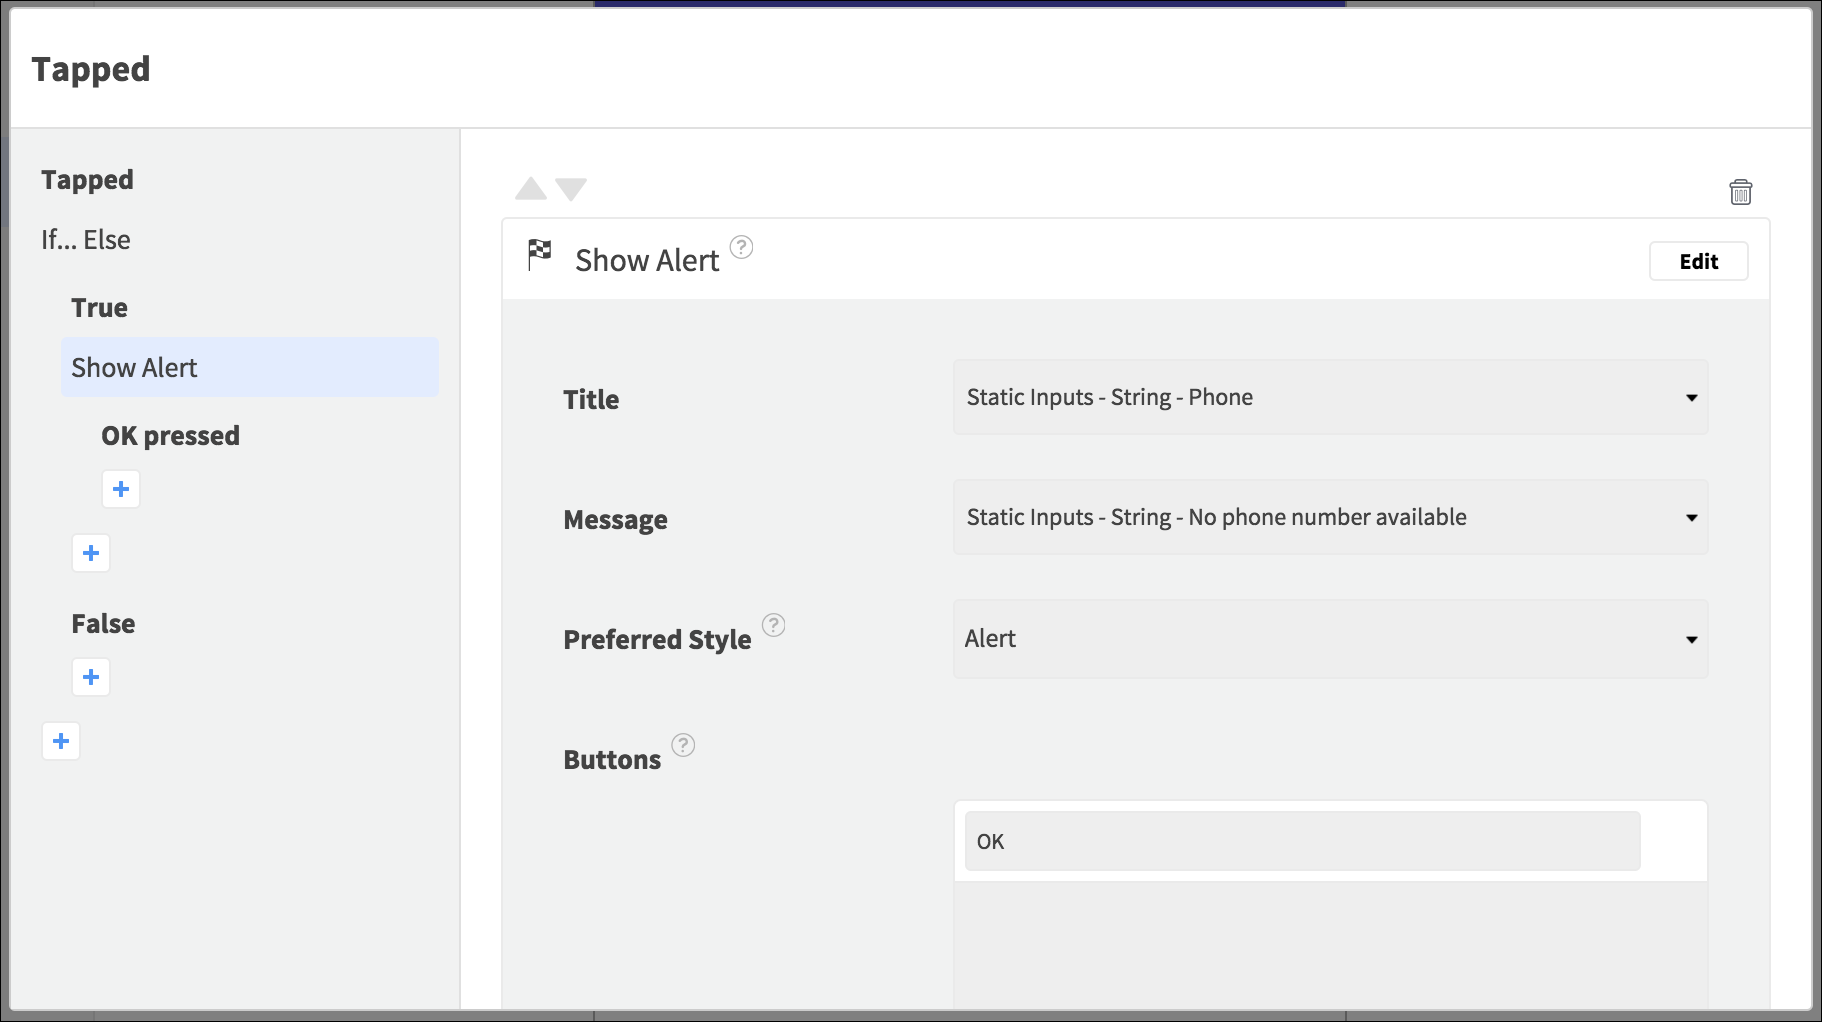
Save the Action. Under the True Event on the left, click the plus ![]() button and add another Action, this time Show Alert (iOS) / Show Snackbar (Android).
button and add another Action, this time Show Alert (iOS) / Show Snackbar (Android).
- On iOS, set the Title to “Phone”, and the Message to “No phone number available”. Choose Alert Style and add one button, with “OK” text. Save the Action.
- On Android, set the Text to “No phone number available”. Set the Button Text to “OK”, and choose Indefinite Duration.
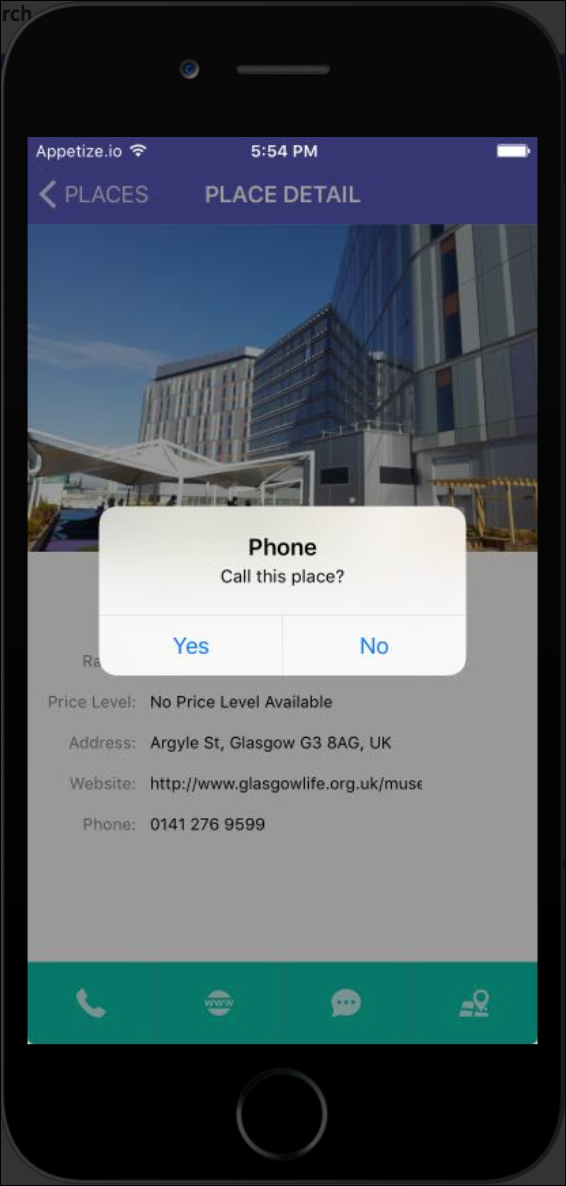
There’s no need to add an Action to the OK pressed Event, because its default behavior is to hide the alert. Add another Action under the False Event, choosing Show Alert (iOS) / Show Alert Dialog (Android). Set “Phone” as the Title again, and the Message to “Call this place?”. On iOS, choose Alert Style and add two buttons – “Yes” and “No”. On Android set the Positive and Negative Labels to “Yes” and “No”. Save the Action.
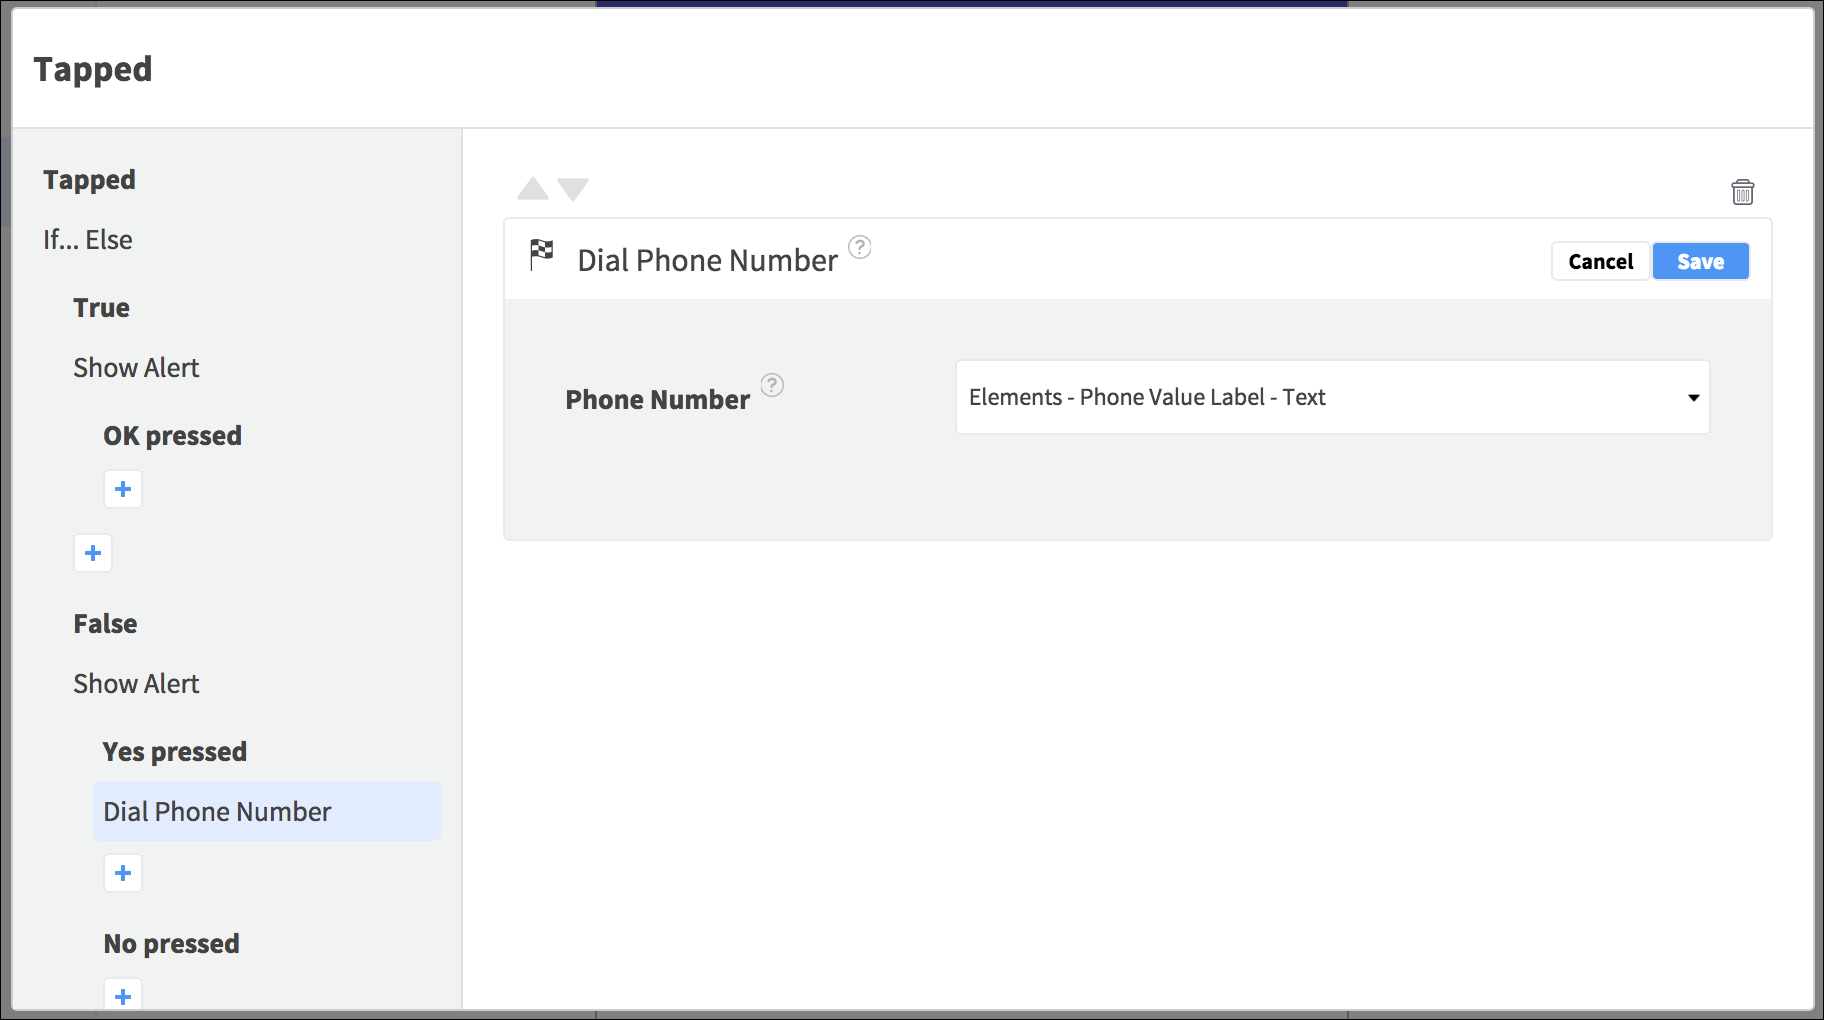
Under the Yes pressed / Positive Button pressed Event, add another Action – Dial Phone Number. Set the Phone Number with the Text property of the Phone Value text Element and Save.
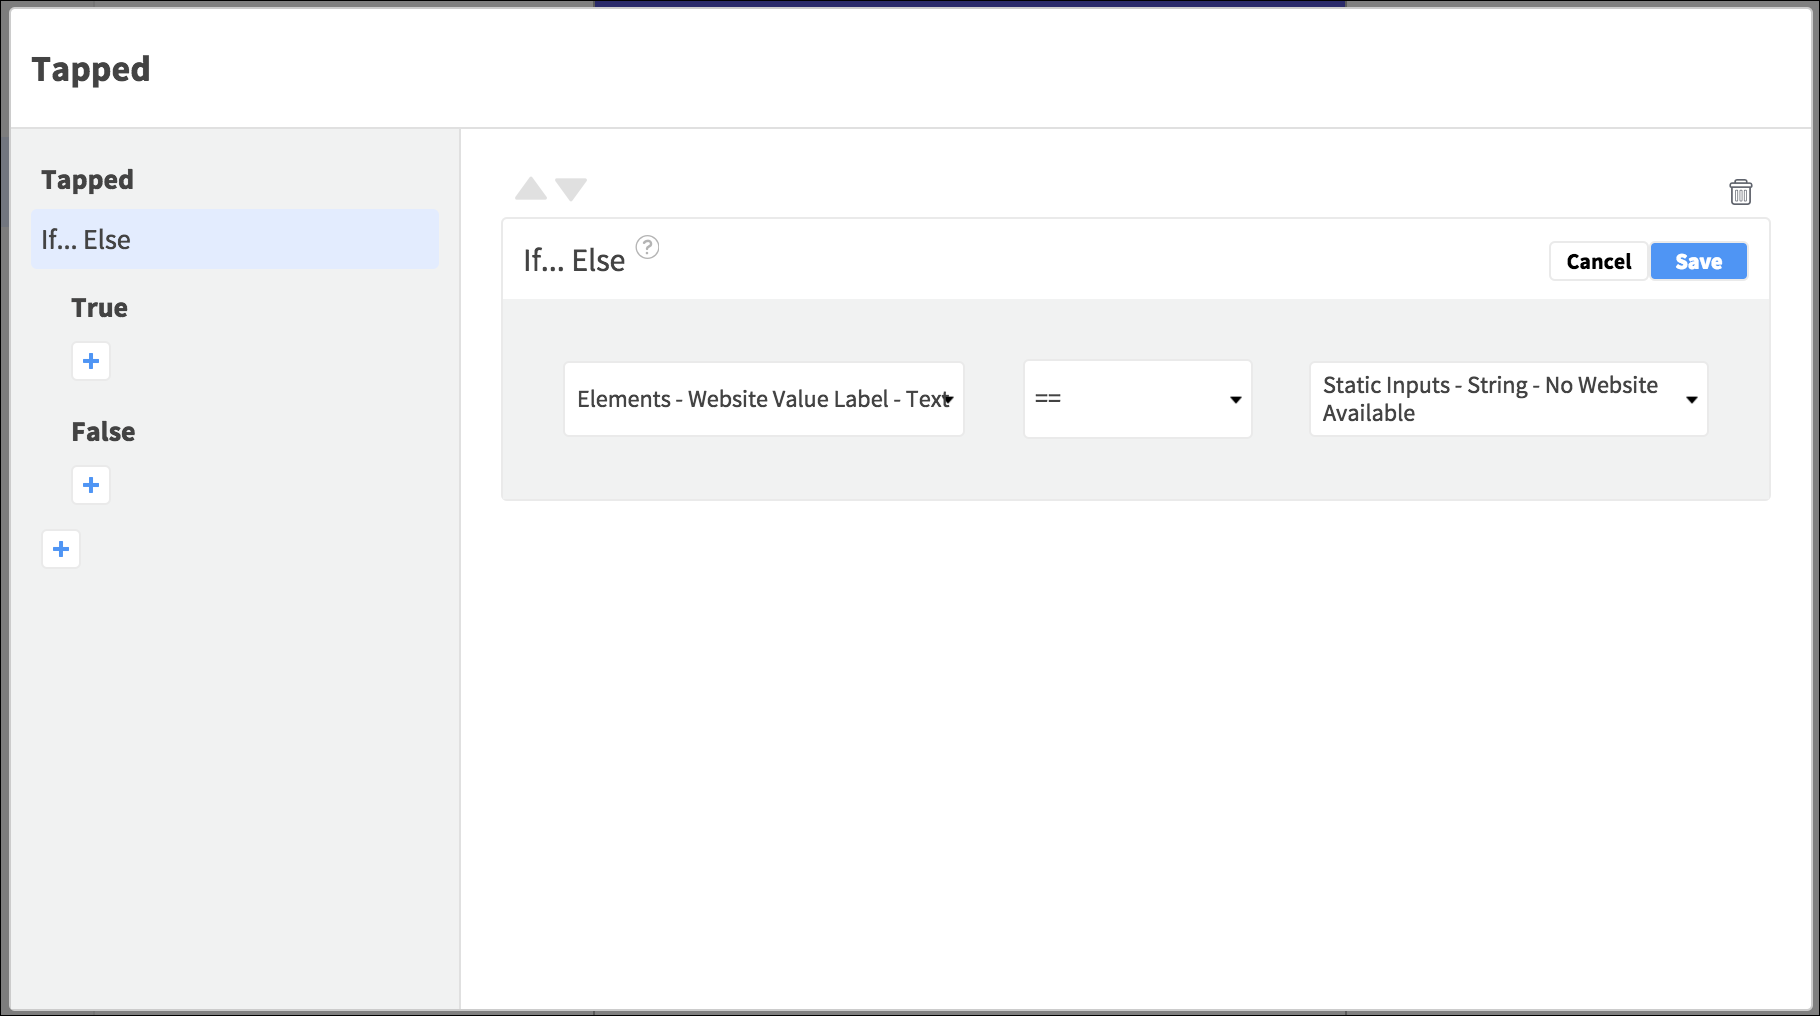
Next, select the Website Button and open Properties > Events, clicking Add for the Tapped Event. Add an If Else Action checking if the Website Value text Element Text equals the placeholder text you added.
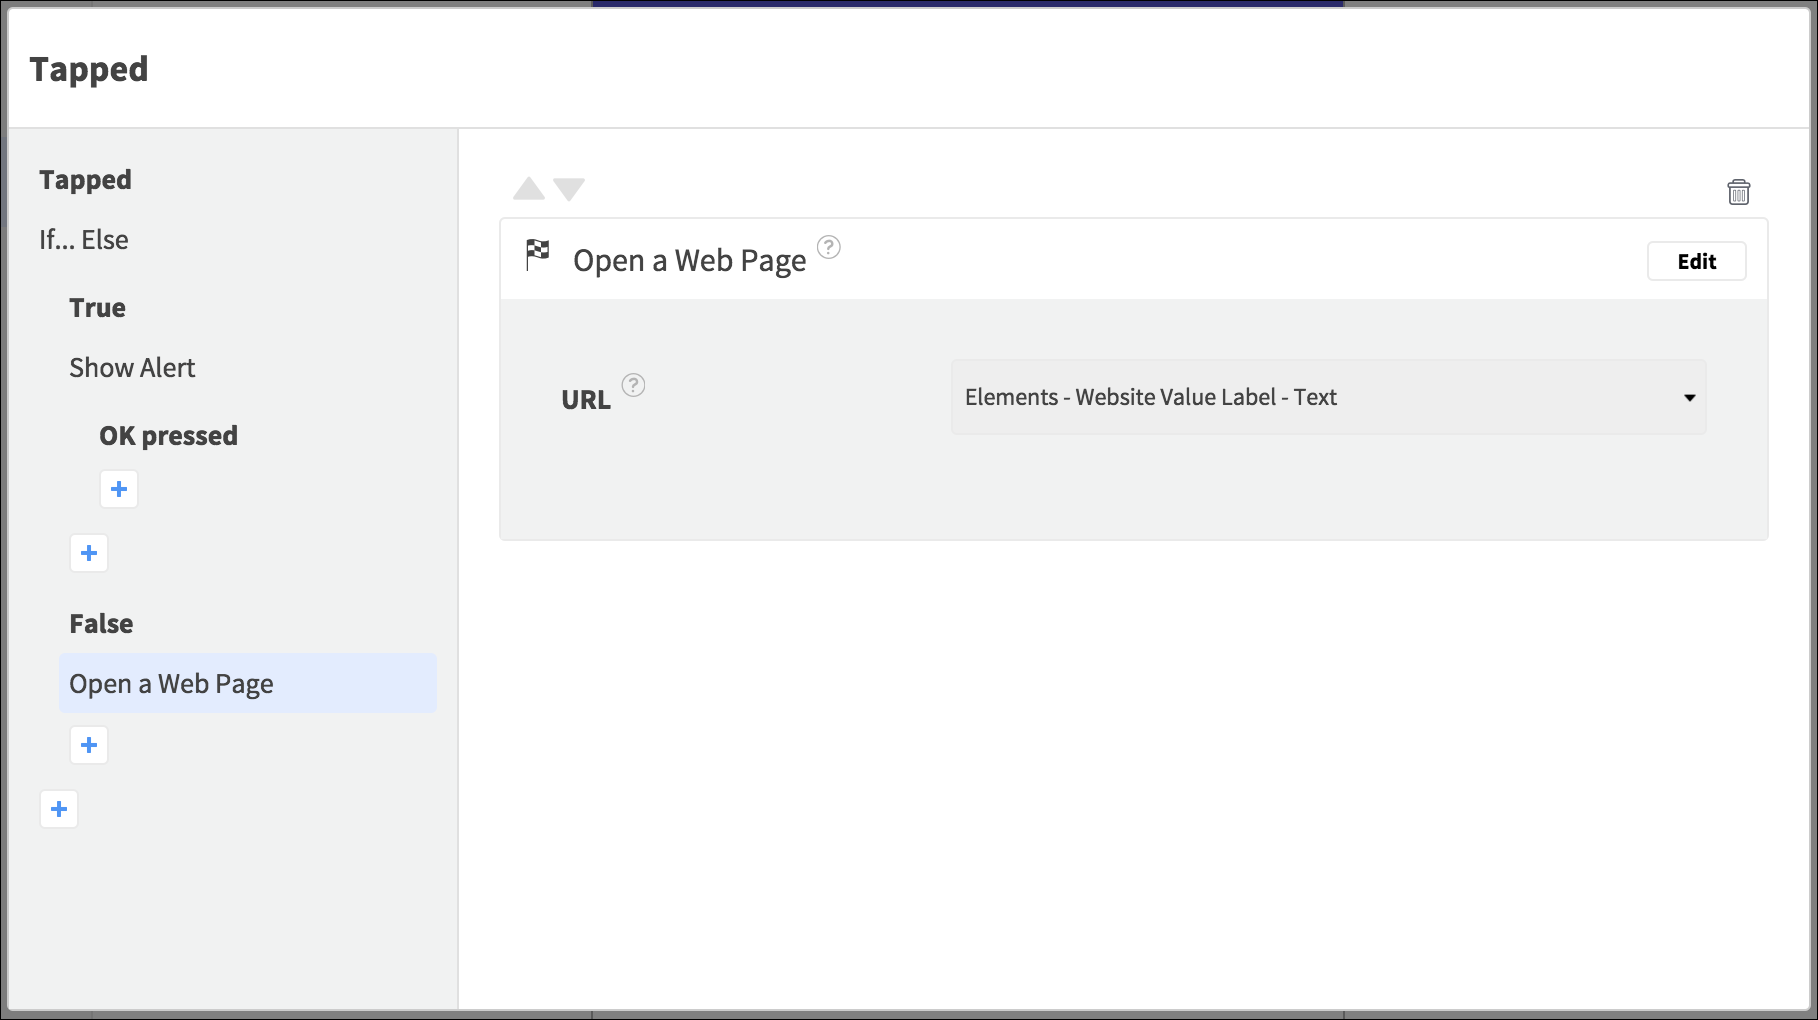
Save the Action and add one to the True Event, choosing Show Alert (iOS) / Show Snackbar (Android). Set the Title to a static input string “Website”, the Message / Text to “No website available”. On iOS choose Alert Style. Add “OK” button text. On Android set the Duration to Indefinite. Save the Action and add one to the False Event, choosing Open a Web Page. Set the URL with the Text property of the Website Value text Element and Save the Action.
Next is the Comments Button – it will navigate to another page, so you’ll come back to it later. Select the Map Button and open Properties > Events, clicking Add for the Tapped Event. Add an If Else Action and check the Address Value text Element for the placeholder text.

Save the Action and add one to the True Event, choosing Show Alert (iOS) / Show Snackbar (Android). Set the Title to “Address”, the Message / Text to “No address available”. On iOS set Alert Style. Add an “OK” button. On Android select Indefinite Duration. Save the Action and add one to the False Event, choosing Open a Web Page. Set the URL to “https://maps.google.com” and Save.
Now you can run the app again! Make sure you choose Test again to create an up to date build with your latest changes. Carry out a search and tap a result to see the place detail – try out the Phone, Website, and Map Buttons.

Next time you will add a page to show the Place Comments.