In this tutorial series you are rebuilding the Checklist example app in Dropsource. The first page in the app displays any To Do Lists the user has already created. The user can delete lists and navigate to other pages for adding and managing lists.


Lists page on iOS / Android.
Create a new page using the Pages drawer plus ![]() button. Choose the Navigation Bar / App Bar configuration and name the page “Lists”. It will automatically be set as the app landing page.
button. Choose the Navigation Bar / App Bar configuration and name the page “Lists”. It will automatically be set as the app landing page.
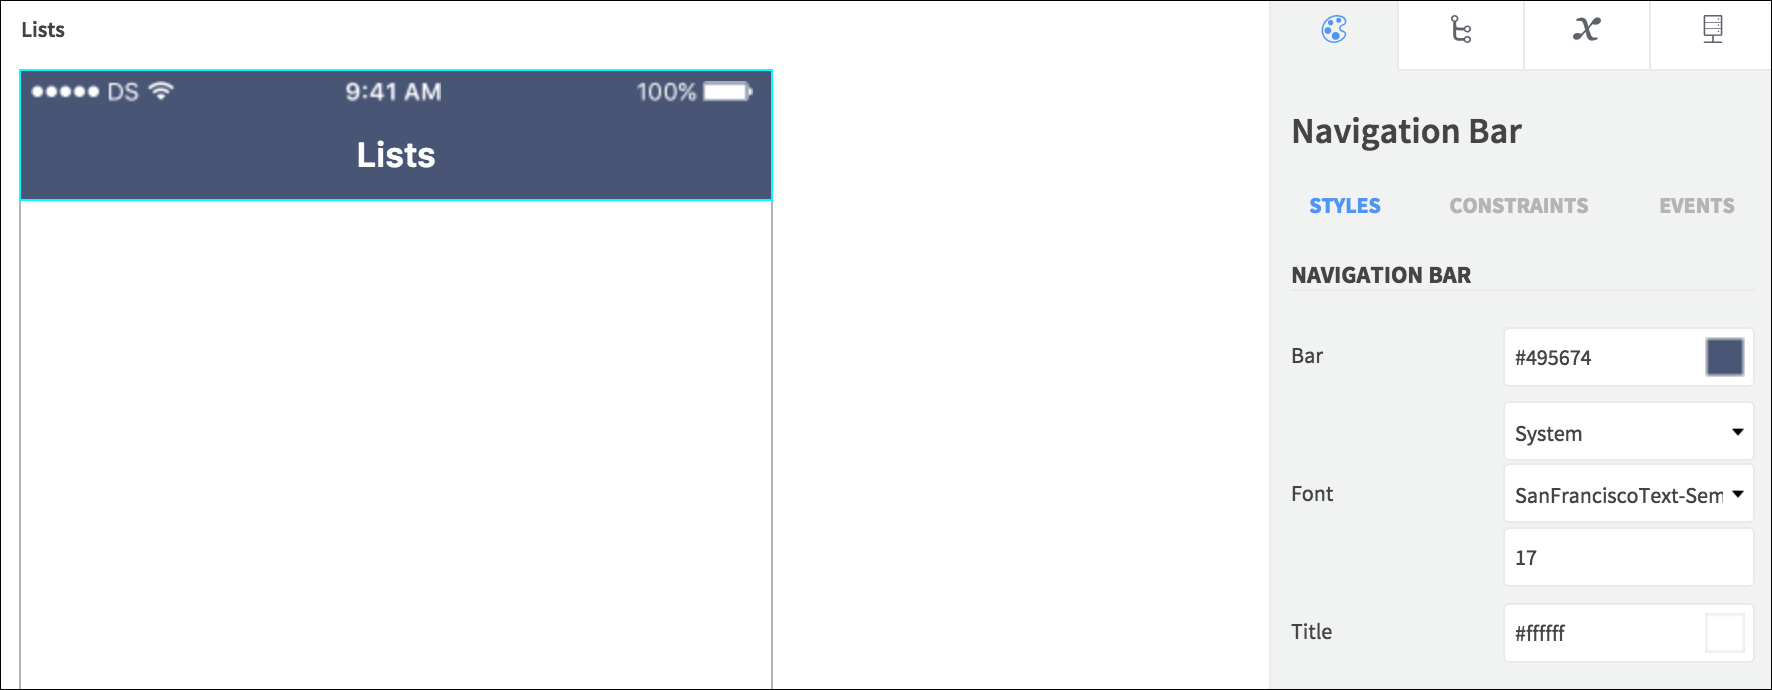
Select the page title to “Lists” – on iOS select the page and use Properties > Navigation Item > Title, on Android select the App Bar and use Properties > Title. Choose color settings for the page and navigation components, including background and text. If you want to match the example app styling, select Elements in the example app and copy the Properties settings into your own project.
Add List Elements
Drag a Table (iOS) / Dynamic List (Android) from Elements onto the page to display the user’s lists. On iOS, set the Content Property to Dynamic. Rename the Element “Lists Table” / “Lists List” and use Properties > Constraints to position it to fill the page. Use Styles to tailor colors for the background, separator, and other properties.

Drag a Table Cell / Dynamic List Tile onto the Table / List and rename it “List Cell” / “List Tile”. Scale it to hold a single line of text plus a small amount of padding.

Inside the Cell / Tile, add an Image Element on the left, renaming it to “List Image”. Click Choose to set the Image asset, uploading and selecting the following image:

Position the Image to fit well inside its parent Element, setting it to aspect scale in Properties, with transparent background.

Add a Label / Text View to the right of the Image, renaming it “List Label” / “List Text View”. Make it occupy most of the remaining width of the parent Element, but with a small space left to its right, and set its height to accommodate a single line of text. Set its Text property to “List Name” and choose other Styles as you prefer. Uncheck the User Interaction Enabled / Enabled property, as this can interfere with taps on the parent Element.

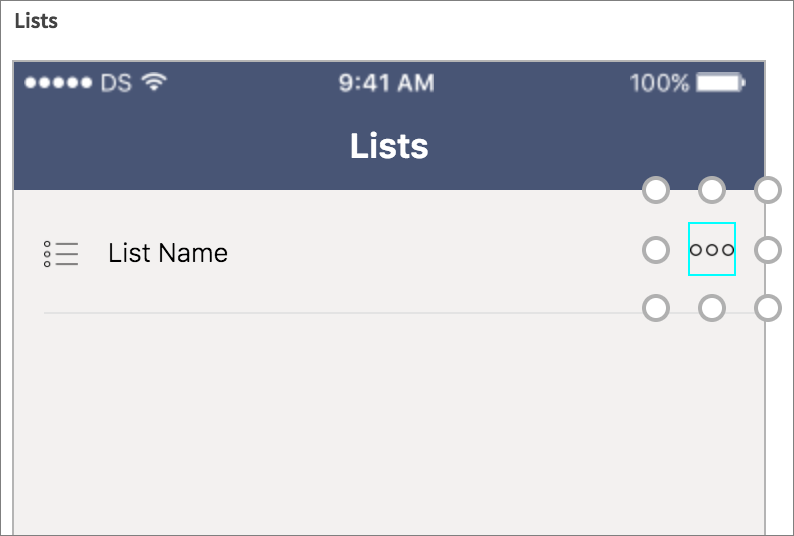
To the right of the text Element, add a Button (iOS) / Image Button (Android), renaming it “Actions Button”. Set its Image / Asset property to the following asset:

Choose aspect scale and a transparent background color, and scale the Element to fit well inside its parent.
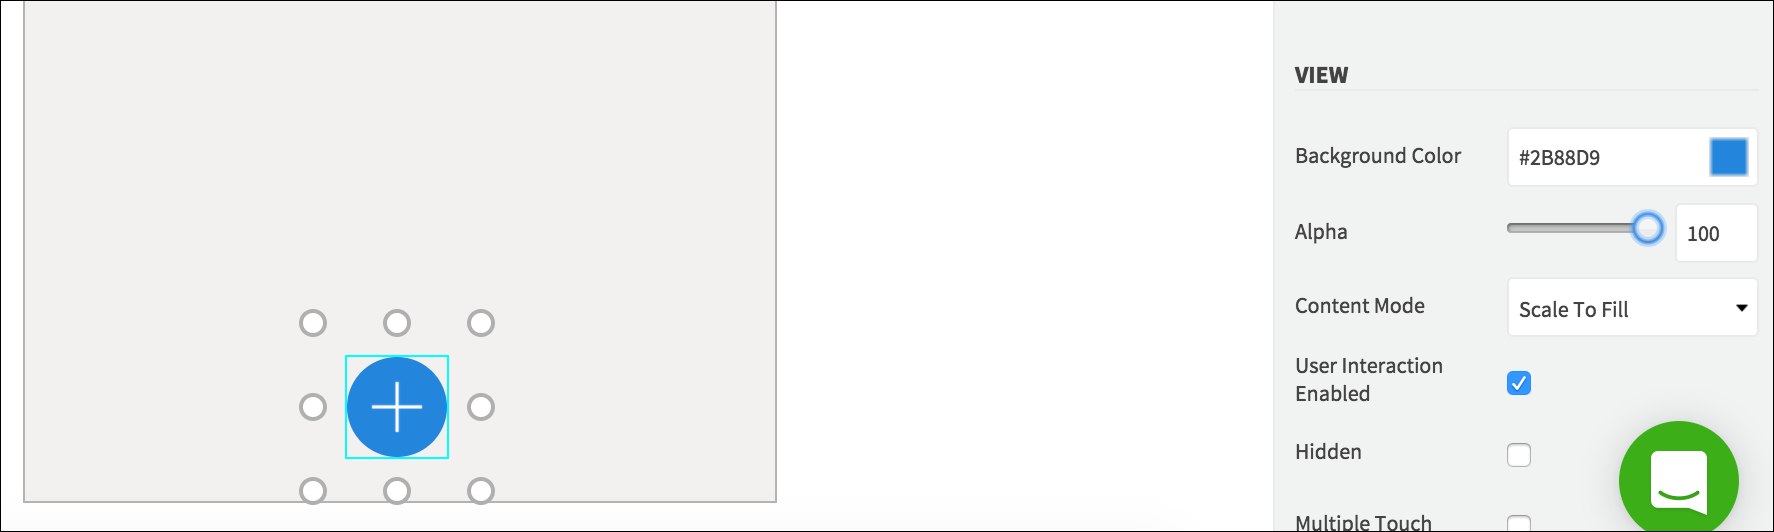
Finally, add a Button (iOS) / Floating Action Button (Android) on top of the Table but near the bottom of the page, renaming it “Add Button”. Set the Image / Asset property to use the following asset:
![]()
On iOS, set the width and height of the Button to be equal in Constraints, then in Styles, set the Corner Radius to half of the width / height so that the Button appears round. Choose any other styling properties you like, such as background color and image tint.
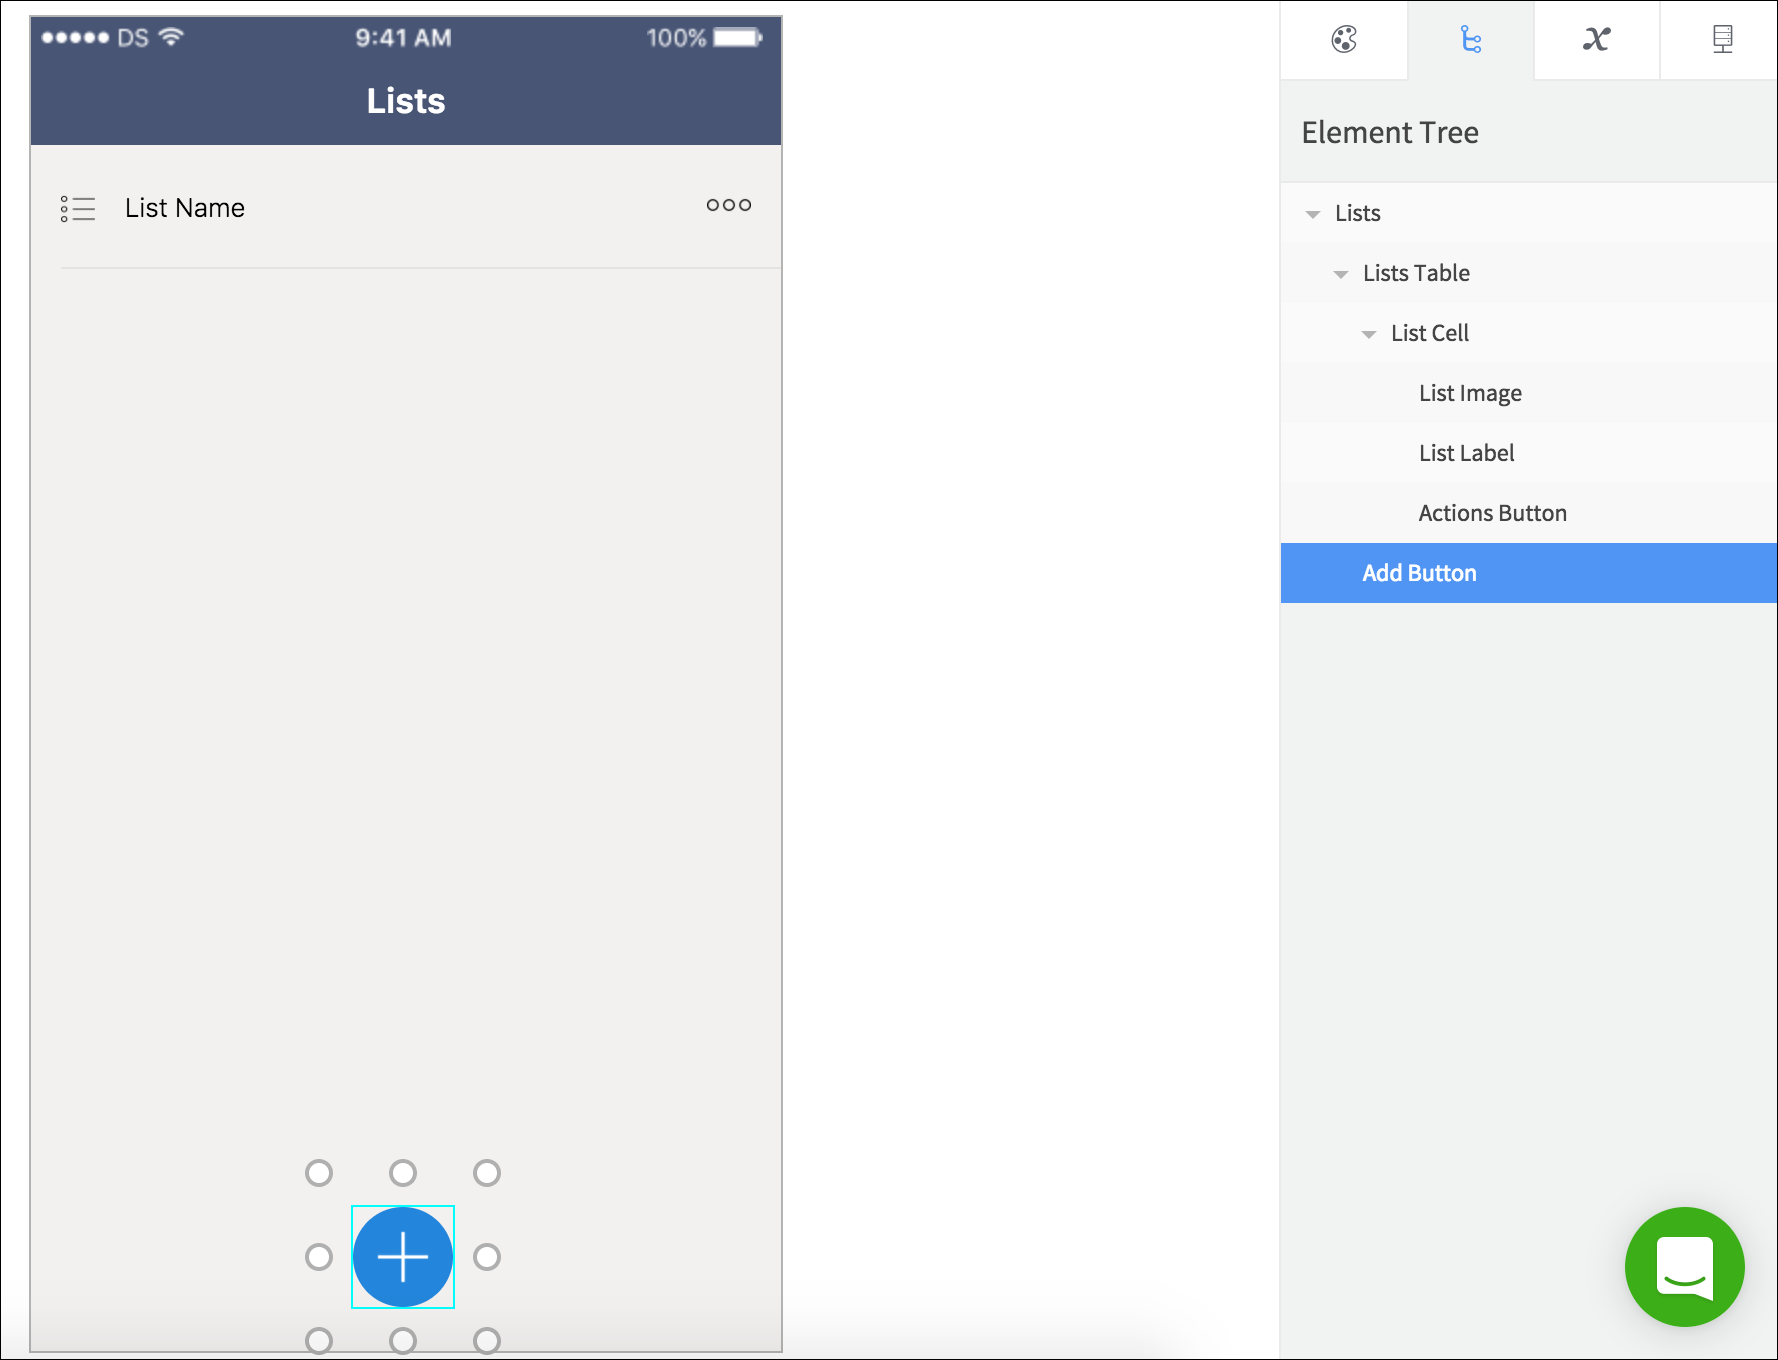
Your Lists page should now look something like this:
Request List Data
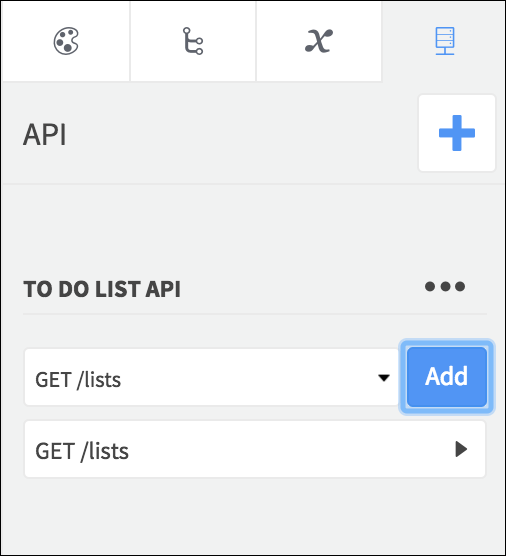
Now you can add the API for the app – open the API tab and click the plus ![]() button. Choose the To Do List API and click Add. Once it’s added you’ll see a drop-down list of the available endpoints in the API tab.
button. Choose the To Do List API and click Add. Once it’s added you’ll see a drop-down list of the available endpoints in the API tab.
You need to authenticate your requests to the API using a unique identifier:
- In Variables on the left of the editor, create a new Device Variable with Java or Swift String type.
- Select the page, and in Properties open the Loaded (iOS) / On Create (Android) Event, adding a Set Value Action. Set the Device Variable you added to a unique string value such as your email address.
- Back in the API tab, click Set Authentication above the endpoints and select your Device Variable.
Select GET /lists and click Add to use it in this page.
Click the GET endpoint you added to open it. The app won’t need to send data to the request, so click Responses to display the API data in the page.
The lists will be returned in an array, which is listed in Dropsource as a Data Source. You can display a Data Source in a dynamic Element that holds repeating child Elements – this will be the Table / List, which will repeat the Cell / Tile for every array entry returned from the API. Click the Data Source and drag it onto the Table / List on the Canvas. You can alternatively bind it by clicking and selecting the Element.

Inside the Data Source, you can bind fields to the Elements inside the repeating child Element – bind the name field to the text Element you added, either by clicking and selecting from the Elements container, or dragging onto the text Element on the Canvas.

Now you can specify when you want the request to run – it can run whenever the page appears. Select the page in the Element Tree (it’s the parent Element) and open Properties > Events. Click Add for the Appeared / Resume Event, click the plus ![]() button to add an Action, and choose Run API Request. Select the
GET request and Save the Action.
button to add an Action, and choose Run API Request. Select the
GET request and Save the Action.

Delete Lists
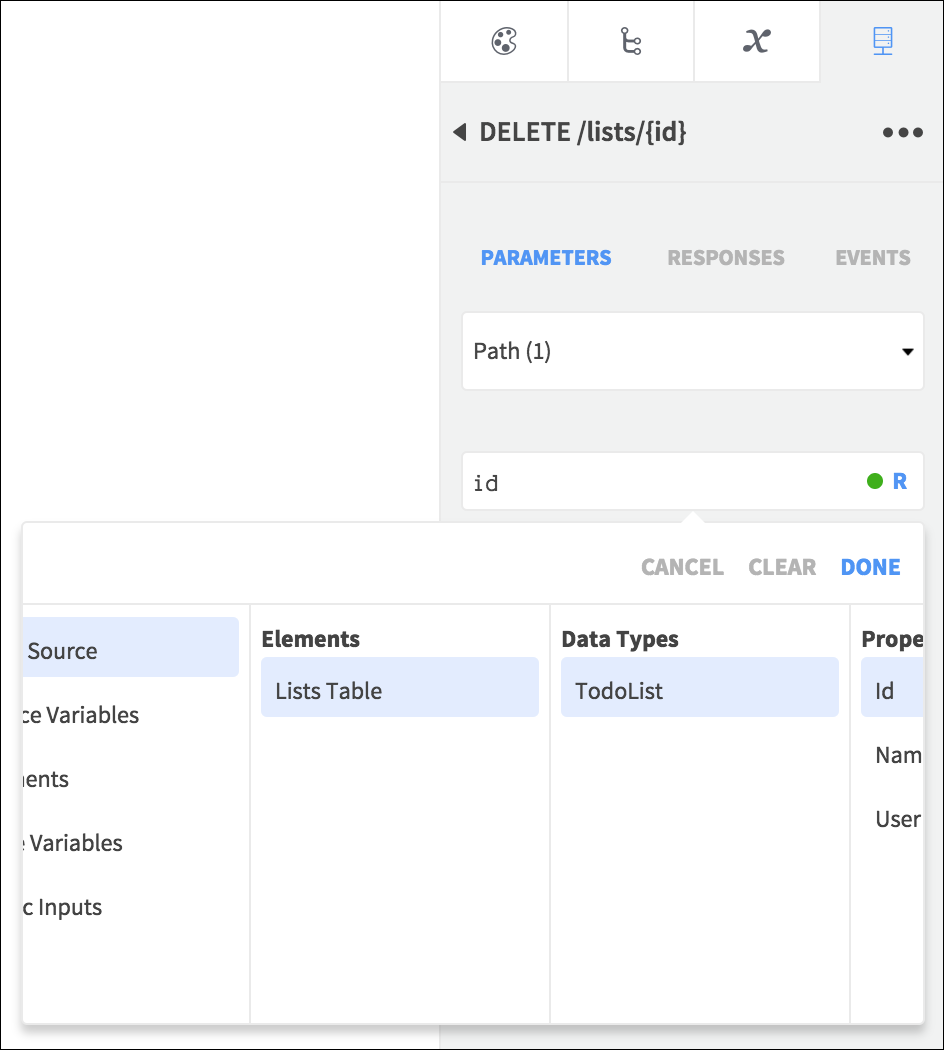
The Lists page also allows the user to delete lists – add another API endpoint to the page, this time selecting DELETE /lists/{id}. Click to open the request – this time it will need a parameter, so select Parameters and choose Path from the drop-down list. The list ID will need to identify it uniquely, and since the request is going to run when the user taps the Actions Button for a particular list, it will be able to retrieve the ID from the Data Source entry bound to the Cell / Tile. Click the field and select Data Source > Lists Table / List > Todolist > Id.
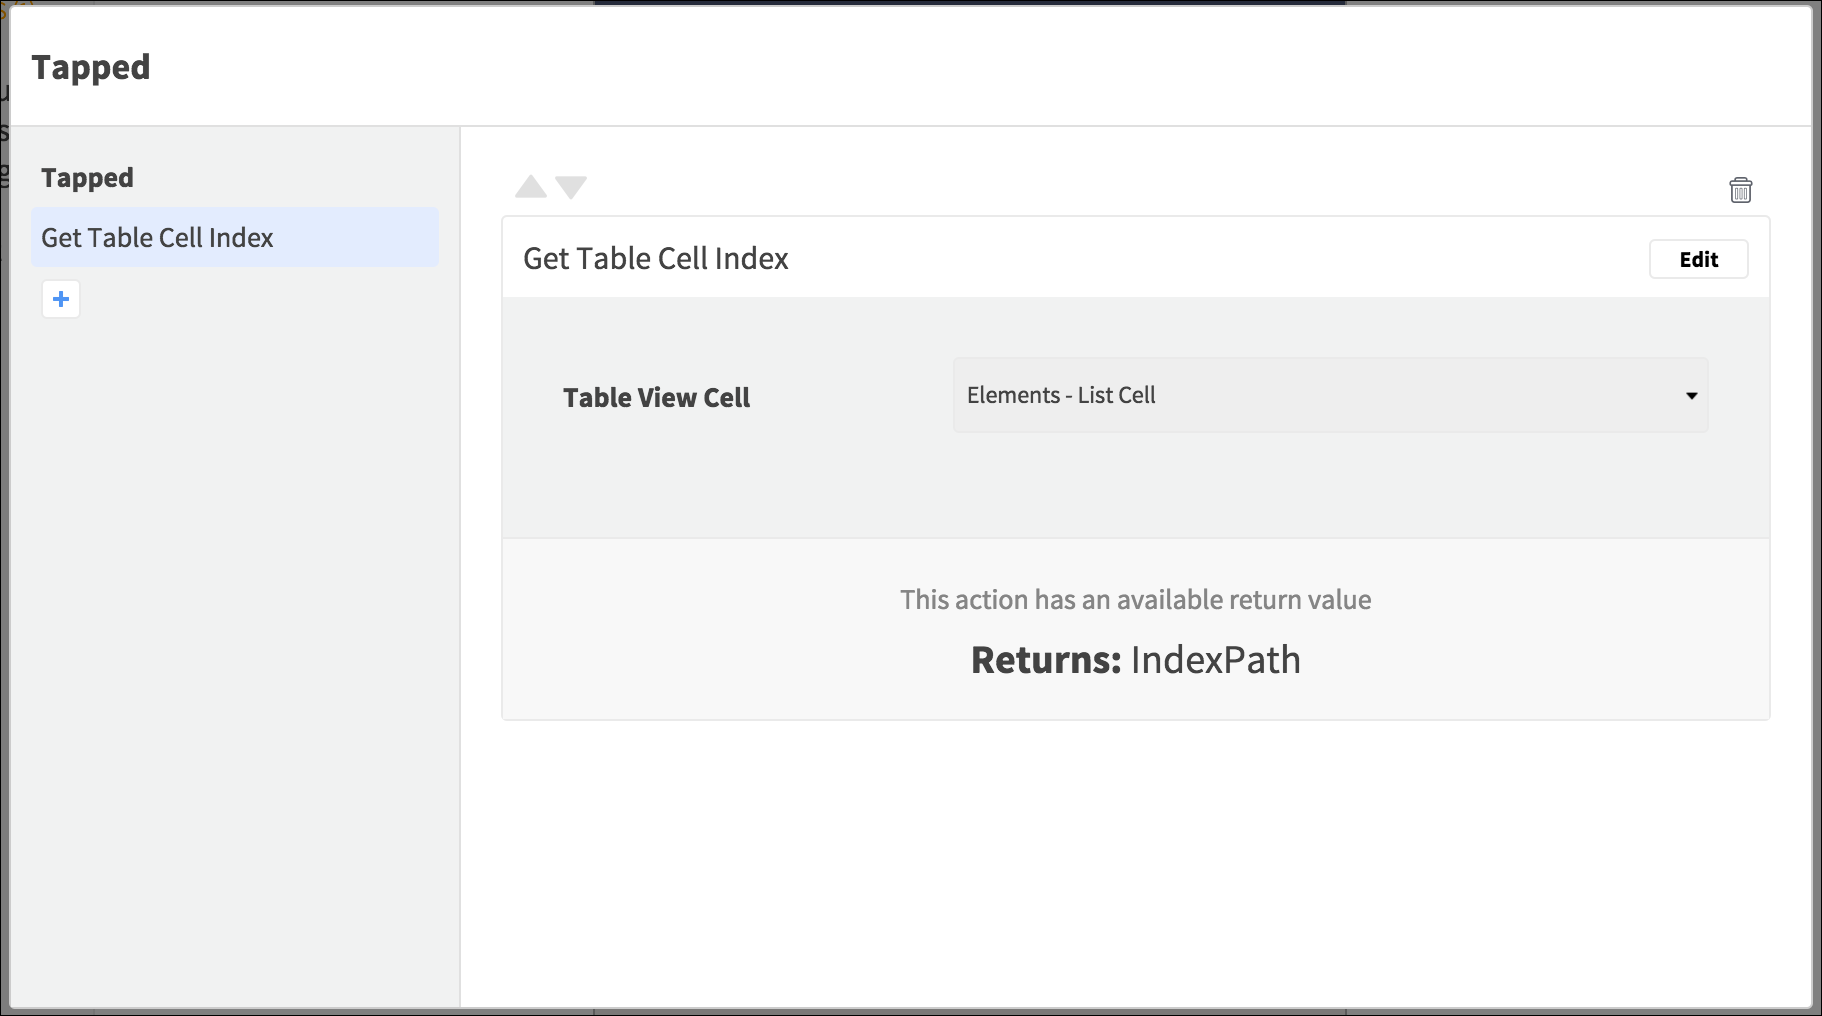
When the user taps the Actions Button, the app will confirm whether they want to delete the list, then run the request and remove the Cell / Tile. Select the Actions Button and open Properties > Events. Click Add for the Tapped Event and add an Action, choosing Get Cell Index / Get Tile Index. Select the Cell / Tile and Save the Action.
The Action will return data to identify the Element. Add another Action, this time Show Alert (iOS) / Show Alert Dialog (Android). Set the Title to the static input string “Actions”. Set the Message to “Please select an action”. On iOS choose Action Sheet Style and add two buttons: “Delete List” and “Cancel”. On Android set the Positive and Negative Buttons to “Delete List” and “Cancel”. Save the Action.
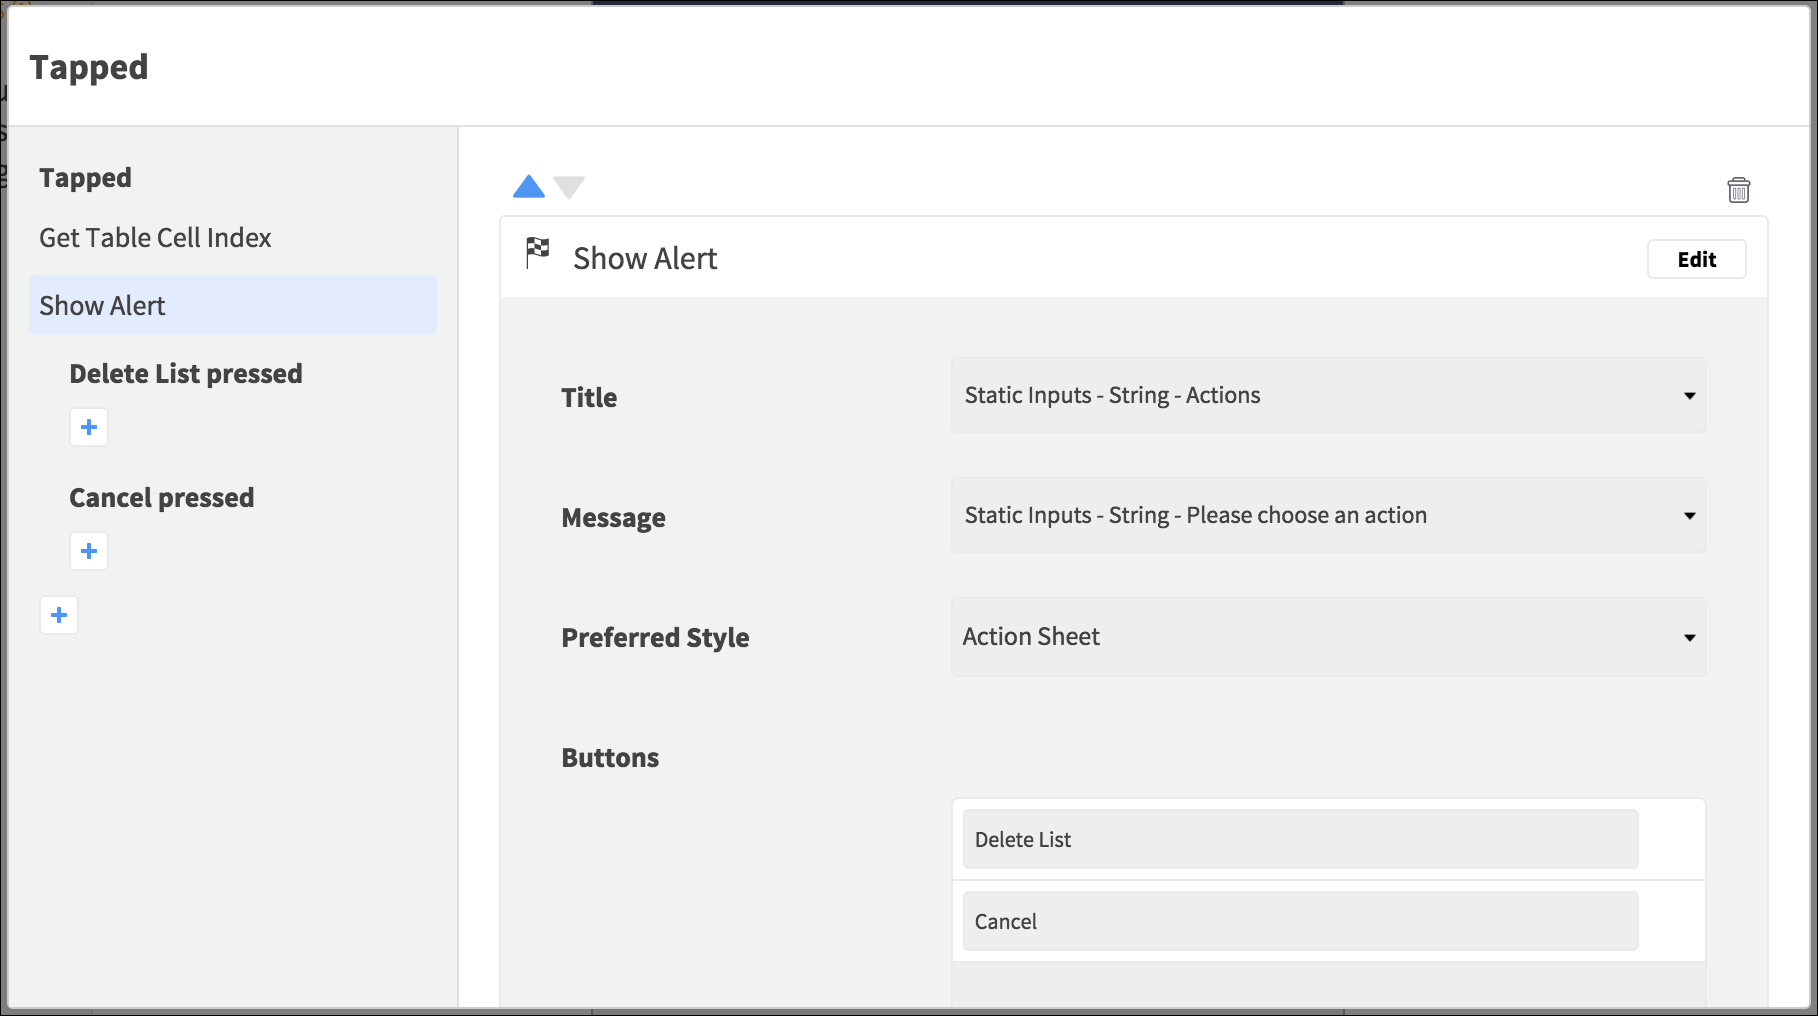
Add an Action under the nested Delete List / Positive event, choosing Run API Request, and selecting the DELETE request.

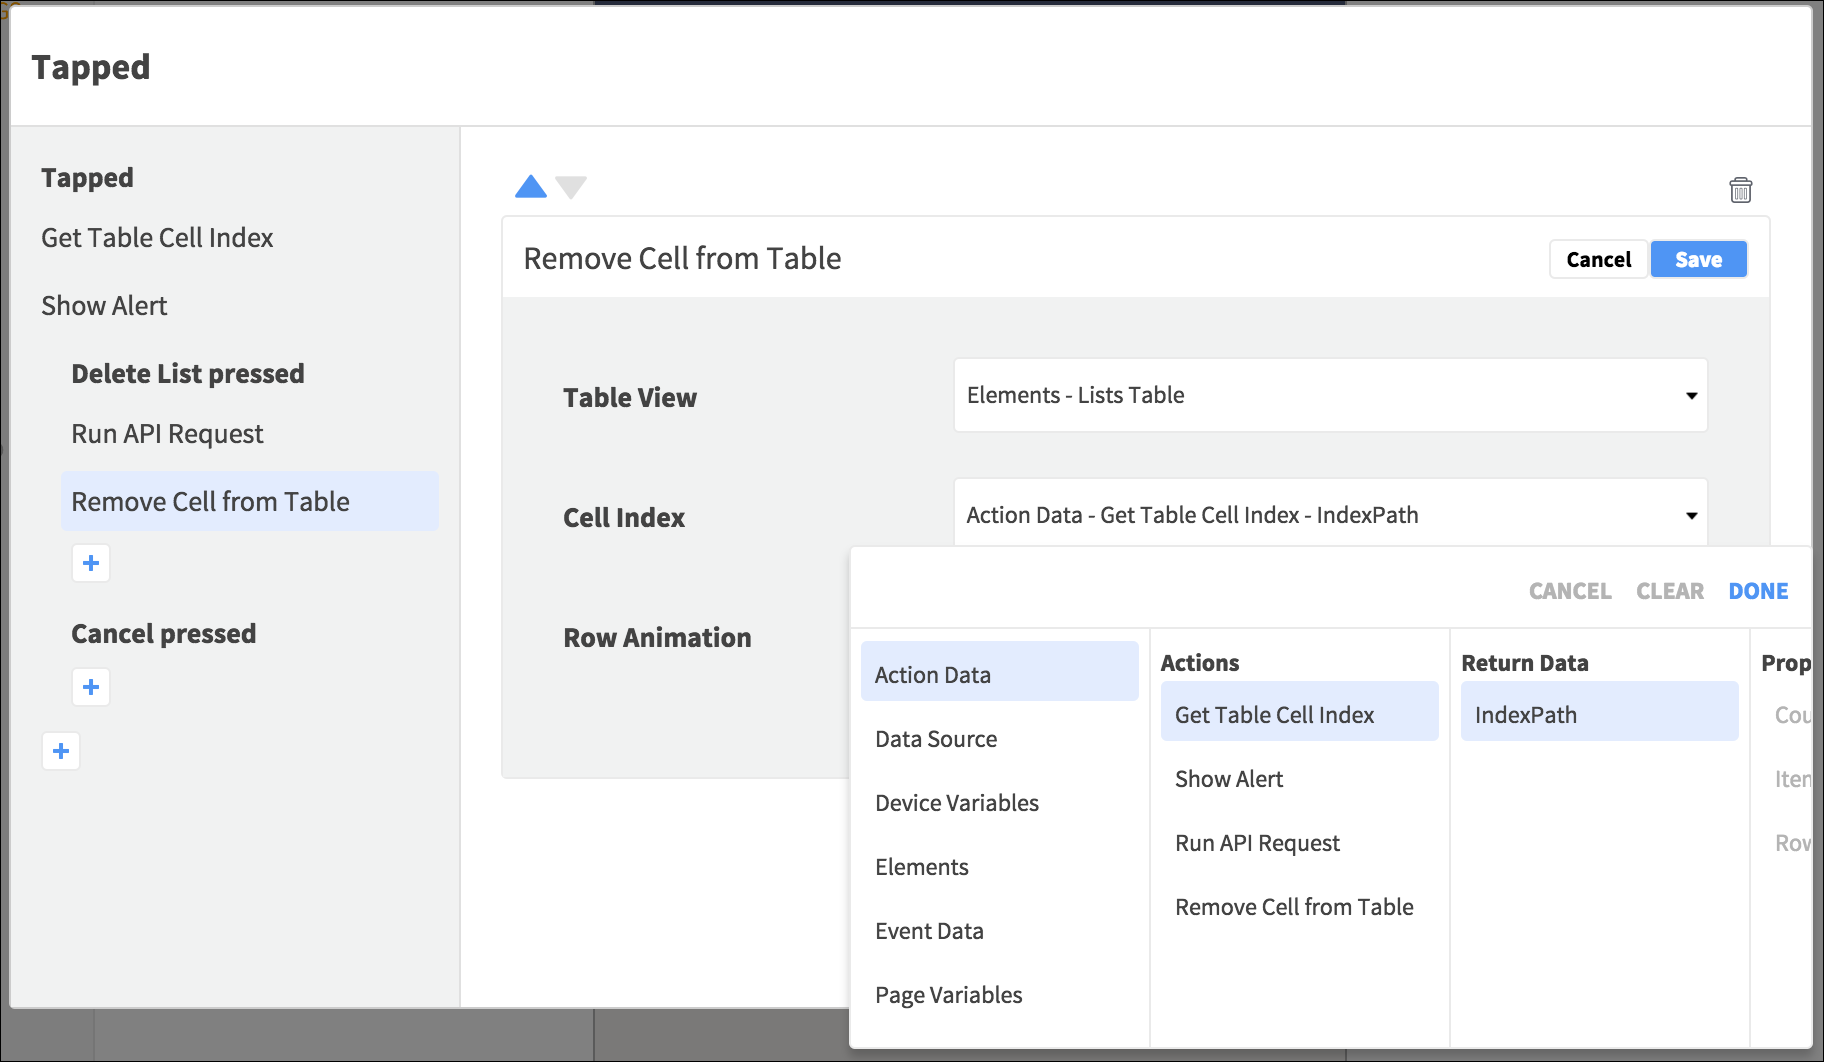
Save the Action and add another to the same Event, this time Remove Cell from Table / Remove Tile from List. Select the Table / List, retrieve the Cell / Tile index from the Action Data container, and choose an animation on iOS. Save the Action.
Next time you will create a page to add lists, which the app will navigate to when the user taps the Add Button – so you will revisit the landing page to implement that.