
You can send your Android app users notifications from Firebase Cloud Messaging. You can set up your Dropsource project to process and display the information when it is received.
-
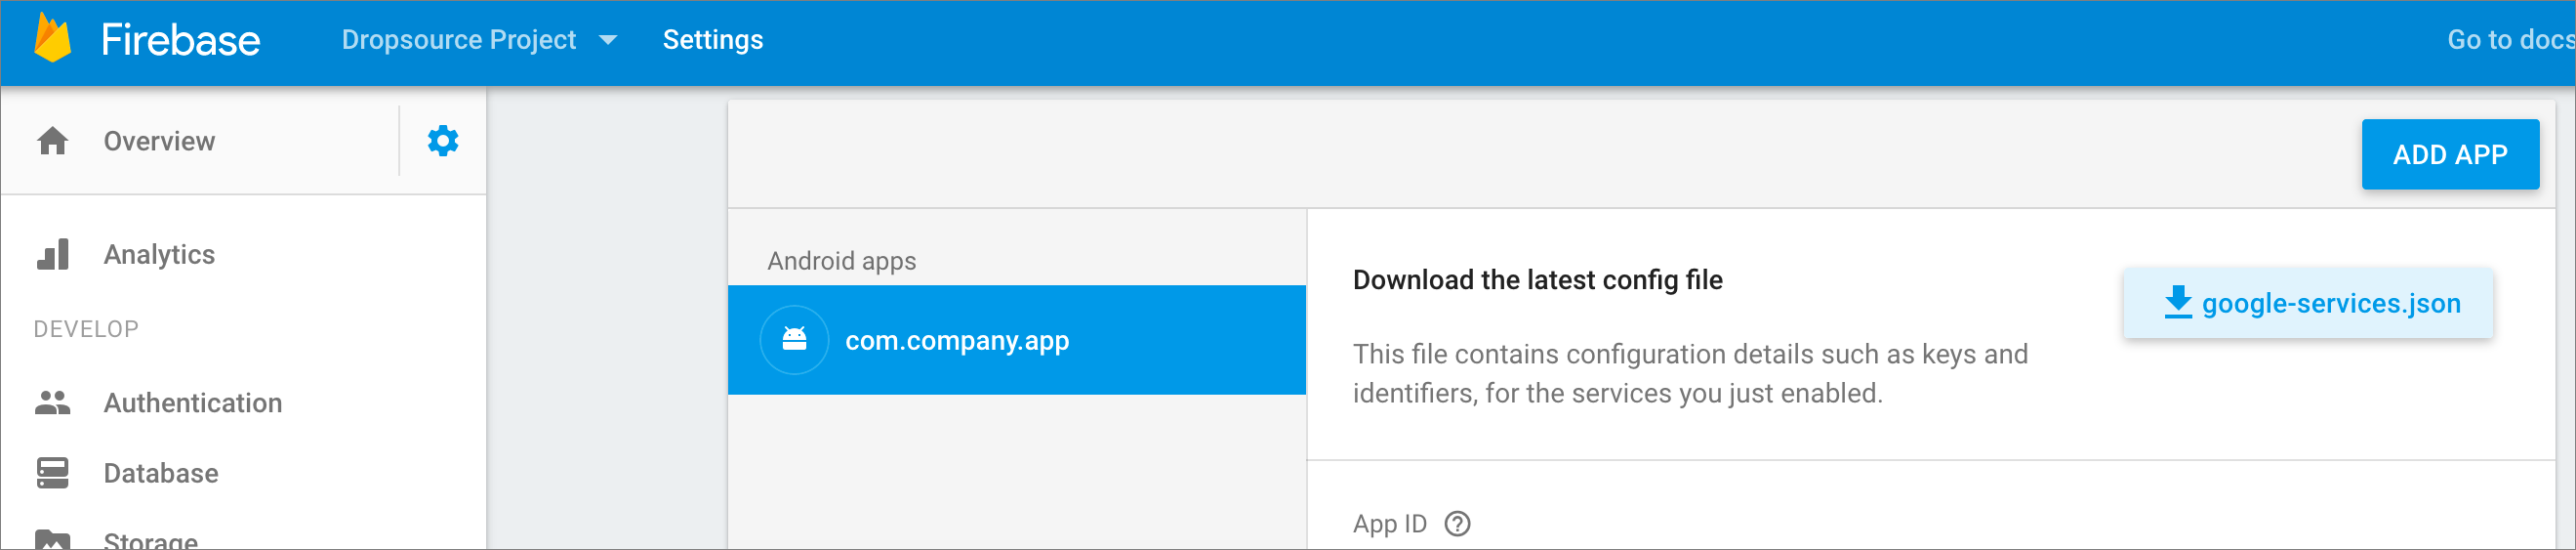
If you haven’t already done so, create a Firebase project and open it in the console. You will need the Google Play Services JSON file from your Project Settings.

Download the google-services.json file from Your Apps.
In your Dropsource project, open Settings on the left of the editor.

Select Firebase and upload the JSON file you downloaded from your Firebase console.

-
Save notification messages in your app. When a notification is received, you will be able to access the information contained in it. You can save this data and present it to the user, for example by storing the body of the message in a variable, and showing it to the user when they open a particular page in the app. To use this method, in Variables on the left of the editor, create a new Device Variable of Swift/Java String type.
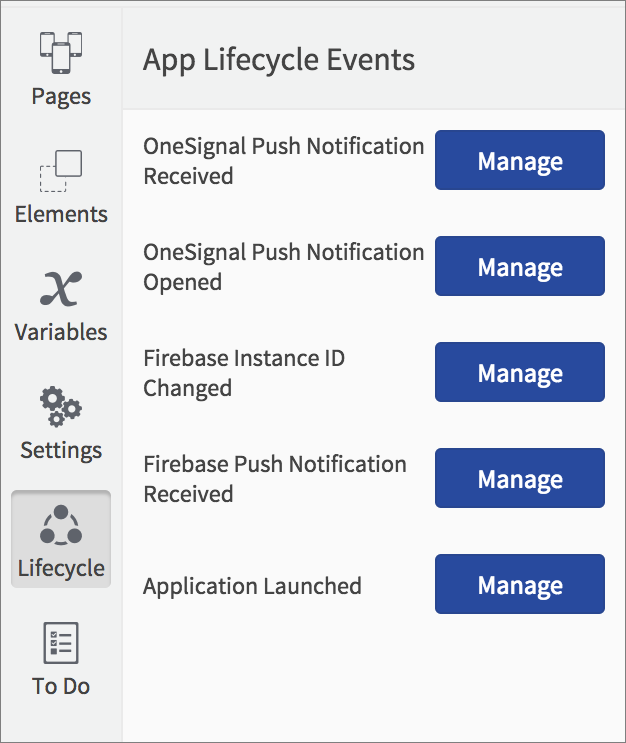
Open the app Lifecycle Events on the left of the editor and select the Firebase Push Notification Received Event.
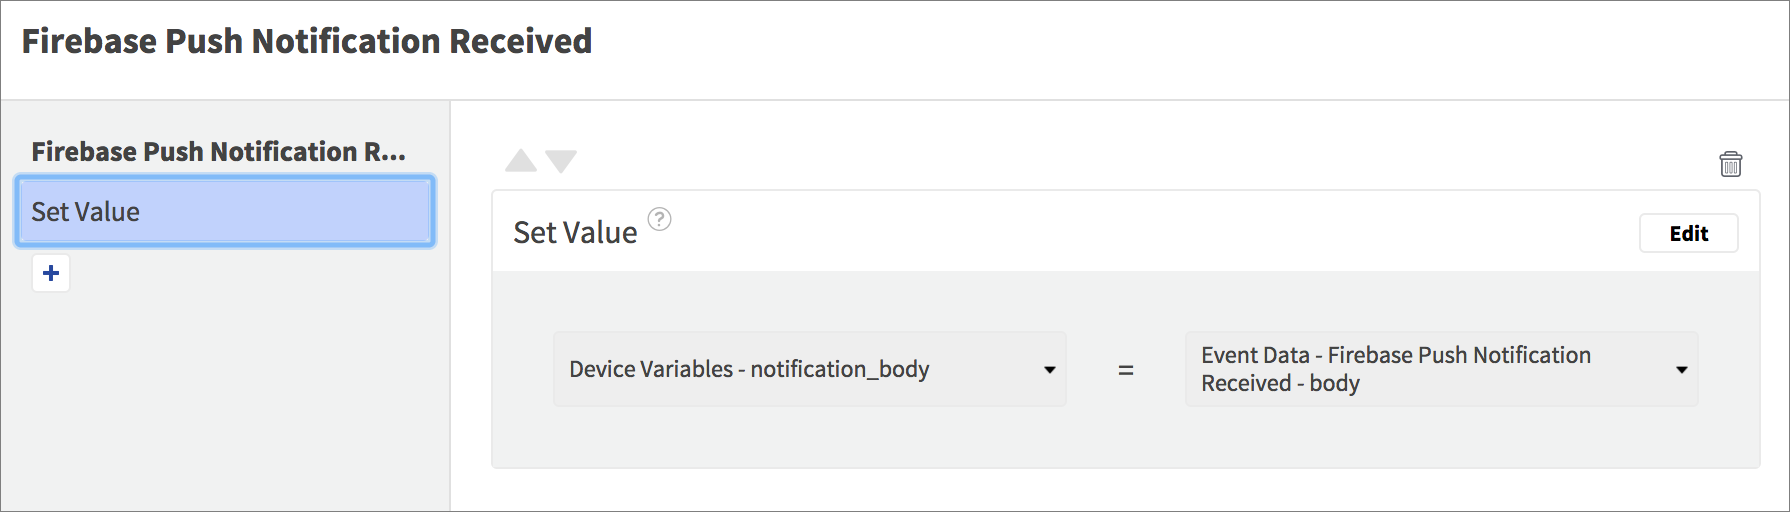
This Event will fire whenever the app receives a push notification from Firebase – the user could be on any page of the app when that happens, so instead of displaying the data straight away you can store it in a variable. Use a Set Value Action to save the notification body to the Device Variable you created, via the Event Data.
Your app will now store the message body whenever a notification is received, allowing you to process or display that data as the user interacts with your app.
-
Display or process your notification content. Once a notification has been received and stored in the app, you can display it when an Event occurs. For example, when a page resumes, you can check that a Device Variable has a value and show a notification Element if it does. Add Elements to show your notification in a page, such as a View Element with text and other Elements inside it.

If your app is not always going to have a notification to display you can hide the View initially.
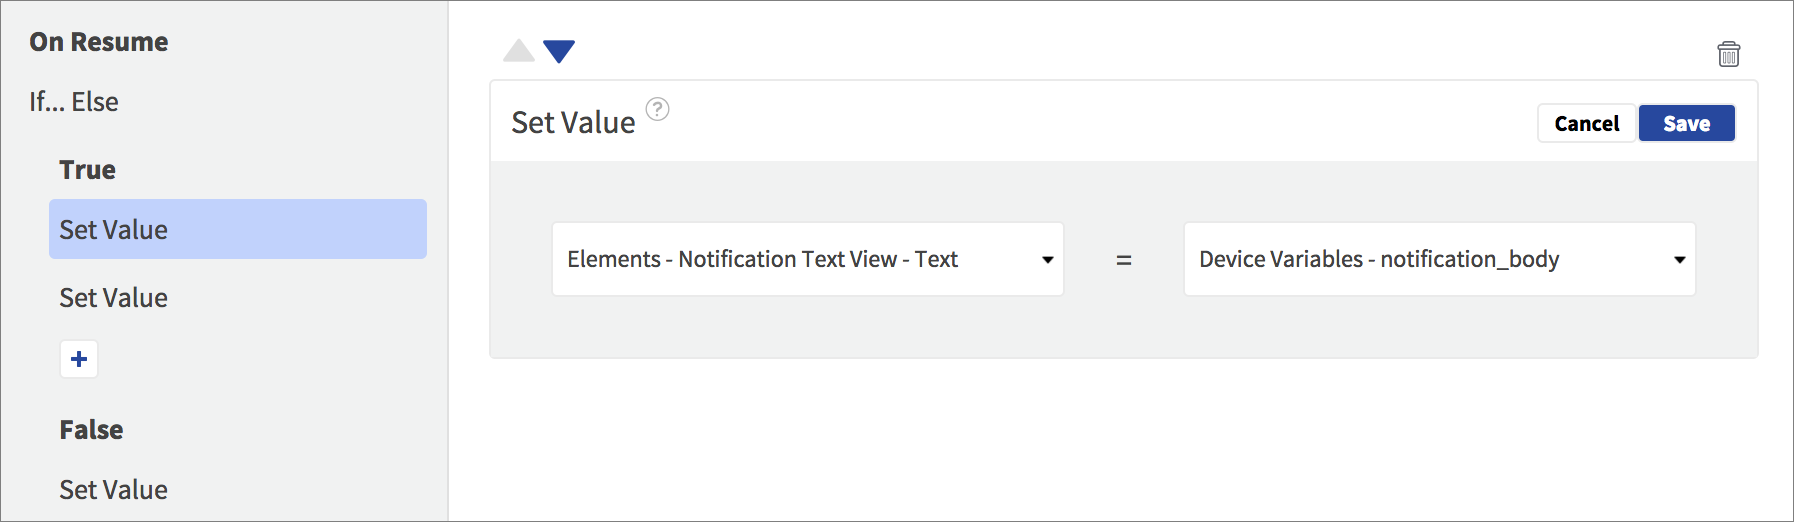
Open an Event such as On Resume for the page. Add an If Else Action to check if the variable has a valid value – check it’s length is greater than 0.

-
In the nested True Event, notification text has been received, so use a Set Value Action to show it in a text Element.
If you hid the containing View, use another Set Value Action to show it.

In the False Event you can hide the View if necessary.
-
-
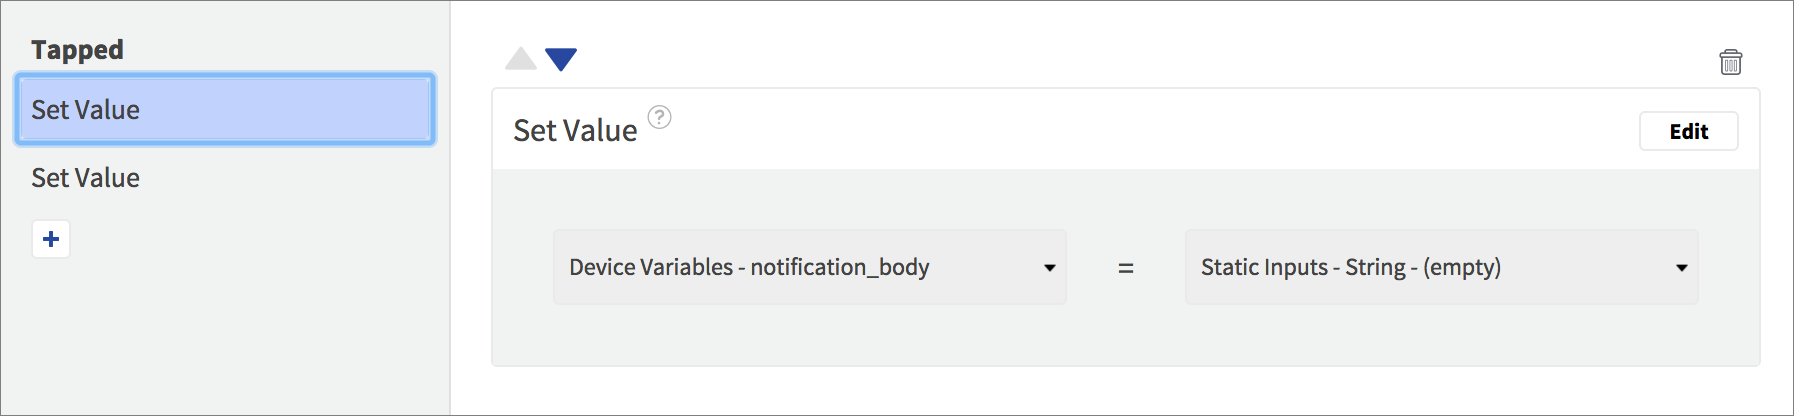
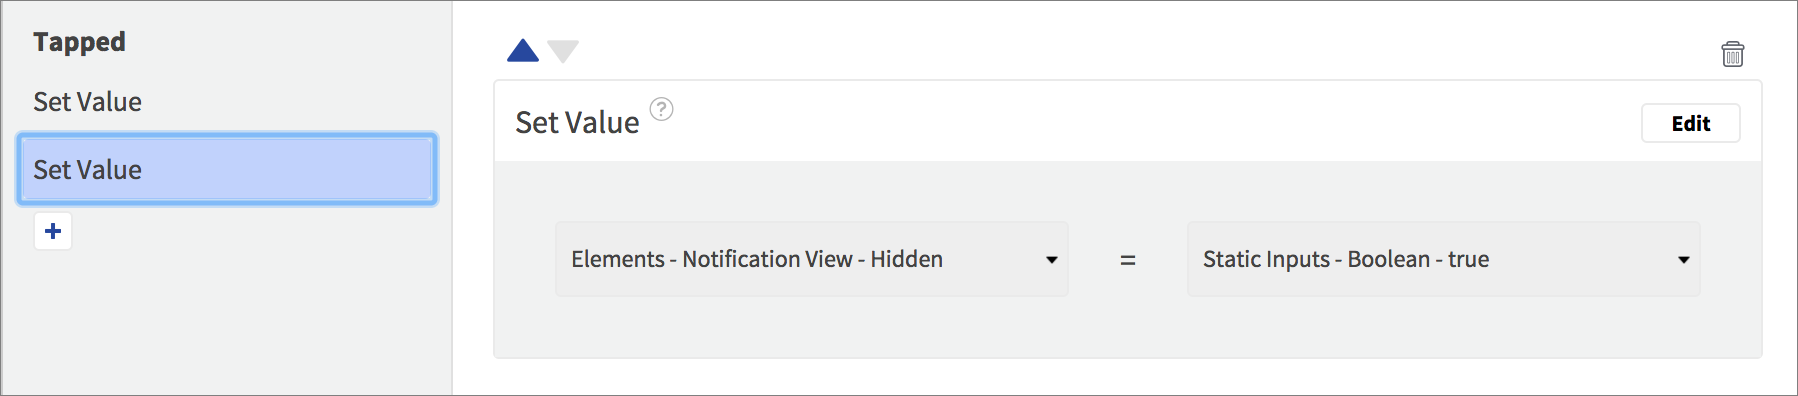
Optionally provide the user with the option to dismiss a notification, for example using a delete Button Element. In the Button Tapped Event, use Set Value Actions to empty your notification Device Variable, and hide the notification View if necessary.
-
Send a notification. Back in your Firebase Console, navigate to Notifications and choose New Message.
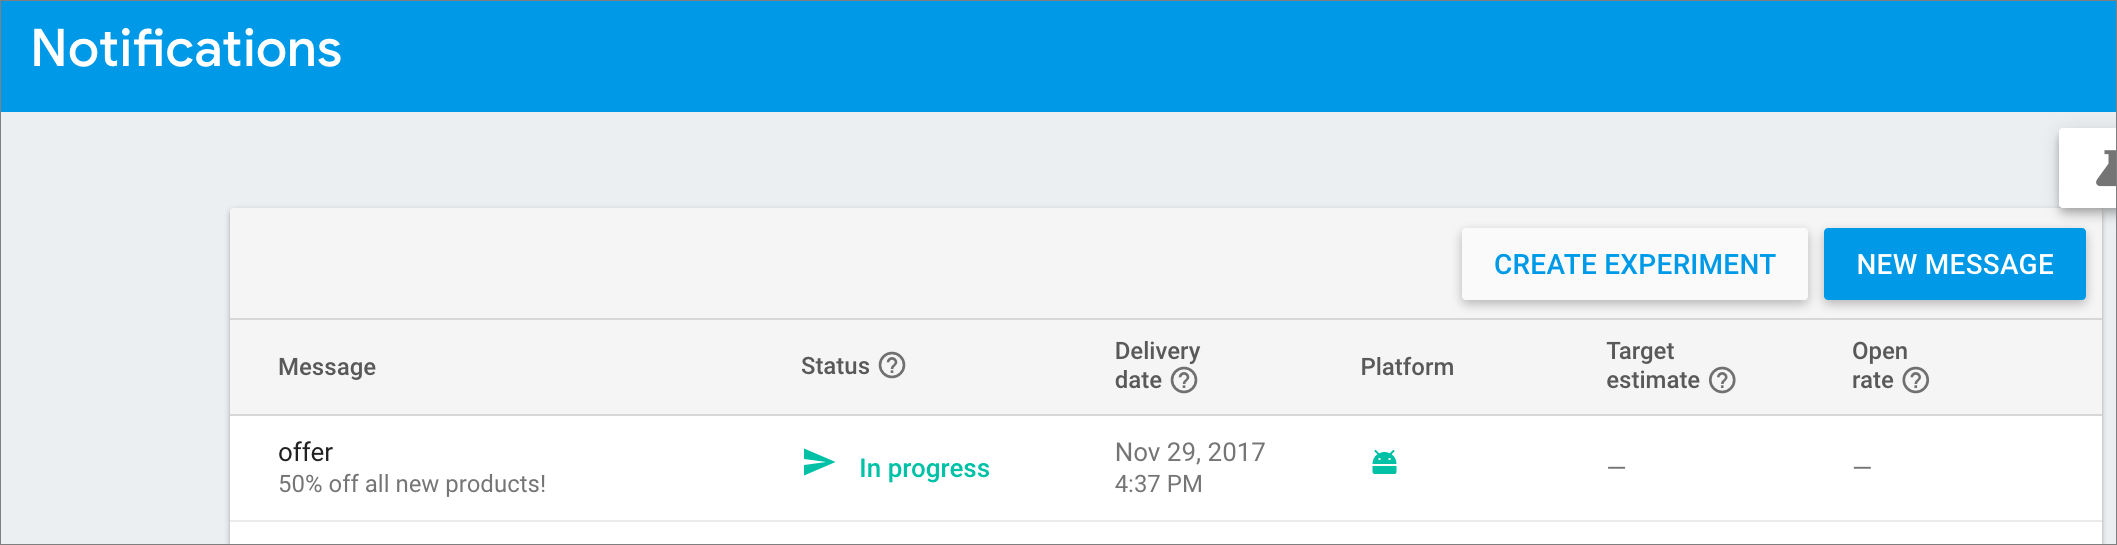
Add content to your new message. The message text will be represented in your Dropsource app as the notification body.

Choose a target for your message. You can send to all of your app users, target those who have subscribed to a topic (which you can manage in your Dropsource app), or target single users with a unique device identifier (which you can also retrieve from your Dropsource app). A range of message options are available – you can send a message straight away or schedule it, and by default a message will expire in 4 weeks (but you can alter that if necessary).

Click Send Message. You will see an indicator of the message progress.
Your Dropsource app Package ID (in Settings) should match the one in your Firebase Console and Google Services JSON file.
Each time you send a new notification, your Device Variable will update with its content, so you can show it to your users as they browse the app.
You can additionally authenticate your users with your Firebase backend. You can also subscribe users to Firebase topics from your Dropsource app – note that there is a delay after creating a topic before it is available for notifications. Dropsource also provides Firebase events and analytics tracking Actions, and you can access conversion info in your Firebase Console, as well as setting message priority.