In this tutorial series you are building a location-aware photo saving app. The first two pages in the app will handle user login and retrieve the user’s existing data from the API.


The Login and Collection pages on iOS.
Create the Login and Landing Pages
The app landing page is going to display the collection of photos the user has already saved to the API. If the user is not yet logged in or signed up, the app will send them to another page to enter login credentials. Create a new page in your project using Pages on the left of the editor. Choose the Navigation Bar (iOS) / App Bar (Android) config and name the page “Collection”.
When the page opens for editing, style the navigation Elements in Properties on the right with your chosen colors and text settings. Set the Nav Bar / App Bar title to “Collection”:
- On iOS select the page on the Canvas and use the Navigation Item > Title property.
- On Android select the App Bar on the Canvas and use the Title property.

You will add Elements to this page later, focusing on the login functionality for now.
Create another page, this time choosing no config Elements and naming it “Login”.

Setup Auth
The API for the app is going to use a token to authenticate requests for user photos. The user will enter their email address and password, which the app will send to the API. If login is successful, the API will return an access token that the app will send with subsequent requests to manage the user’s data.
You will store the auth token using a Device Variable – create a new one in Variables on the left of the editor, naming it access_token and choosing Swift / Java String type.

Later you will add an Action to set the token value when it’s received from the API – at that point it will be available throughout the pages in the app.
Attempt to Access Data
Open the Collection page again from Pages on the left. When the app runs it will initially attempt to retrieve the user’s existing photos from the API, navigating to the Login page if the user has not yet logged in, or if their access token has expired. If the user is already logged in and the app still has a valid access token, the page will display their collection.
Add the API in the API tab on the right of the editor by clicking the plus ![]() button, selecting Choose, and uploading the JSON spec file you downloaded earlier.
button, selecting Choose, and uploading the JSON spec file you downloaded earlier.

You will see an indication when Dropsource has imported the API into your project. In the API tab you will now be able to access the available endpoints. Use the Set Authentication button to setup authentication.

Select the Device Variable you created as the api_key value.

The app will now send the current value of the variable with every request, so when it has a valid token requests will be authenticated, otherwise requests will fail (later you will send the user to the Login page when a request fails).
Request User Data
In the API tab, add a request to the GET /obj/picture endpoint in the Collection page by selecting it the dropdown list and clicking Add.

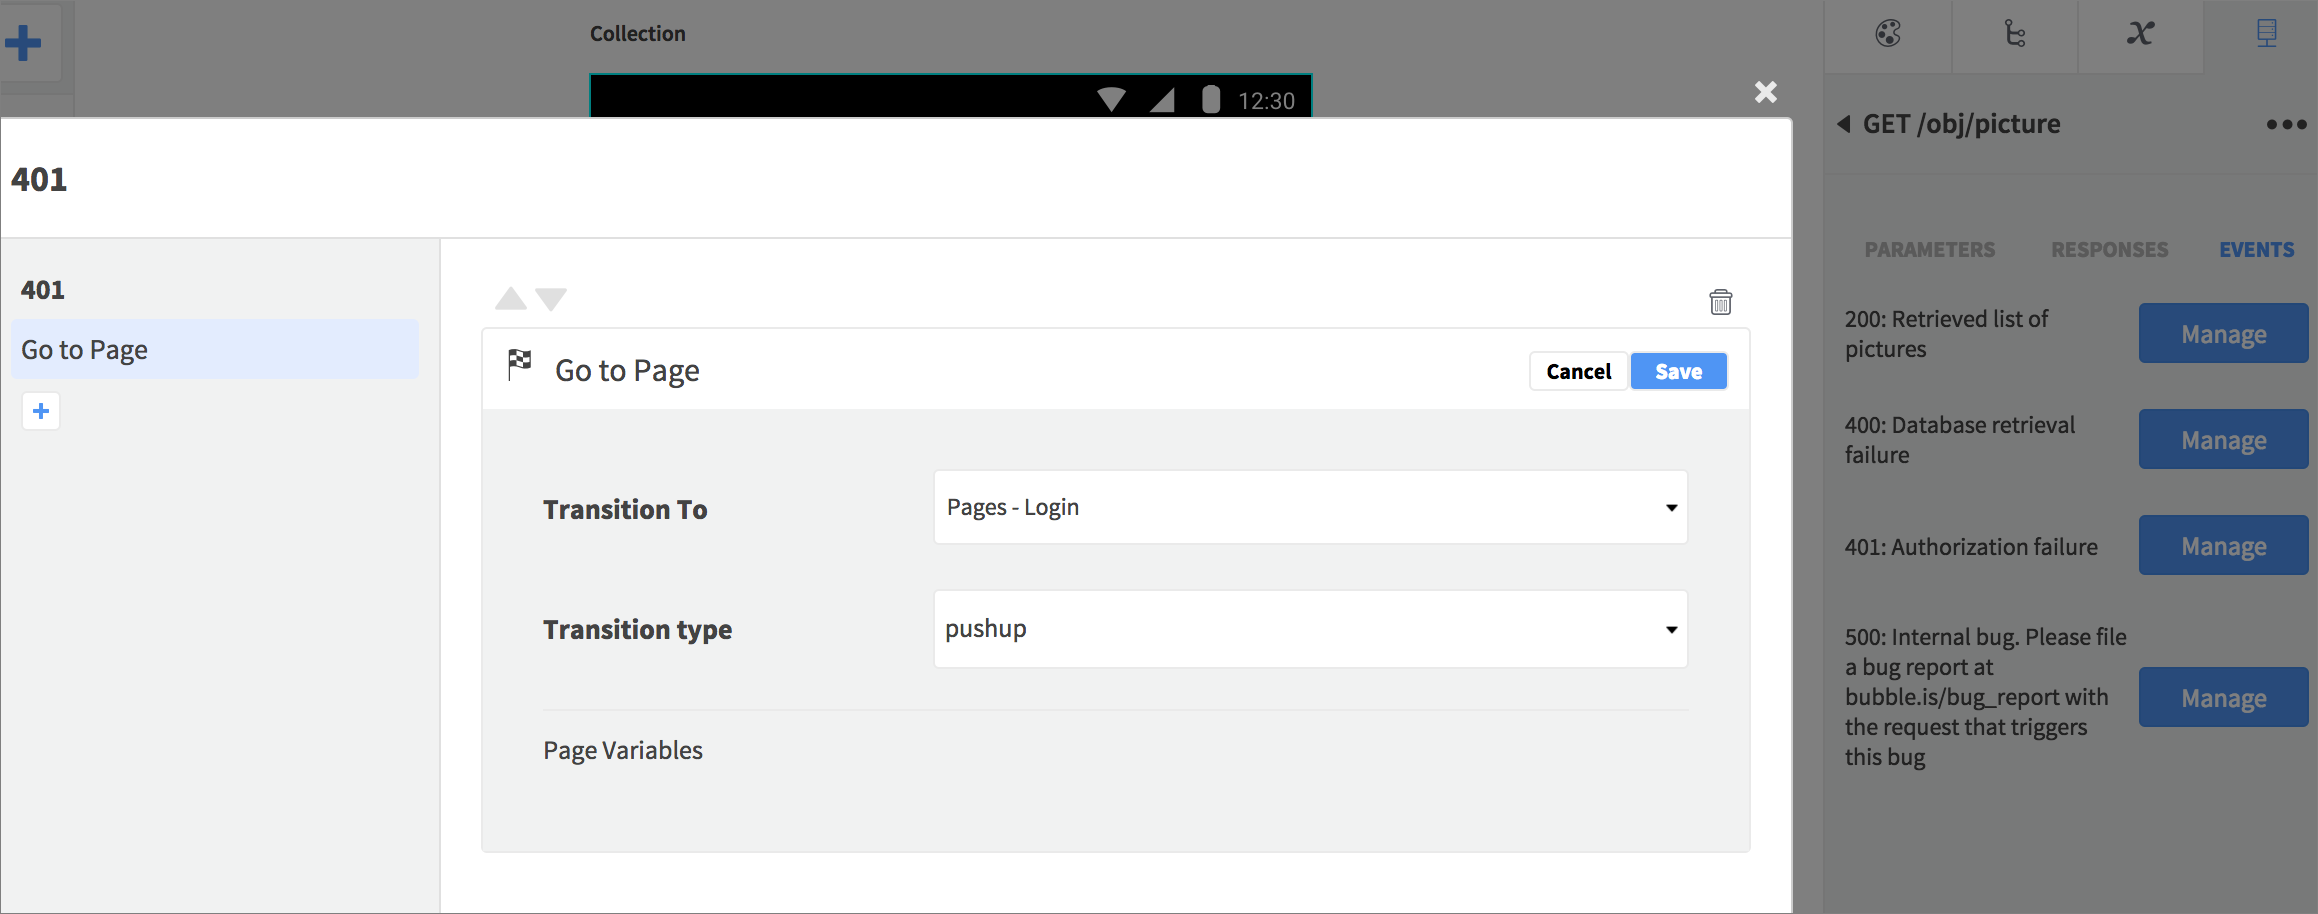
Click the newly added request to open it. Later you will use the Responses section to display the user data in the page, but for now select the request Events. The API will return 401: Authorization failure if the access token is invalid or expired, so click Add for that Event.
Add an Action, choosing Go To Page, selecting the Login page and a pushup transition.
Handle First Login
The app will attempt the GET request – if the user has previously logged in, in which case the token will already have a value. However, when the app launches, you can simply send the user straight to the Login page.
In Lifecycle on the left, add an Action to the Application Launched Event and add a Set Value Action. Set the token Device Variable you created to an empty Static Input > String, so the token will initially be empty.

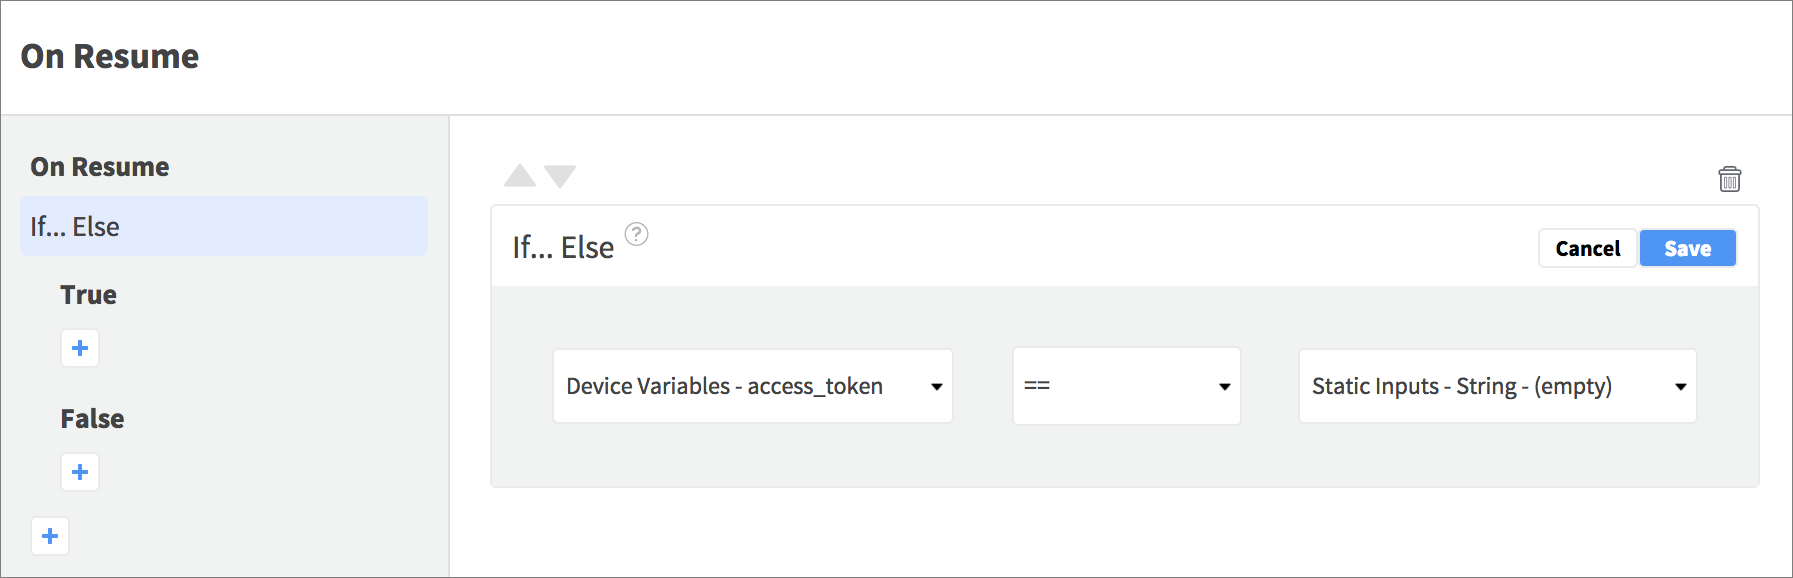
In the Collection page, select the page (click the empty Canvas), and open Properties > Events. Open the Appeared (iOS) / Resume (Android) Event.
If the user hasn’t logged in yet, you will send them to the Login page, but if they have, you can attempt to run the request. Add an If Else Action, checking whether the token variable is empty.
In the nested True Event, you know that there is no token value, so add an Action there, choosing Go To Page, selecting the Login page and a pushup transition.

In the False Event, you have a token value, so add a Run API Request Action, choosing the request.

For an optional extra UX addition, add another Action to the False Event, before the Run API Request Action (Tip: use the arrow keys to reorder Actions).
- On iOS use Show Progress Overlay – choosing Zoom Animation Type, “Loading Photos” for the Title Text, and Indeterminate Mode.
- On Android drag a Progress Circle Element onto the page and set it Hidden in Properties. Then in the page resume If Else – False Event, use a Set Value Action to show the Element before running the API request (set its Hidden property to a Static Boolean value of False).
Log the User In
Open the Login page. Here you will capture the user’s email and password, and send them to the API, retrieving the access token. If the user has an existing account the app will log them in, otherwise it will sign them up for an account.
Add the following items to the page, dragging each from Elements on the left onto the page Canvas – add each one under the previous one, and rename them in Properties as you add them:
| Element | Name | Properties |
| Image | “Logo Image” | Placed in the center horizontally and near the top, with the logo asset you downloaded: |
| Text View / Label | “Title Text” | Displaying “Photo Save” in a large font. |
| Text View | “Intro Text” | Displaying “Enter an email address and password to log in / sign up”. |
| Text Field | “Email Text Field” | Placeholder / Hint property “email”. |
| Text Field | “Password Text Field” | Placeholder / Hint property “password”. Check Secure Text Entry on iOS / Password as the Format on Android. |
| Button / Text Button | “Login Button” | Title / Text property “LOG IN”. |
Choose any other style Properties you like. Your page should look something like this:

Add the Login Request
In the API tab, add the POST /wf/log-in endpoint and click to open it.
In Parameters (Body), send the user entry along with the request by binding email to the Email Text Field (click and drag the parameter onto the Text Field on the Canvas, or choose it in the Elements container), and password to the Password Text Field.

Select the Login Button and open Properties > Events – add an Action to the Tapped Event. First add a Hide Keyboard Action to stop the soft keyboard from displaying. Next add a Run API Request Action, choosing the login request.

For an optional extra UX addition, show a progress indicator before the Run API Request Action – on iOS choose Show Progress Overlay and on Android add a Progress Circle Element to the page, initially setting it to be Hidden, and using Set Value to show it before running the request.
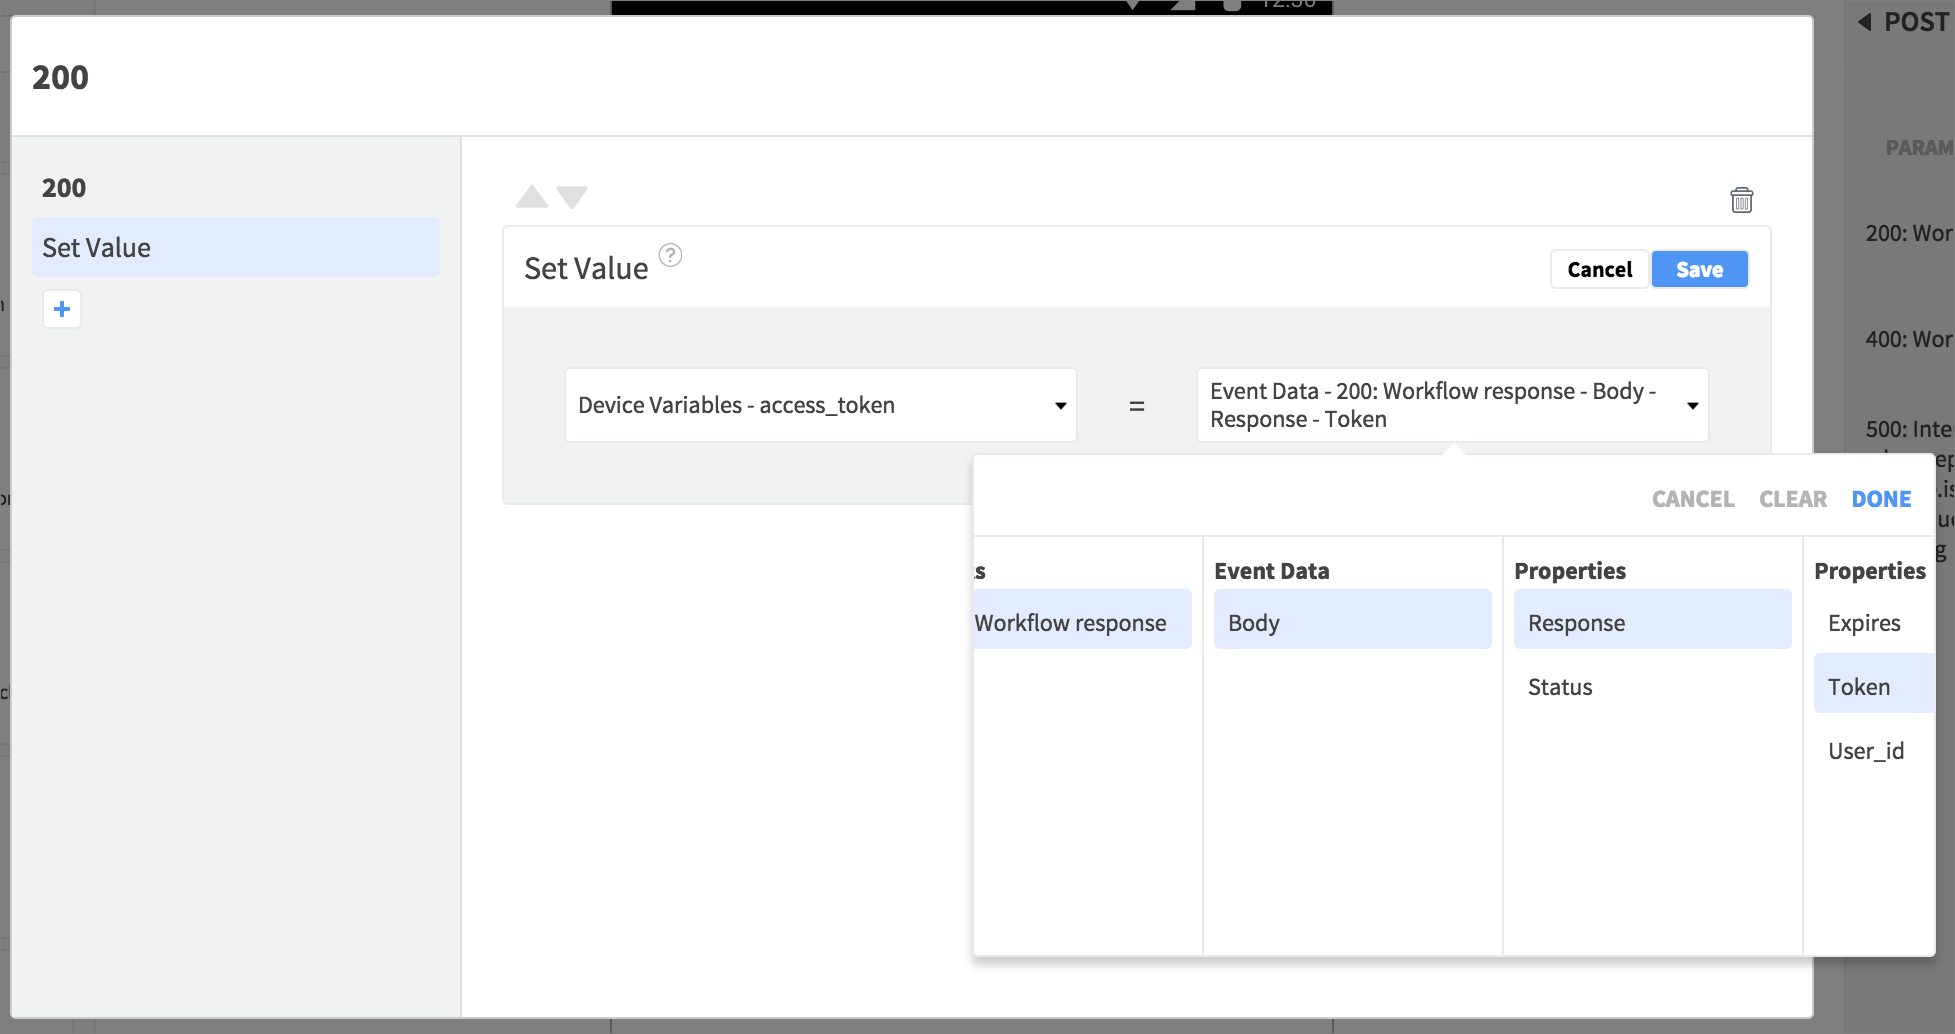
Open the request again in the API tab and choose Events – open the 200 Event, which will fire if login is successful. Add a Set Value Action, setting the token variable to the token returned from the API, which you can access via the Event Data container.
If you used a progress indicator add an Action here to hide it – Hide Progress Overlay (iOS) or Set Value (Android).
Add another Action, this time Go To Page, selecting the Collection page and the pushup transition.

For an optional extra level of error handling, add Actions to the request 400 and 500 Events, for example to show an alert letting the user know login has failed so that they can e.g. try again – make sure you hide any progress indicators you have displayed at the same time.
Run the App
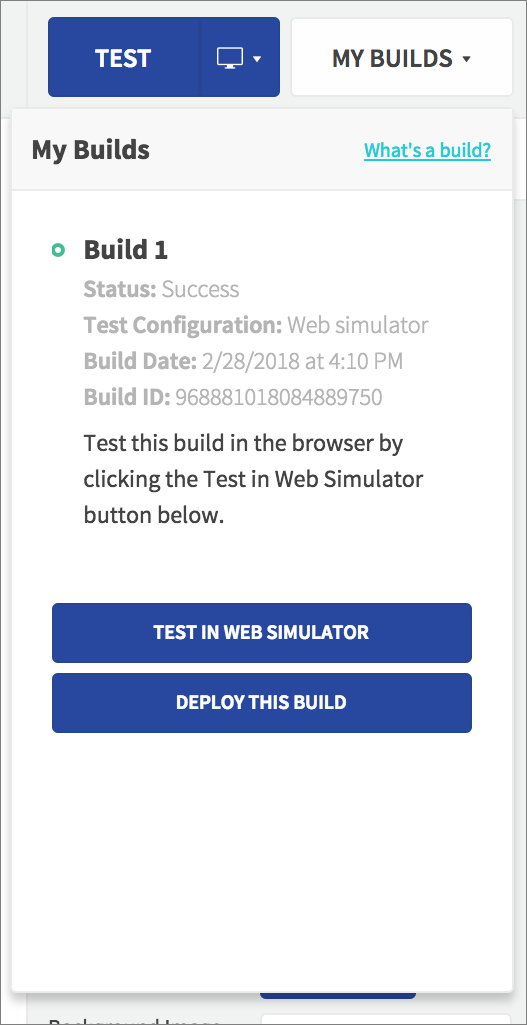
At this stage you can run the app to see the login functionality working! Click Test at the top of the editor to create a new build – when it’s ready you’ll see an indicator and your build will appear in the Builds list.

Choose Test in Web Simulator and your app will launch onto a virtual device inside the browser.
When the app launches it should take you to the Login page – enter any email address and password (take a note of your login credentials so that you can enter them again each time you run the app). Tap the Login Button, and the app should navigate to the Collection page (which will be empty right now).
Next time you will display the user’s existing photo collection.