In this tutorial series you are rebuilding the Places example app in Dropsource. The first page in the app will carry out a search when the user enters a query and taps a button.
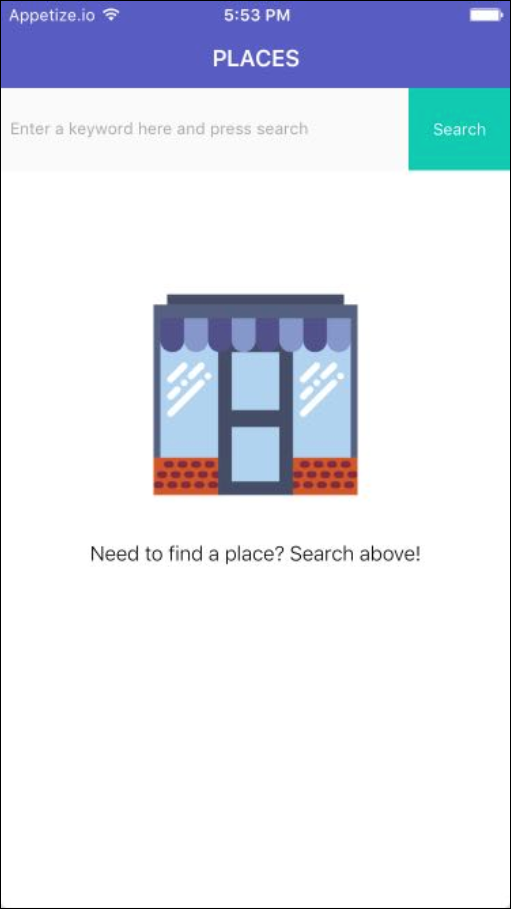

Places home page on iOS / Android.
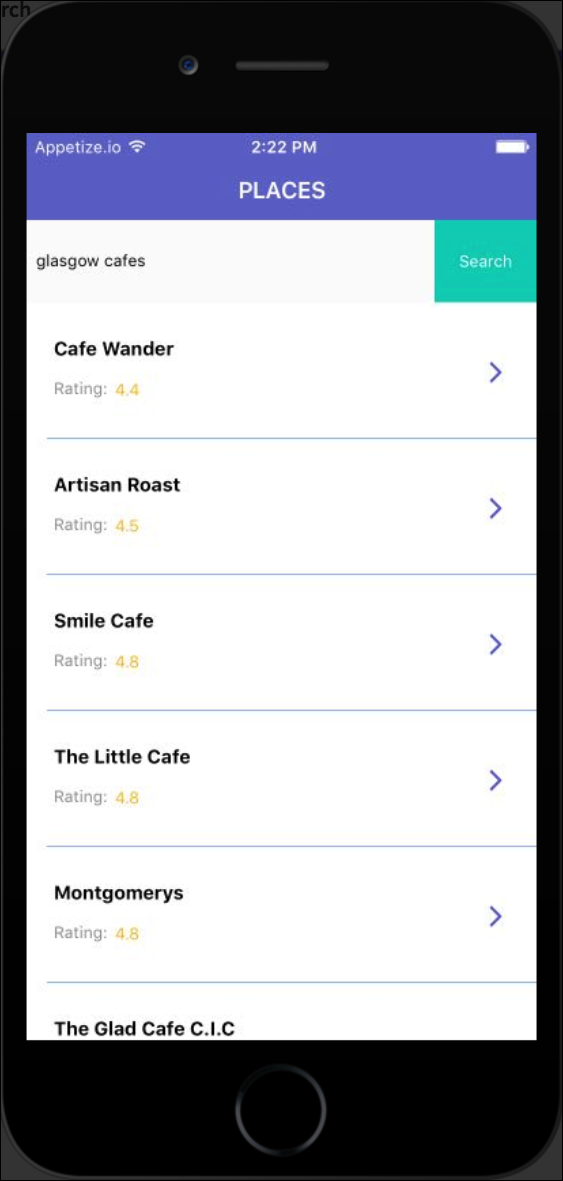
When the Google Places API request returns a response, the app displays the list of places.
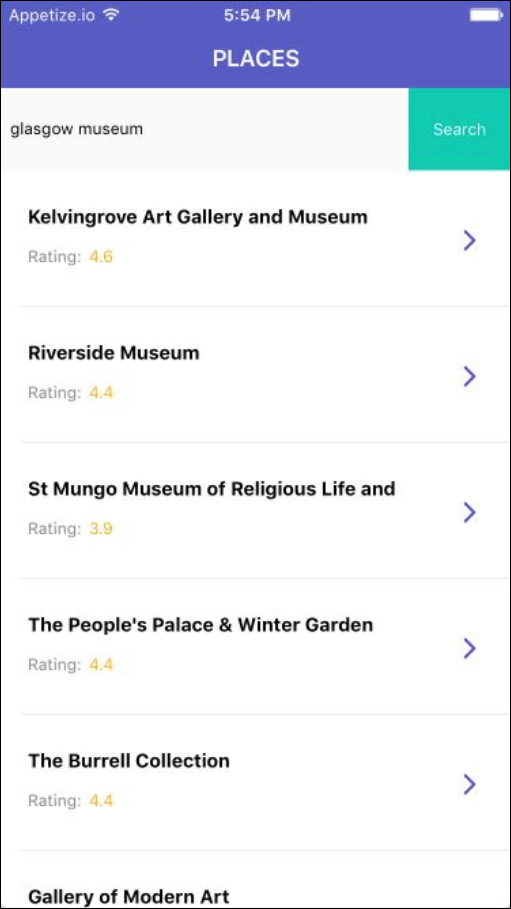

Places search results on iOS / Android.
Create the Search Page
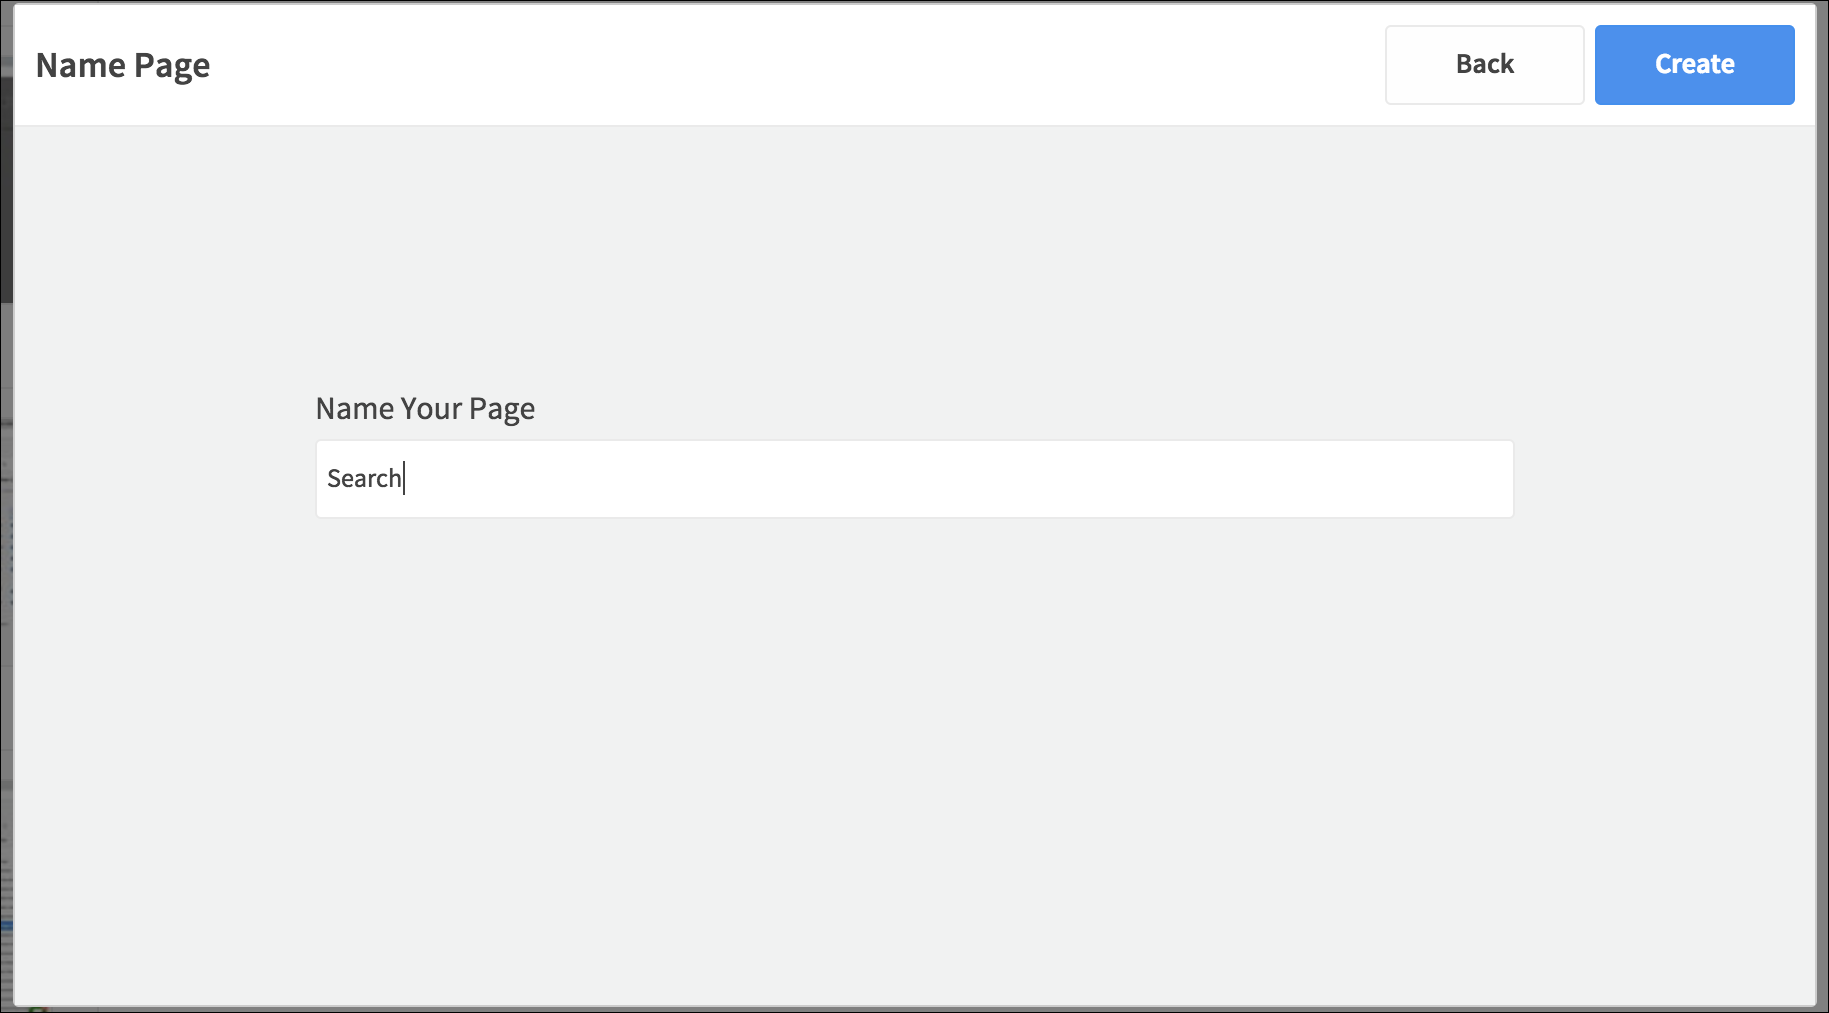
When you open your new project in the editor, it won’t have any pages in it. Create a new page using the plus ![]() button in the Pages drawer on the left. Choose the Navigation Bar (iOS) or App Bar (Android) config, and set “Search” as the page name.
button in the Pages drawer on the left. Choose the Navigation Bar (iOS) or App Bar (Android) config, and set “Search” as the page name.
The new page will appear in the Pages list and will be open for editing on the Canvas. The first page you create is automatically set as the app landing page.
At this stage you can set styling properties for the Nav Bar / App Bar as well as the page itself. Select the page / Nav Bar / App Bar on the Canvas and use the Properties tab on the right.
Set the page element Navigation Item Title (iOS) / App Bar Title (Android) to “PLACES”. Feel free to use whatever styling you prefer, but if you want to emulate the example app style, check the properties on each Element within it and copy them into your own project.

Add the Search Elements
Now you can add Elements to build the Search page UI. Initially the user will see a Text Field, Button, and placeholder Image / Text.
Search View
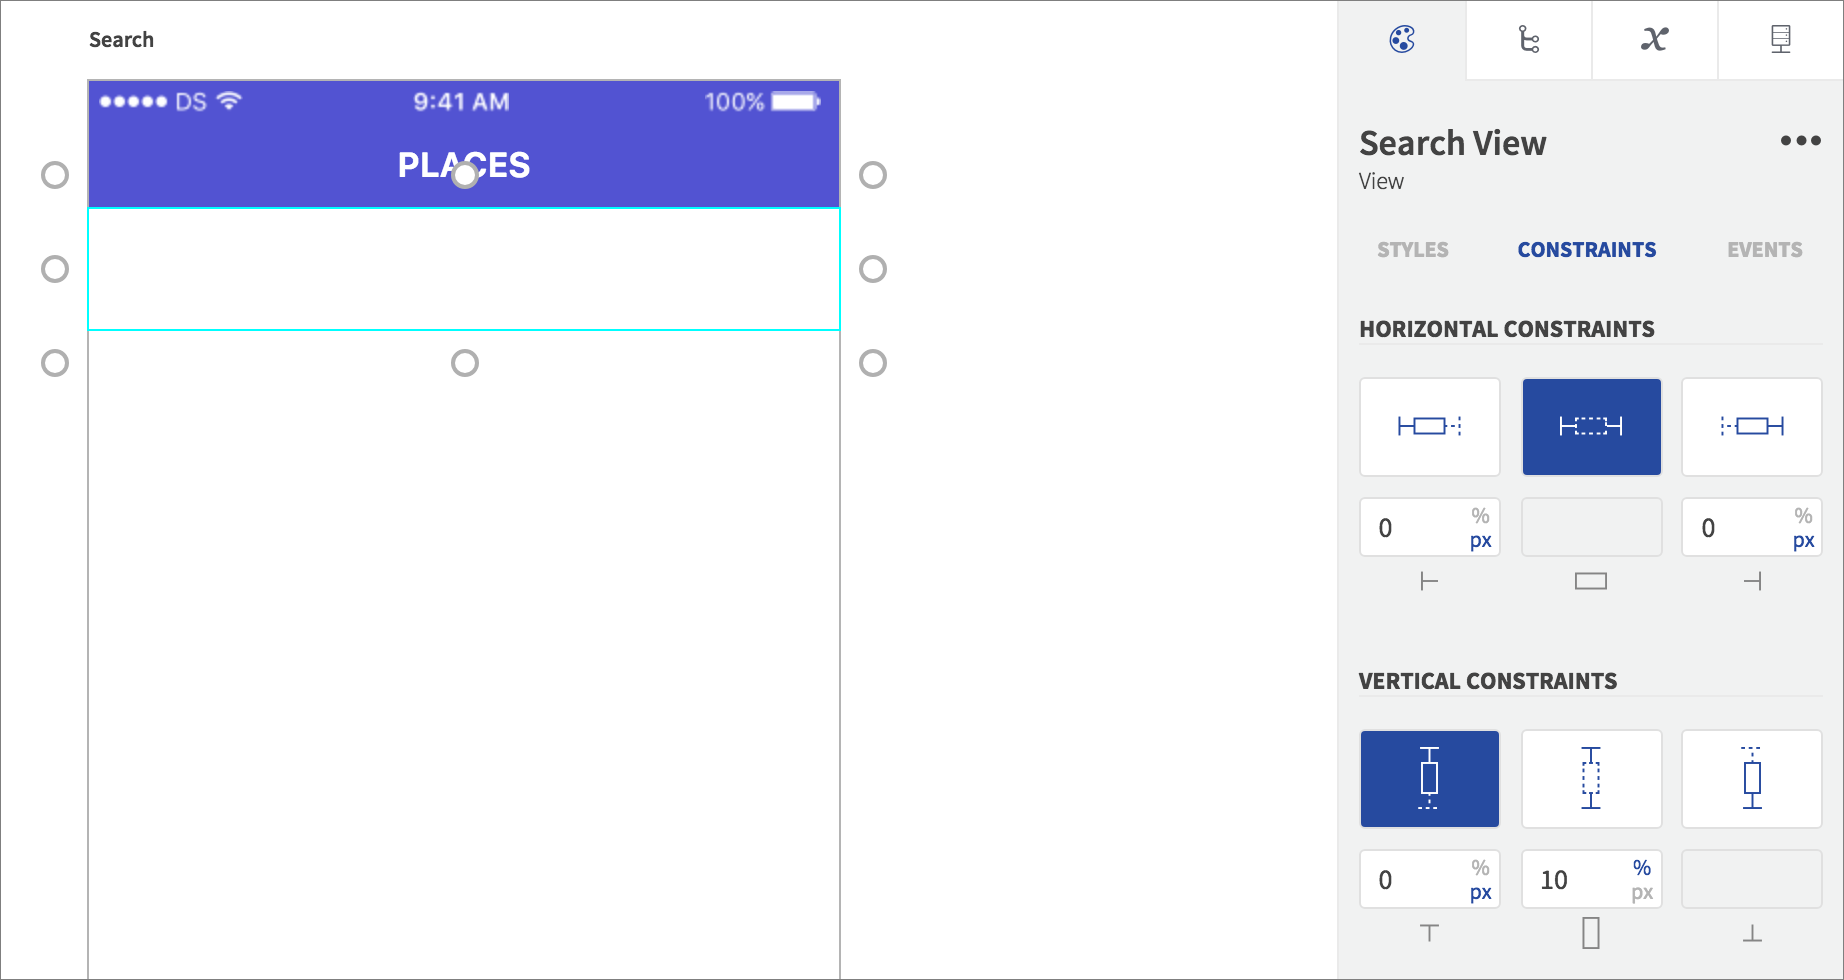
The Text Field and Button will be grouped inside a View so add that – drag a View from Elements on the left onto the Canvas.

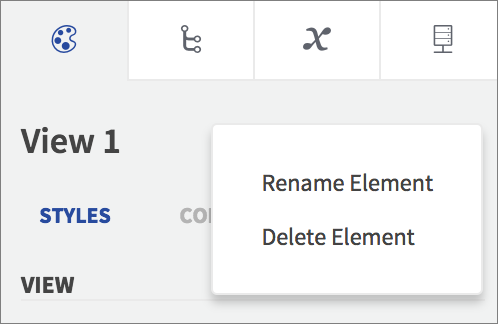
In Properties, rename the View to “Search View”.
Use Properties > Constraints to position the View at the top of the page, filling the width and occupying about a tenth of the height.
Search Text Field
Drag a Text Field into the View, and rename it “Search Text Field”. In Properties, set the Placeholder to “Enter a keyword here and press search”.
In Properties > Constraints, make the Text Field most of the width of the View, positioning it on the left and roughly in the center vertically (on Android you can make the Text Field occupy the full height of the parent Element).
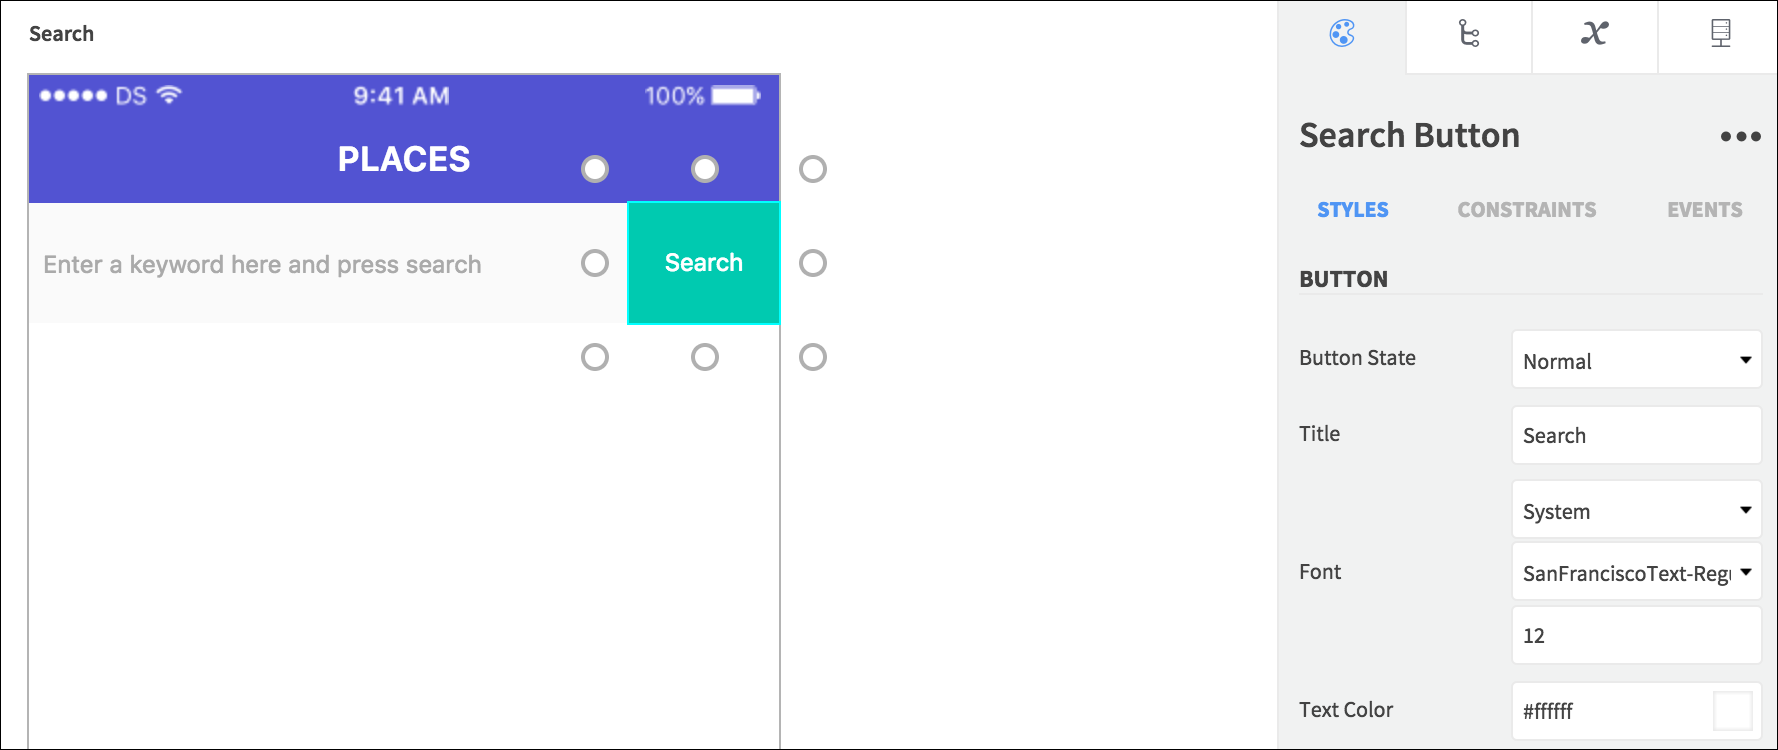
Search Button
Next drag a Button into the View, to the right of the Text Field. Rename it “Search Button” and use Constraints to make it occupy roughly the right hand fifth of the View, extending the full height. Set the Title to “Search”, and use the Button State list on iOS to set styling in different interaction states.
Search Results
The search results will be displayed in a Table (iOS) / Dynamic List (Android), so drag one out and place it under the search Elements. In Properties, rename it “Results Table” / “Results List” and if you’re on iOS set its Content to Dynamic so that it can show API data. Position the Table / List to occupy the remainder of the page height under the search Elements.
Inside the Table / List, add a Table Cell / Dynamic List Tile, renaming it “Results Cell” / “Results Tile”. The Cell / Tile will be repeated for each place the API request returns. The app will display the name and rating of a place inside each Table Cell / List Tile.
For the place name, add a Label (iOS) / Text View (Android) to the Cell / Tile. Rename it “Name Label” / “Name Text View”. In Properties, uncheck User Interaction Enabled / Enabled, as this can interfere with interaction on the parent Element. Position the text Element near the top left of the Cell / Tile. Set the Text property to “Place Name”.
Add another Label / Text View directly under the previous one, naming it “Rating Label” / “Rating Text View”. Set the Text property to “Rating:”, and uncheck User Interaction Enabled / Enabled.
To the right of the rating text, add another Label / Text View, renaming it “Rating Count Label” / “Rating Count Text View”. Set its Text property to “No Rating” and uncheck User Interaction Enabled / Enabled.
Add an Image Element on the right of the Table Cell / List Tile, renaming it “Arrow Image”. In Properties, click Choose for the Image setting, and upload the arrow image:
![]()
Click the image and open Properties. Choose an aspect scale setting for the image. Resize the Element, making it smaller and positioned in the center of the Cell / Tile vertically, near the right-hand edge.
![]()
The Table / List will not be visible initially, so select it (on the Canvas or in the Element Tree on the right) and in Properties, check Hidden.
Placeholder
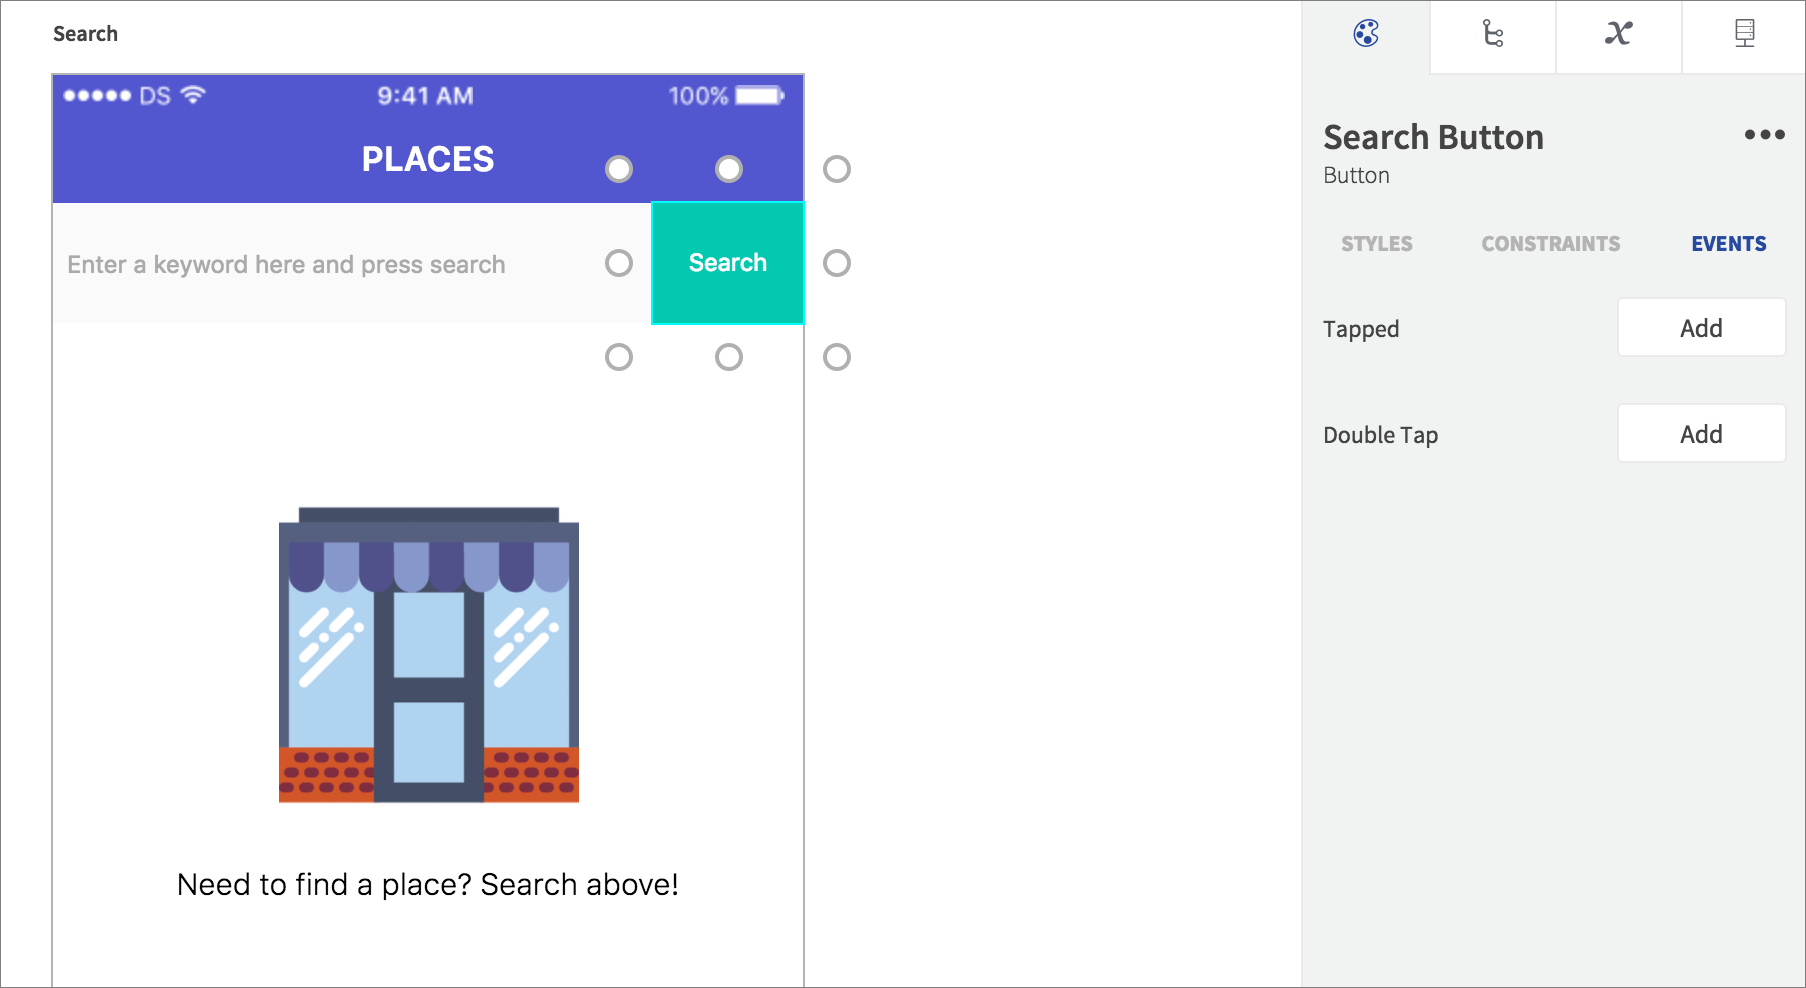
When the user initially launches the app, they will see a placeholder image and some text, which will disappear when they carry out a search. Drag an Image Element onto the Canvas, placing it below the search Elements. Rename it “Placeholder Image”, and set its Image asset to the store image, selecting an aspect scale property:

Position the Image somewhere in the center of the Canvas, scaling it to occupy just under half of the page width.
Add a Label / Text View under the Image, naming it “Placeholder Label” / “Placeholder Text View”. Set its Text property to “Need to find a place? Search above!”, and Center align the text. Stretch the text Element to occupy the full width of the page.
Your Search page should look something like this:

Build the API Request
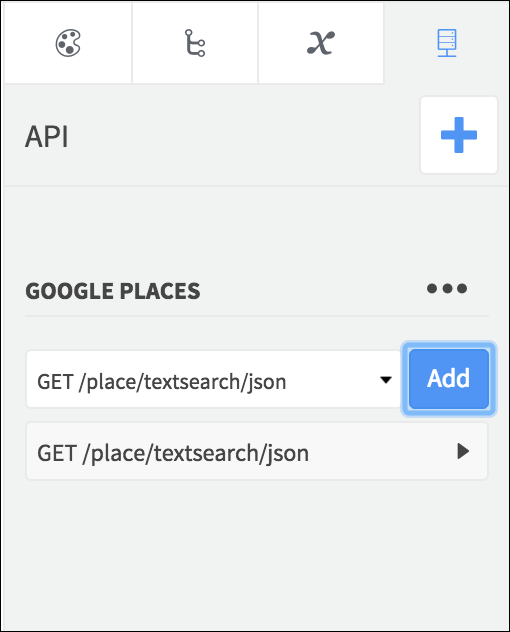
Now that the Search page UI Elements are in place, you can connect the app to external data and build the functionality. In the API tab on the right of the editor, click the plus ![]() button, and choose the Google Places API from the demo library. Click Add, and it will be imported into your project.
button, and choose the Google Places API from the demo library. Click Add, and it will be imported into your project.

In the API tab you will now see the available endpoints. Select the textsearch endpoint in the drop-down list and click Add.
The endpoint has now been added to the page as a request that the app can make when it runs. Click the request to open it. The first section you will see is for Parameters. When the request runs, the app should pass the text string query entered by the user. Select Query from the drop-down list.

The text string query is going to be passed via the query parameter field, so click it and drag it onto the Text Field on the Canvas.

You can also bind request fields by clicking and making a selection.

Once a field is bound, a green dot appears next to it.
Now select the Responses section. The request response includes the place search results as an array – Dropsource represents this as a Data Source. The results Data Source includes the details the app will display in the dynamic Table / List, so click it and bind it to that Element.

With the Data Source bound to the Table / List, you can display the fields from inside the array in the Elements inside the Table Cell / List Tile. Bind the name field to the Name Label / Name Text View Element Text property.

Bind the rating field to the Rating Count Label / Rating Count Text View Element Text property.
The request is now complete, but you still need to specify when it should run – you will do that next.
Respond to User Interaction
Now all you need to complete the Search page is user interaction. When the user taps the Button, the request should run and the Table / List should display instead of the placeholder Elements. Select the Button on the Canvas (or Element Tree) and open Properties > Events. Click Add for the Tapped Event.
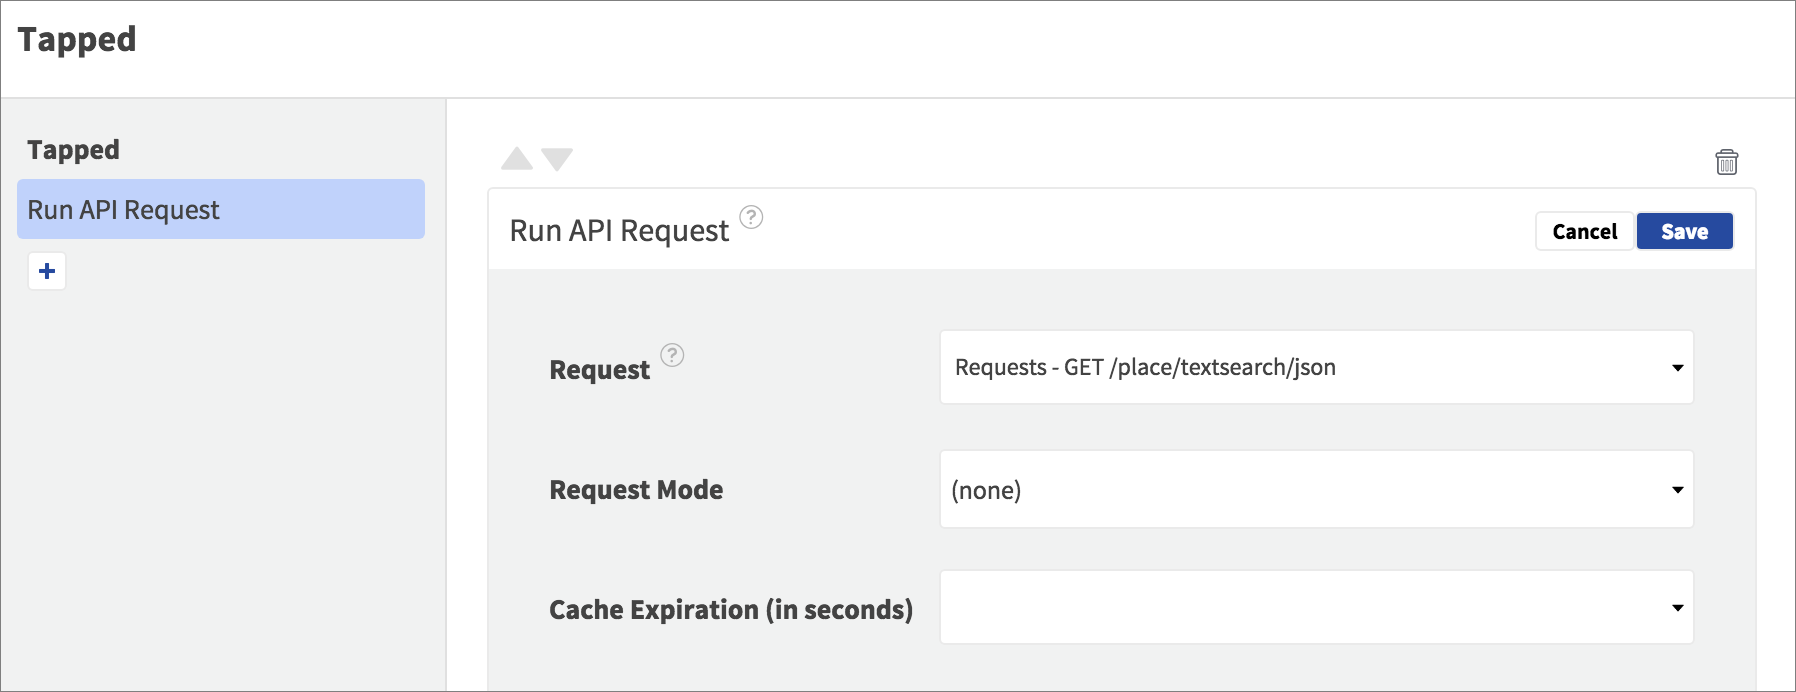
Click the plus ![]() button to add an Action. Select Run API Request and click Edit. Choose the text search request and Save the Action.
button to add an Action. Select Run API Request and click Edit. Choose the text search request and Save the Action.
You’ll need a few more Actions to show and hide the Elements in the page – click the plus ![]() button and choose Set Value. Edit the Action, choosing the Placeholder Image Element Hidden property in the first field, and a Static Input Boolean – true value for the second.
button and choose Set Value. Edit the Action, choosing the Placeholder Image Element Hidden property in the first field, and a Static Input Boolean – true value for the second.

Save the Action. Add another two Set Value actions:
- Set the Placeholder Label / Text View Element Hidden property to true.
- Set the Results Table / List Element Hidden property to false.
Finally, add another Action – choosing Hide Keyboard, so that the keyboard does not interfere with the user viewing the search results. Your Event should now have five Actions added to it.

On iOS you can carry out the same functionality when the user presses Enter, by adding the same Actions to the Text Field Returned Event.
Run the App
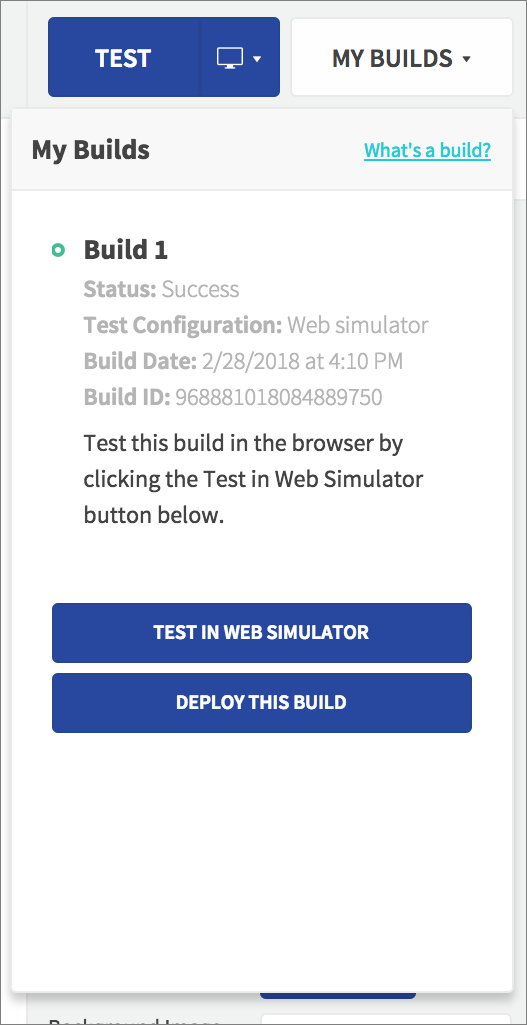
At this point you can run the app and see the functionality you added in action. Click Test (the Web Simulator should automatically be selected in your test configurations). Dropsource will write the app code, and when a build is ready, you’ll see it in Builds – select Test in Web Simulator.
Try out a search!

Next time you will extend the app, allowing the user to select a place to see more information on it.